Introduction
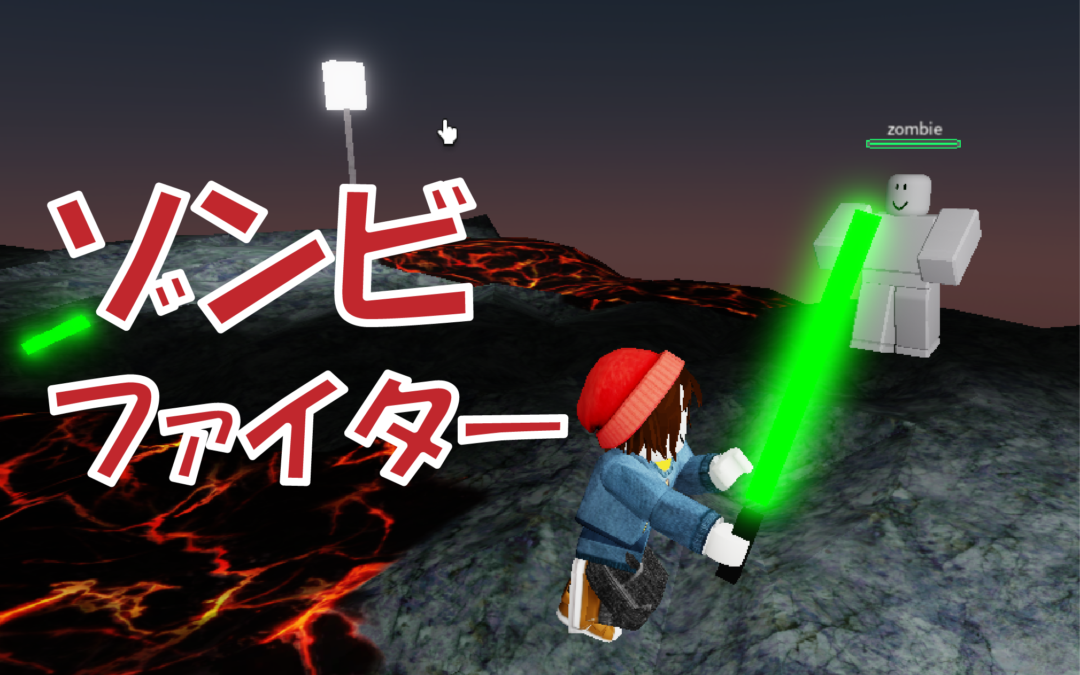
Welcome to the “Zombie lightsaber fight” tutorial!
This tutorial for the game you are about to make is a comprehensive lesson, meaning you are going to learn new knowledge from many different aspects using Roblox Studio, including :
1. Basic lighting (part pointlight, ambient light)

2. Animations, including how to create animation for rigs, and how to load the animation for playing
3. Sound Service (upload audio/use uploaded audio/play audio as effects or BGM)
4. Built-in score board that keep tracks of your kills
5. Cloning thing for automation. In this tutorial it would be how to clone one zombie into many auto generated zombies
6. Tool creation. In this tutorial we will learn how to create a sword that gives damage to the zombies.
7. And many more…
1. Basic objects/parts (how does the game look like?)
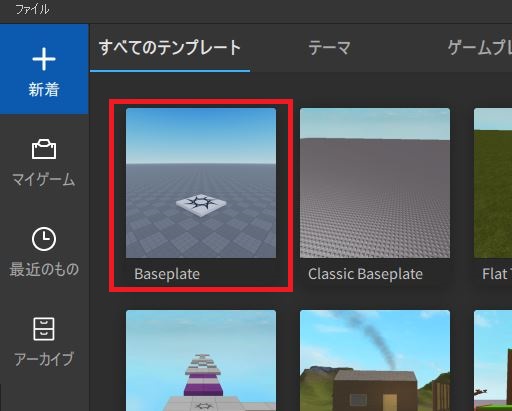
Create a new Baseplate template:
We will start from creating the basic parts that is needed for scripting:
Basic terrain 
1. Delete the Baseplate
2. Create terrain
3. Reposition the SpawnLocation
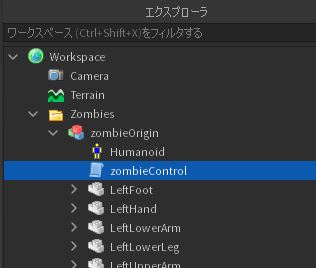
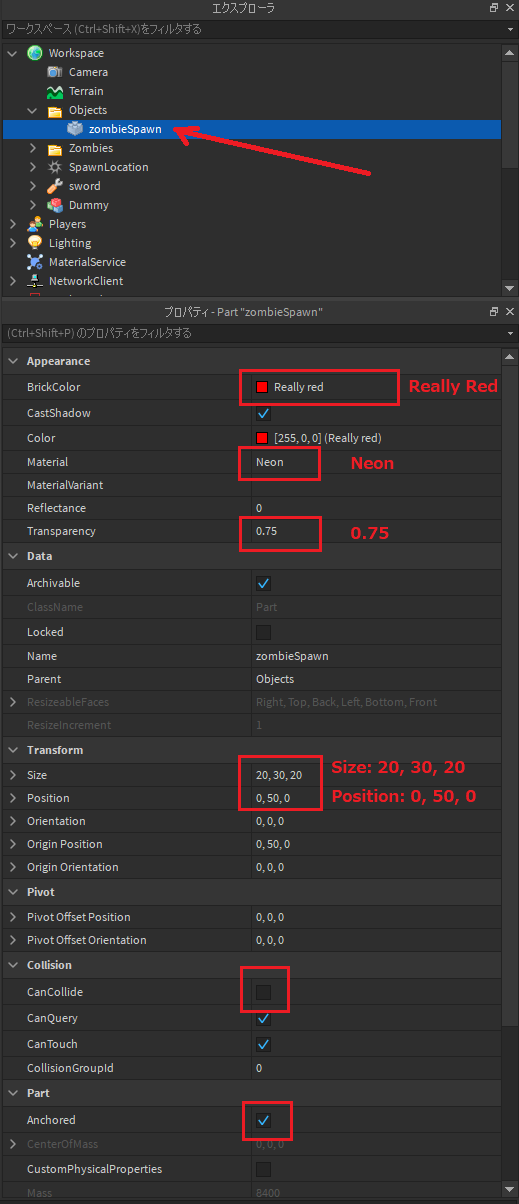
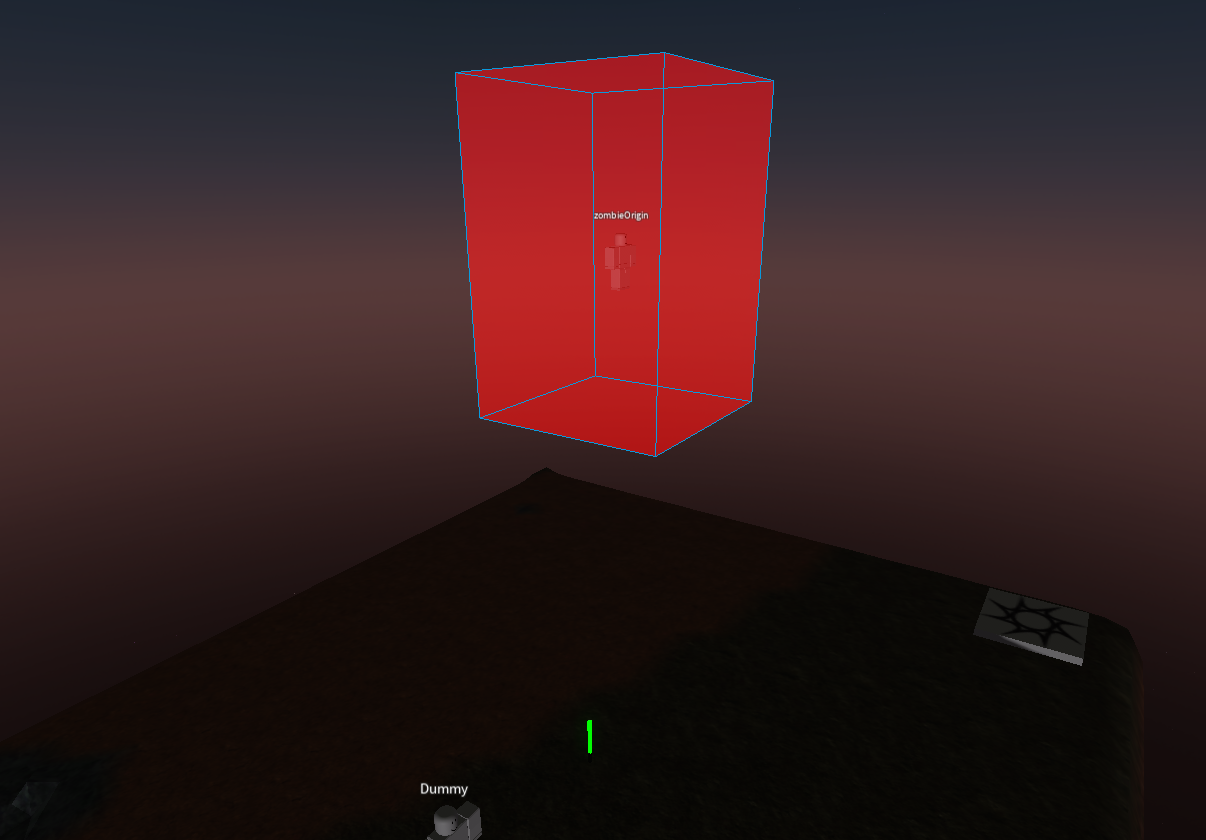
Zombie origin rig 
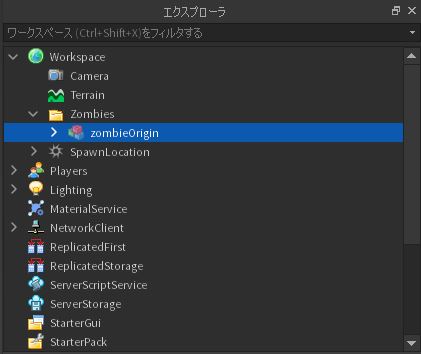
1. Create a folder for zombie origin (and future zombies)
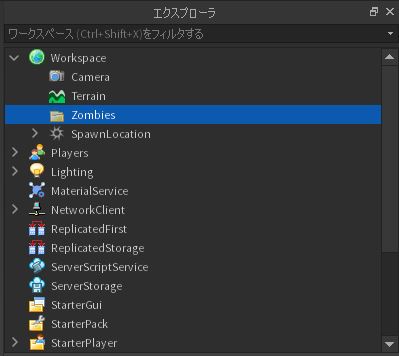
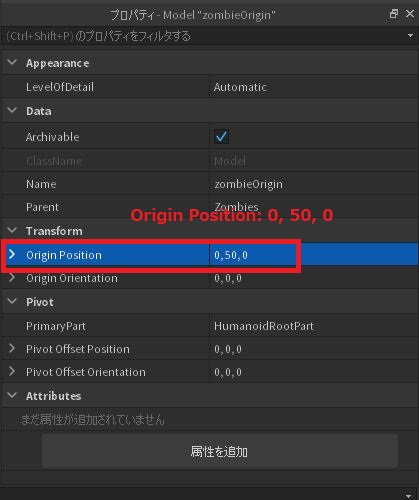
2. Create the zombie origin, and move it into the Workspace/Zombies folder
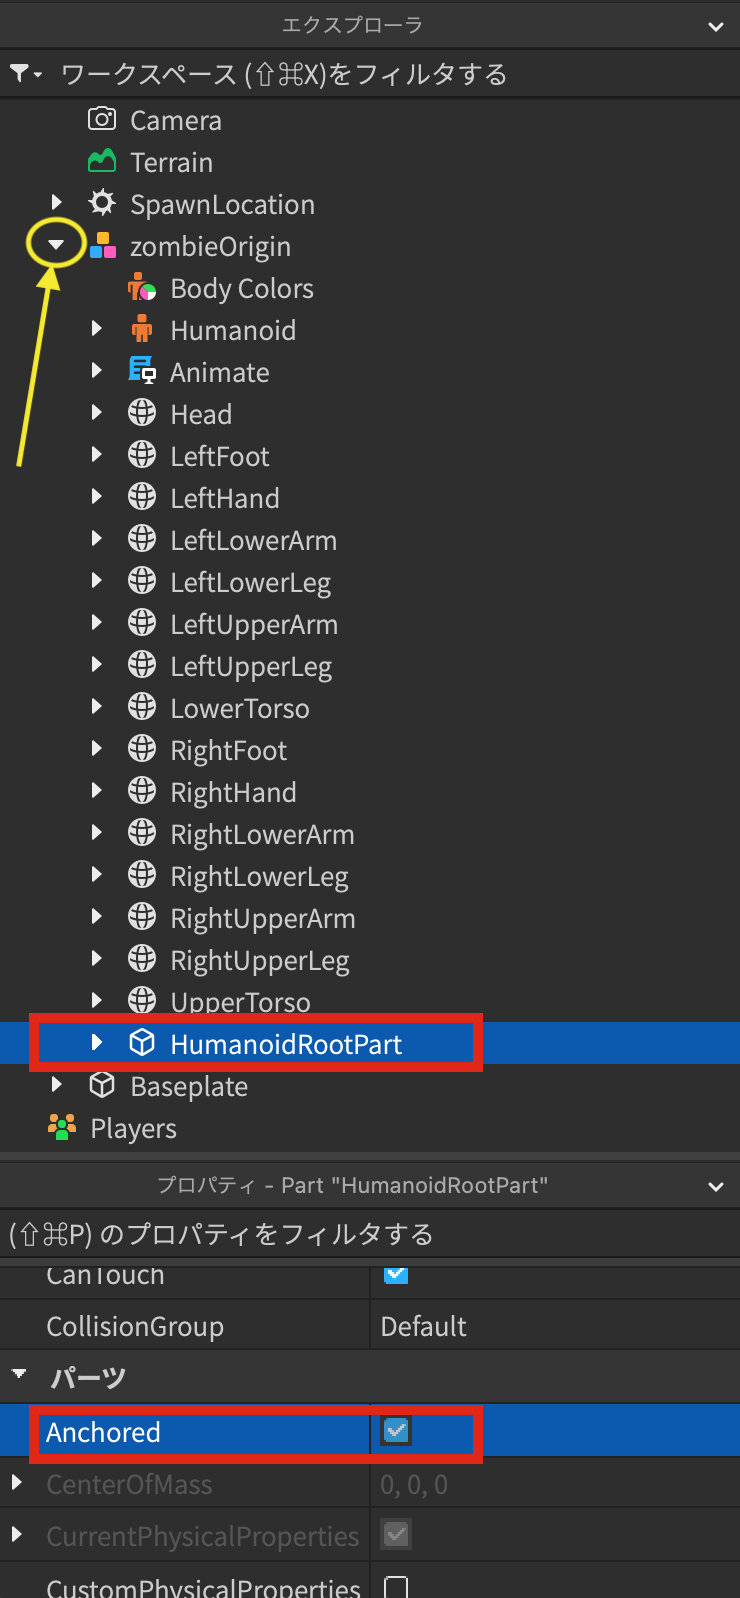
3. Make sure you have anchored the “HumanoidRootPart” of the zombieOrigin:
Player’s Lightsaber 
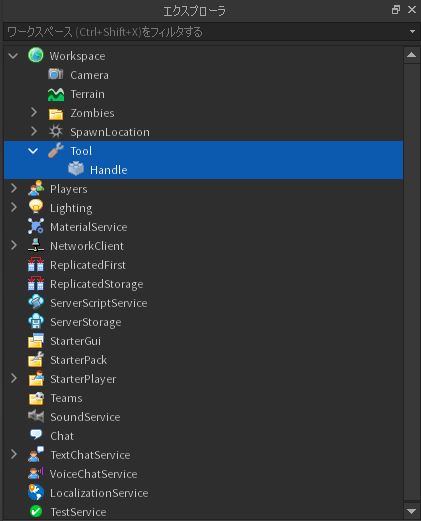
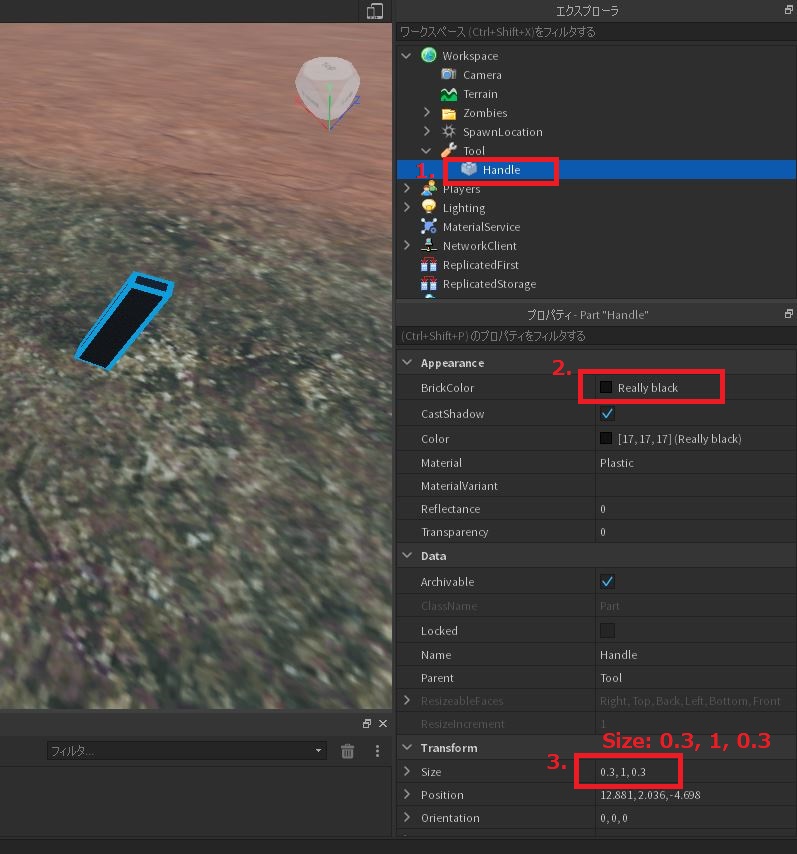
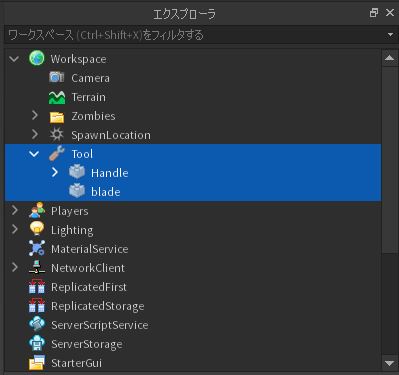
1. Create a tool in Workspace. Create a part inside the tool and name it “Handle” (** the name MUST BE “Handle”)
2. Select “Handle”, adjust BrickColor and Size accordingly
3. Duplicate the “Handle” part, rename it “blade”
4. Resize, rematerial and recolor the “blade”
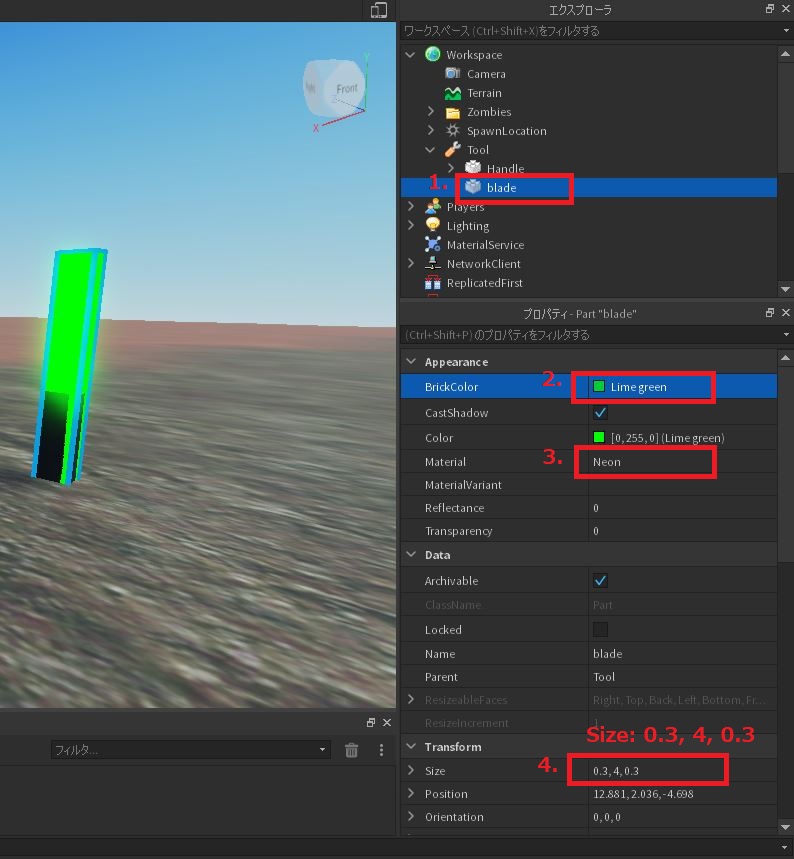
5. Reposition (NOTE: choose the “blade” part from the explorer, not from the game screen!)
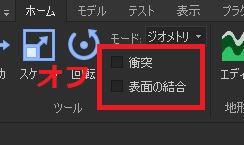
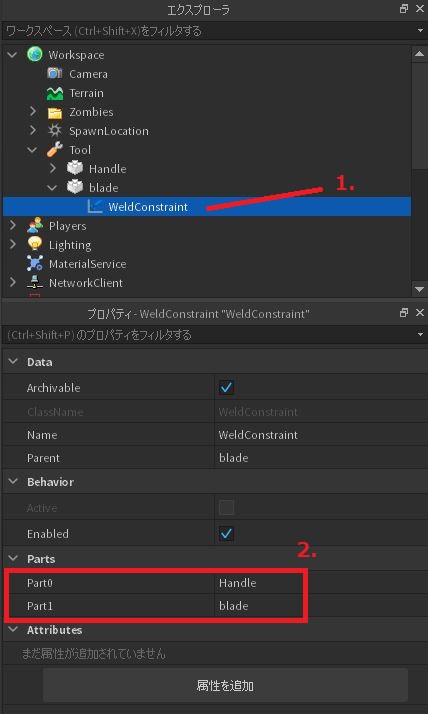
6. Add WeldConstraint into the “blade”, constraint “Handle” with “blade” together.
WeldConstraint helps to connect two parts without dropping either part when holding in hand.
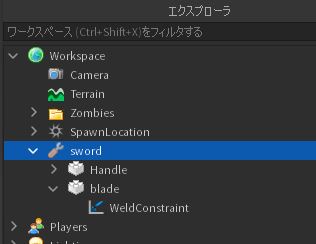
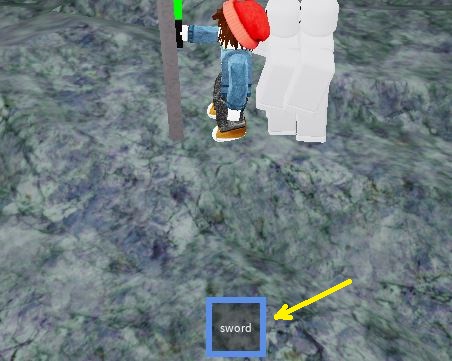
7. Name your Tool “sword”
8. Test if you can pick it up from the ground!
2. Game Mechanics (how does the game work?)
These are the minimum requirement for the game to run (without visual/audio enhancement):
- Zombie Cloning
- zombie keeps being generated
- zombie’s HP bar always shows on top of head
- zombie’s cloning location, frequency
- Zombie behavior
- zombie movement towards player
- zombies speed control
- delete zombie when its HP reaches 0
- Player’s character behavior
- receive damage when touched by zombie
- when mouse click detected, play the swinging animation
- Lightsaber behavior
- give damage to the zombie that got hit
Let’s start with zombie cloning:
1. Zombie Cloning
Main objective: zombie should keep cloning
Create a script under ServerScriptService, name it “server”
Inside the server script, type the follow:
(game.ServerScriptService.server)
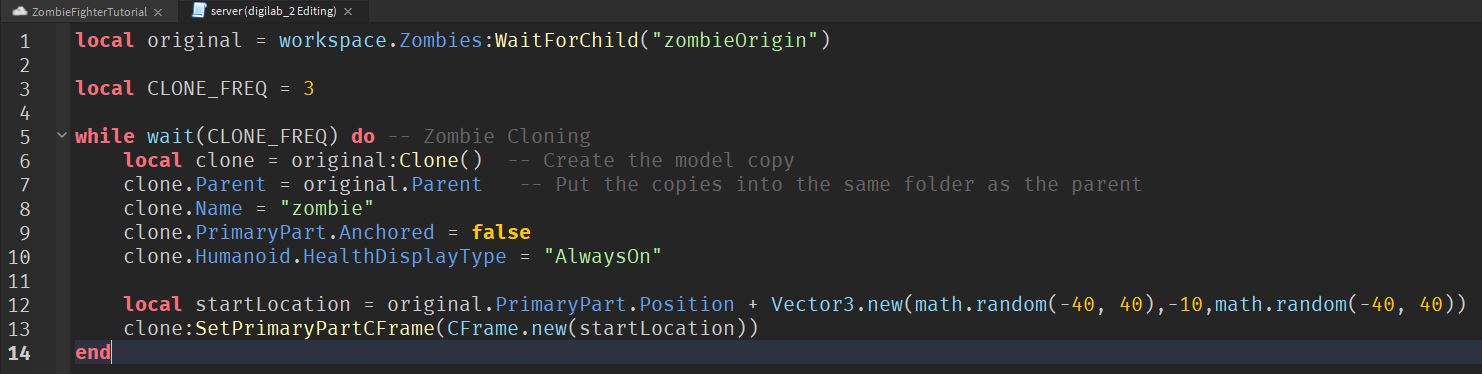
- Line 1: Get the “zombieOrigin” we have created earlier from the Zombies folder
- Line 5-14: A loop with 3 seconds gap to generate zombie
- Line 6: Clone the original
- Line 7: Put the cloned zombie model into the same destination as the origin
- Line 8: Rename the cloned zombie as “zombie”
- Line 9: Set anchor to false so that zombies fall to the ground
- Line 10: Set zombie’s HP bar to always on
- Line 12-13: Set zombie’s spawning location to random
2. Zombie Behavior
Main objective: zombie should keep chasing the player
Create a script under zombieOrigin model, name it “zombieControl”
Inside the zombieControl script, type the follow:
(game.Workspace.Zombies.zombieControl)
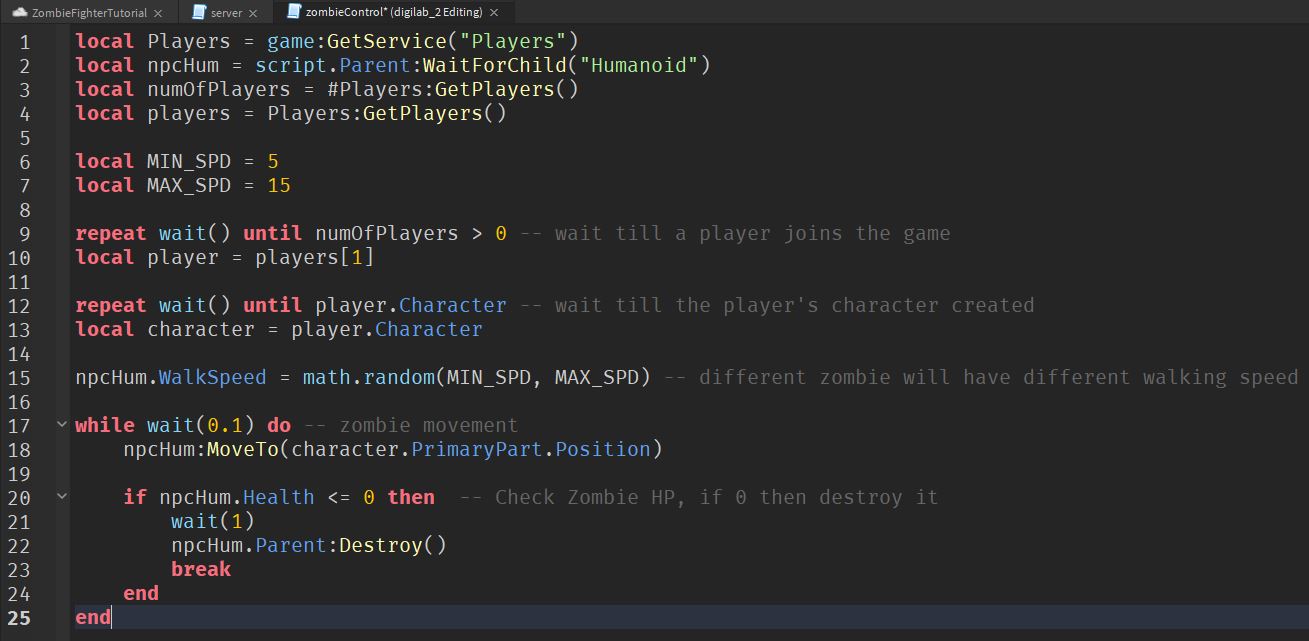
- Line 1-4: Get player and zombie information
- Line 6,7, 15: Set a random speed for each zombie, ranged from 5 to 15
- Line 9-13: Wait until a player joins the game, and wait until its character is set up
- Line 17-25: A loop with 0.1 sec gap
- Line 18: move towards the player (in every 0.1 seconds in line 17)
- Line 20-24: If the zombie HP drops to 0, delete the zombie
3. Player’s character behavior
Main objective: Reduce HP when touched by zombie
Create a “LocalScript” under StarterPlayer.StarterCharacterScripts, name it “charControl”
(Please check the “Server VS Client” tutorial for better understanding on the difference between Script VS LocalScript!)
Inside the charControl LocalScript, type the follow:
(game.StarterPlayer.StarterCharacterScripts.charControl)
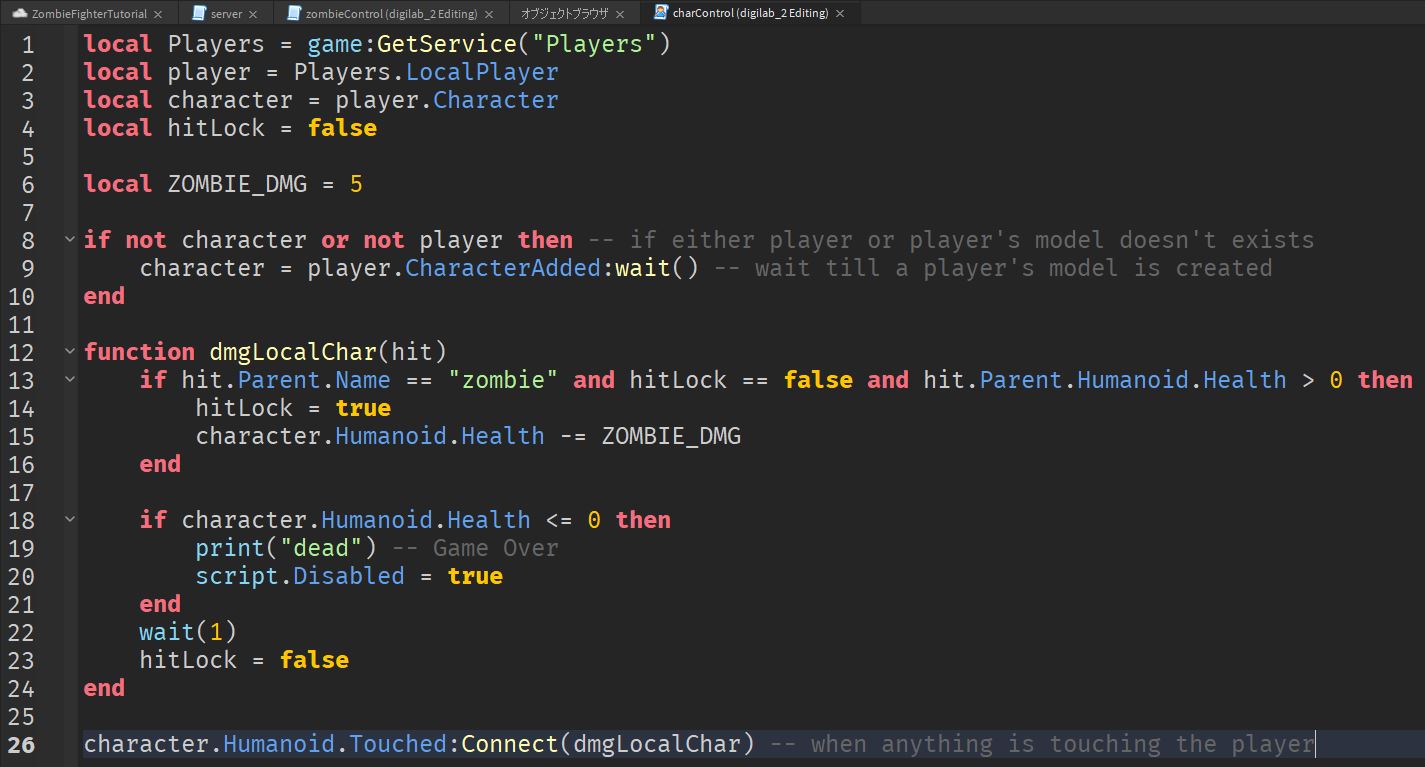
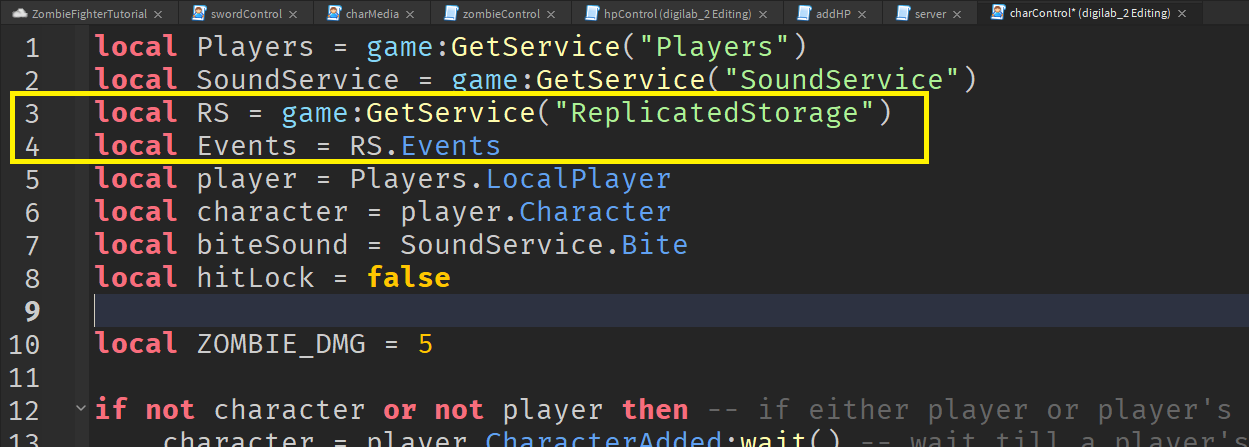
- Line 1-3: Get local player and character information
- Line 4: A Boolean variable to prevent over damage received from zombies (line 13, 14, 23)
- Line 6: A constant for how much damage zombie should do
- Line 8-10: Check if player and the character has loaded into the game. If not then wait
- Line 12-24: A function that check if a player should receive damage from the hit object:
- L13: check 3 things:
- 1. If the hit object is a zombie
- 2. check if the lock is off to prevent extra damage
- 3. check if the zombie hitting is still a living zombie
- L14-15: receive damage and lock for further damage
- L18-21: if the player HP is 0, print the message “dead” on output
- L22-23: wait 1 second and unlock the hit lock so the zombie can damage again
- L13: check 3 things:
- Line 26: when anything hits the player:
- 1. Run the “dmgLocalChar” function on Line 12
- 2. Send the hit object information to the “dmgLocalChar” function (named “hit” on Line 12)
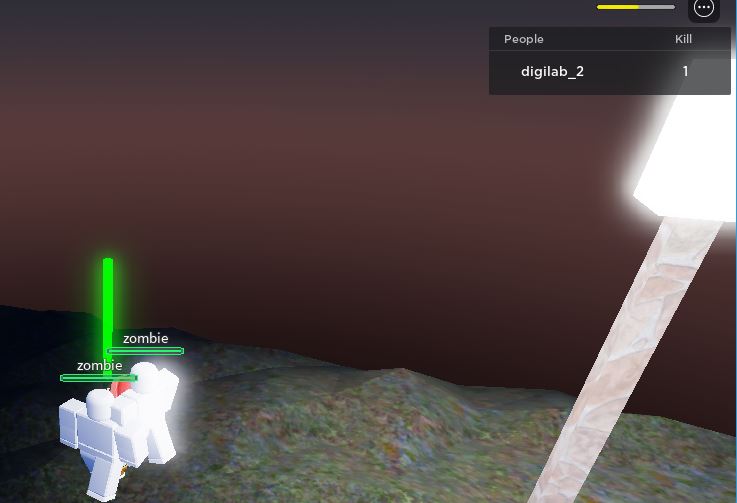
(GIF)
Main Objective 2: When we left click with the mouse, our character should do the swinging sword action like below:
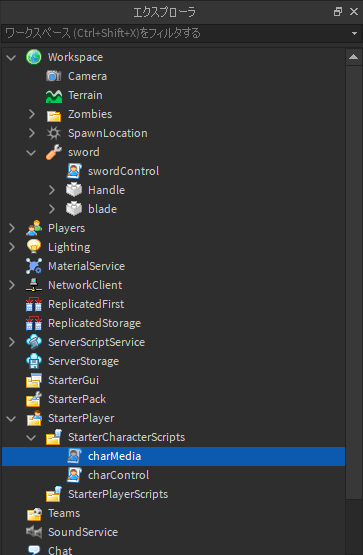
Create a “LocalScript” under StarterPlayer.StarterCharacterScripts, name it “charMedia”
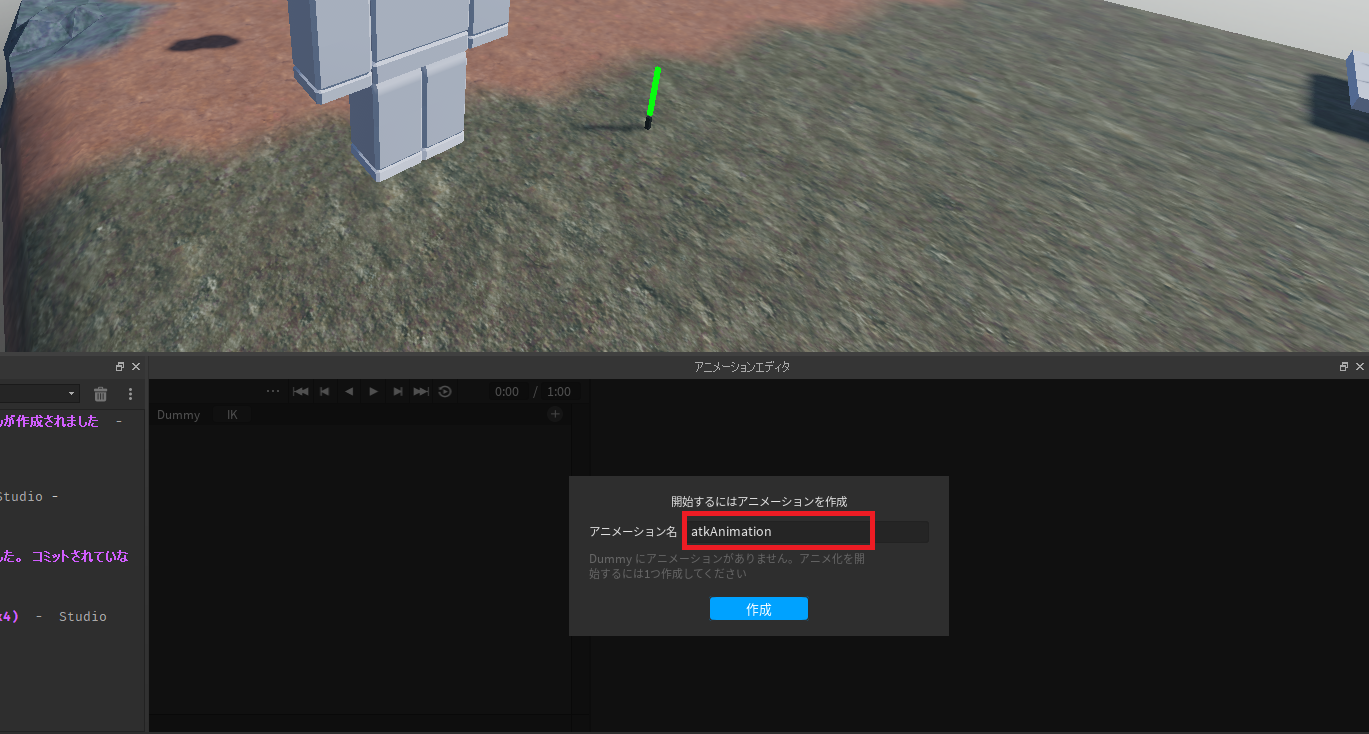
Under “charMedia”, create an animation and name it “atkAnimation”

Now, we will be creating our first animation for our character!
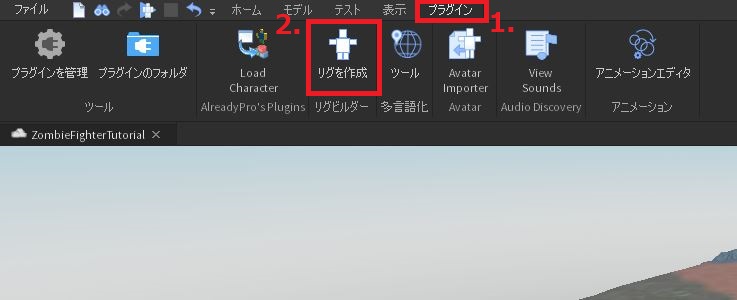
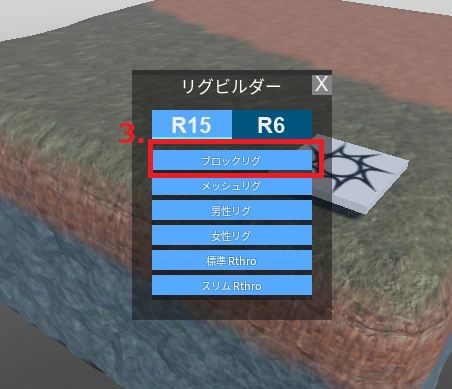
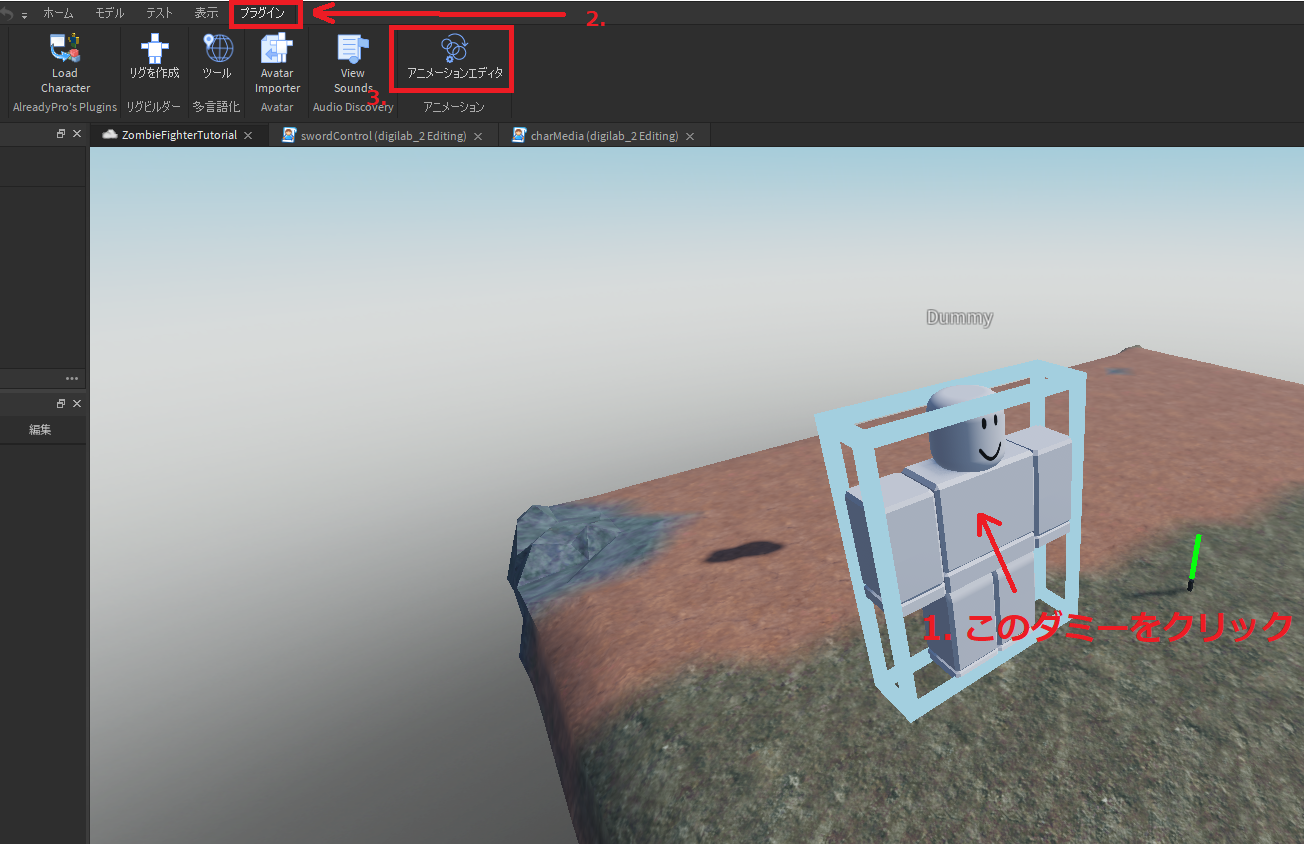
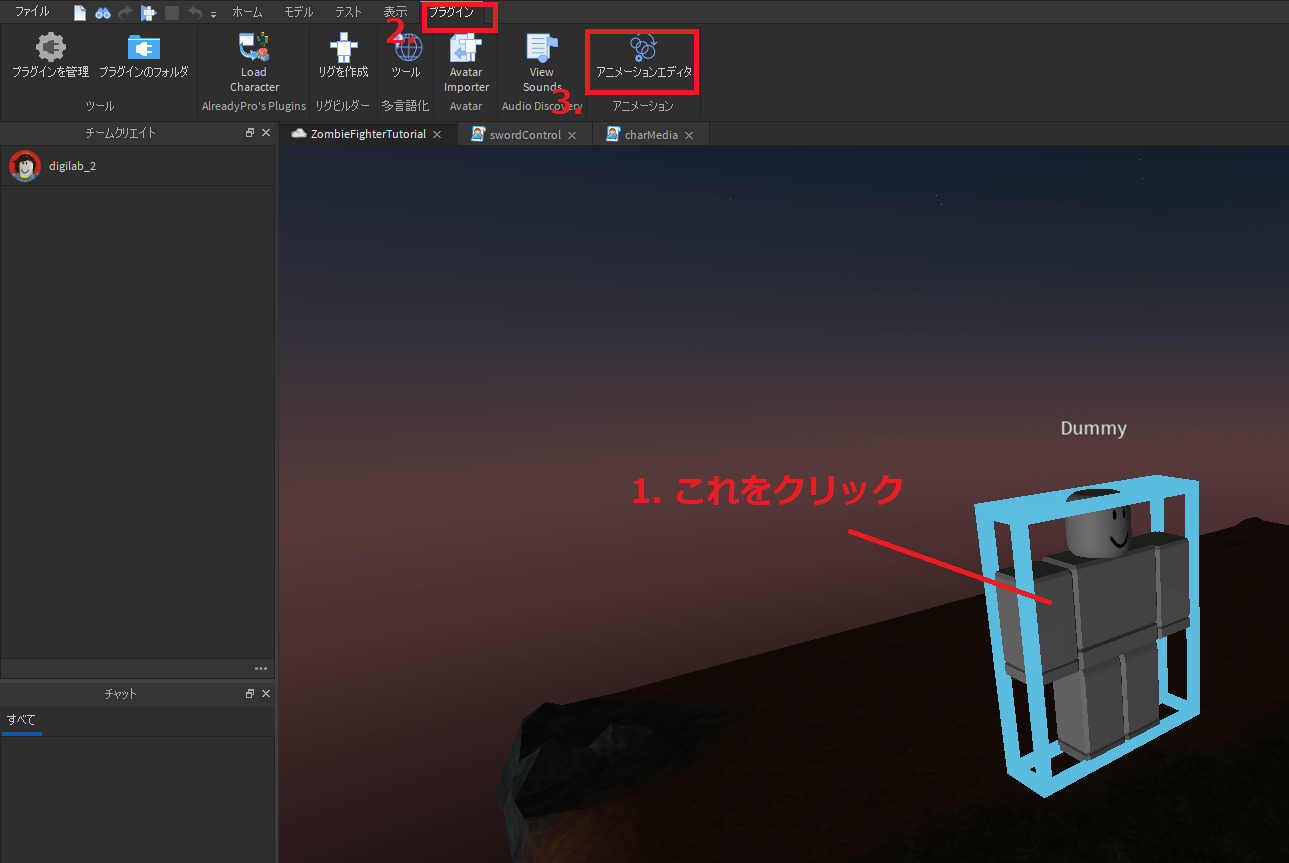
Let’s create a dummy rig for editing our character animation:
Choose the “Dummy” and click “Animation Editor”
You should see the animation editor window poped up somewhere on screen. Name our animation “atkAnimation”, and then click “Create”:
Then we see our Dummy body parts being selectable and editable:
Let’s look at the following to learn how to create Animation for a Rig (A rig is a character body)
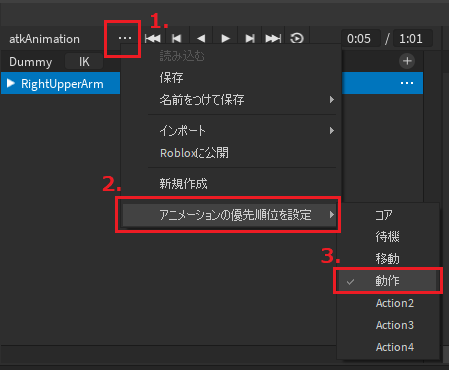
Edit the animation priority to “Action”
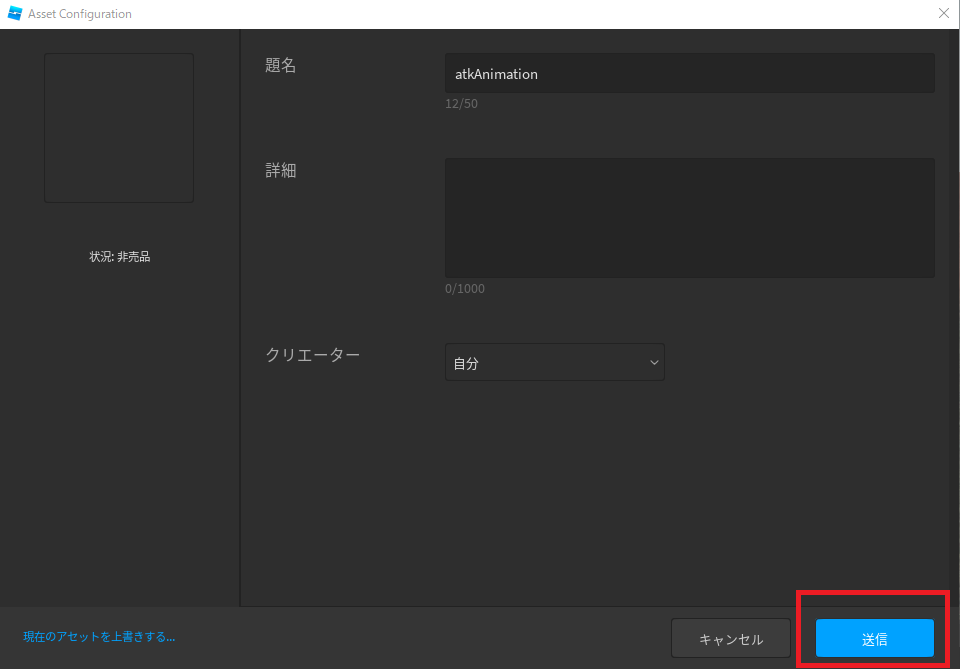
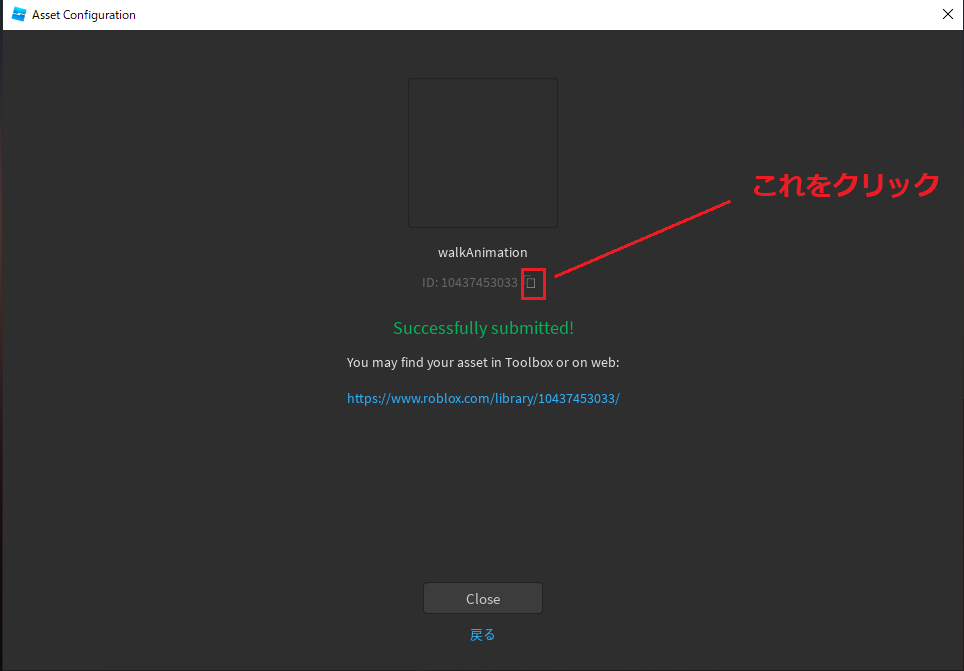
Publish the animation to Roblox Server
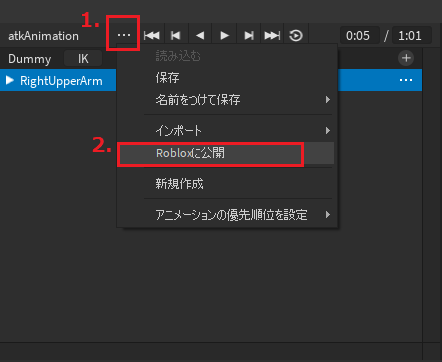
You will see this following window. Click the small icon next to the ID number
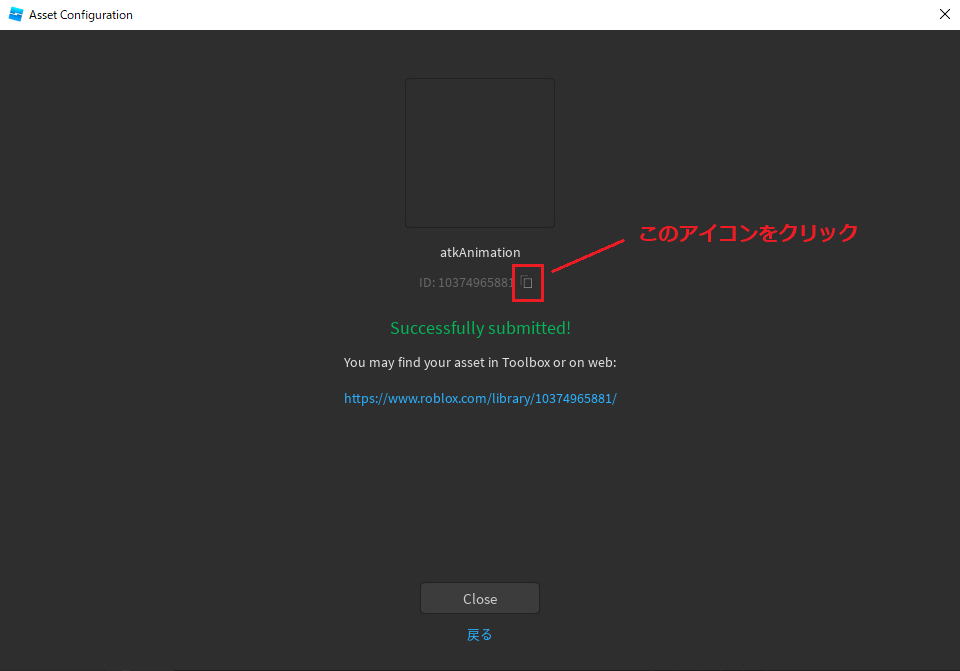
We will paste the copied ID into the animation file we created earlier
We will add the following script to “charMedia” as well
(game.StarterPlayer.StarterCharacterScripts.charMedia)
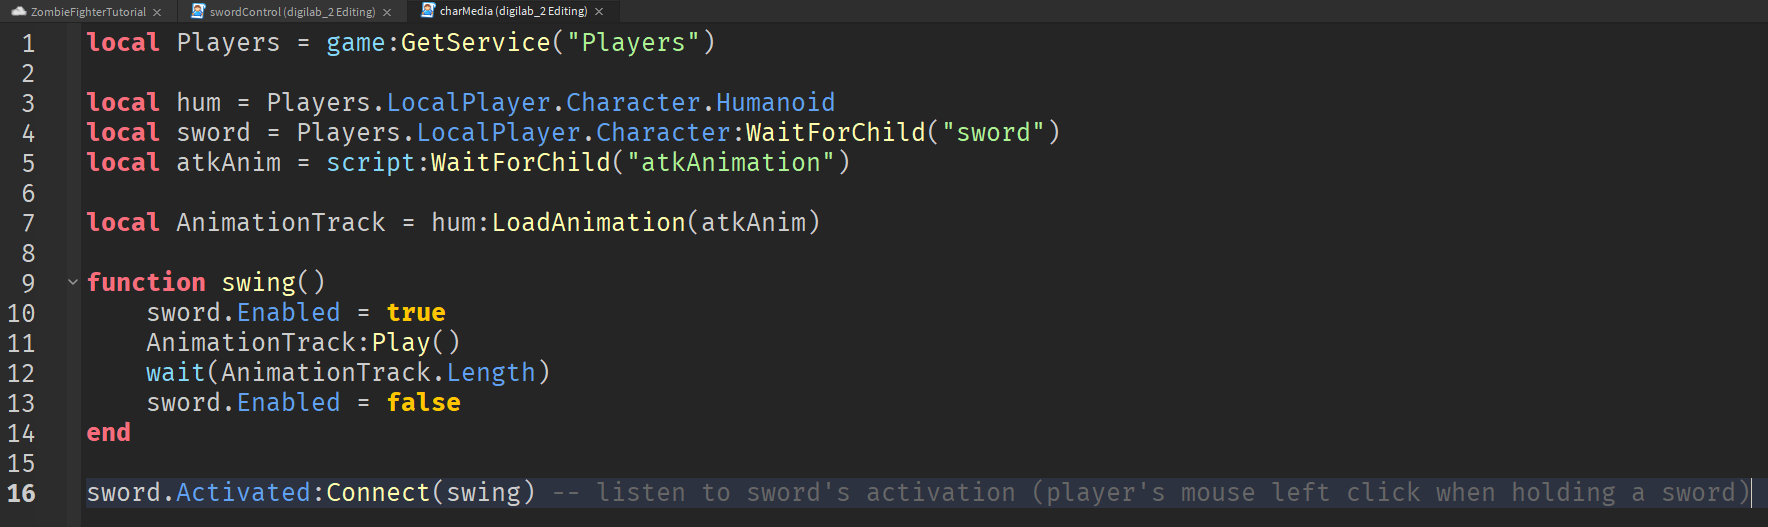
- Line 1: Get Players service
- Line 3-5: Get the current client (player) humanoid, sword (when player is holding), and animation file
- line 7: Create animation track from animation file for the player humanoid (hum)
- line 9-14: lightsaber swinging function:
- L10: enable sword
- L11-12: Play the animation track and wait until the track finish
- L13: disable sword
- line 16: When sword is activated (mouse left clicked), run the function defined in line 9 named “swing”
Now you should be able to swing your sword
4. Lightsaber behavior
Main objective: damage zombie when lightsaber touches it
Create a “LocalScript” under sword, name it “swordControl”
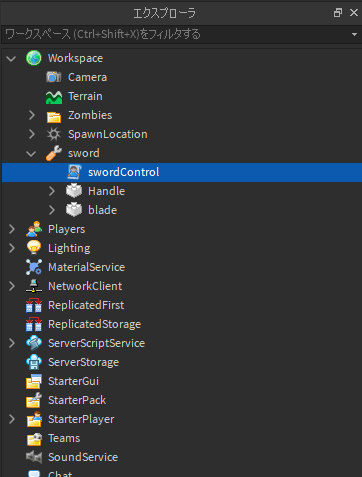
Inside the charControl LocalScript, type the follow:
(…sword.swordControl)

- Line 1: Get the sword tool from script’s parent
- Line 3: Turn the sword off when player is not using
- Line 4: Define sword damage to 20
- Line 6-15: A function named “giveDmg”:
- L6: Receving the part (could be zombie’s hand, zombie’s torso, etc) that hits the sword and name it “hit”
- L7: Assign that hitting part’s parent (usually it’s the zombie’s model) and name that model “zombieModel”
- L9-10: Check if zombieModel is a zombie, and if the sword is turned on (controlled in charMedia localscript), attack the zombie with damage
- L11-13: If the zombie that is touching the sword has no HP, set a new attribute named “isKilled” and set it to value “true”
- Line 17: When sword’s blade is touching something, run the function named “giveDmg” (at line 6)
3. Game Enhancement (how to make the game more attractive?)
So now if you play the game, everything should move just fine, but a little bit boring…
Let’s add more fun elements into the game!
- Environment lighting
- Zombie animations (walking)
- Audio (lightsaber swinging sound, lightsaber hit sound, zombie bit sound, BGM)
- Decorative objects (Terrain editing, Light pole, etc)
- Leader board, game settings
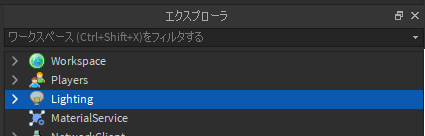
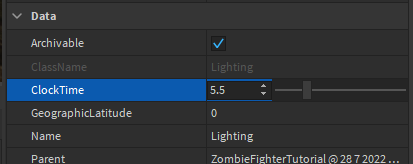
1. Environment lighting
We can use the ClockTime under “Lighting” to change the game world time and its light. If we put “0” means 12am, where as “12” means 12pm noon.
We will put “5.5” to our game this time, meaning 5:30am (of course you can decide the time you like!)
2. Zombie animation
Let’s make our zombie move like a usual human being:
Using the Dummy model we had earlier, select the Dummy by clicking it, and open “Animation Editor”
To create an animation for a part of the body:
a. Select the part you want to anime it
b. Next, move the part to the position you want it to start with. This will be the first keyframe in the timeline as shown
c. Move the blue line inside the timeline by dragging it to the next time frame you prefer, and create your second keyframe
d. Check if the animation is working by clicking the “play” button
Let’s create your own zombie movement! Below is an example of a moving zombie
Same as the animation we created earlier, make sure you change the priority of the animation to “Action”
And publish it to roblox

(Make sure you copy the ID! We will use it again later)
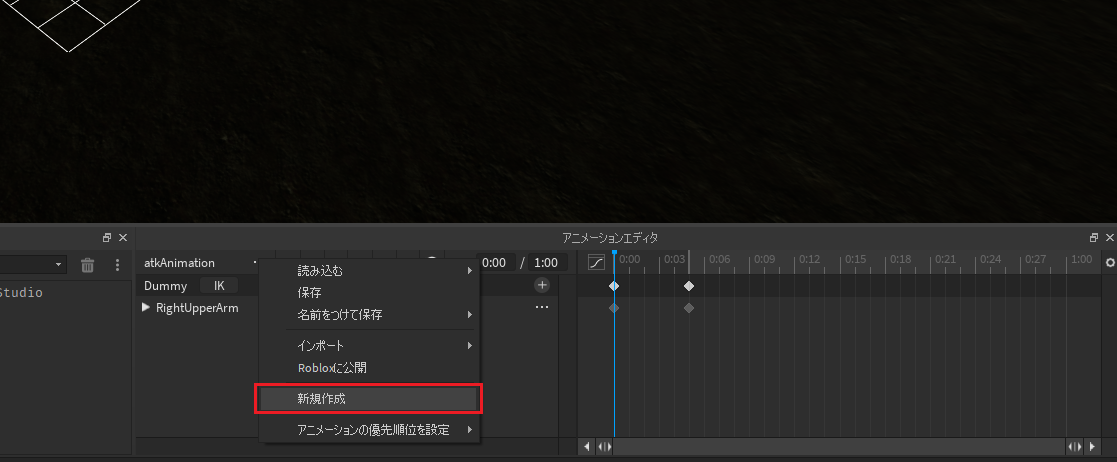
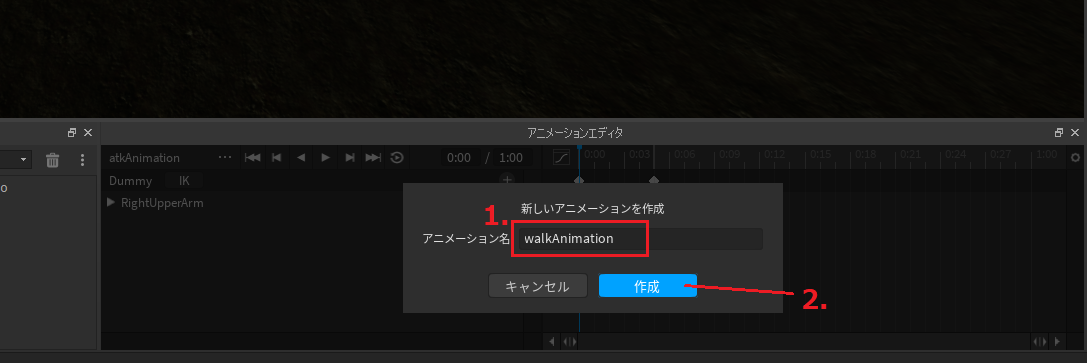
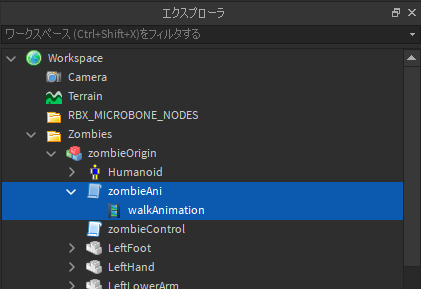
Next, create script under “zombieOrigin”, name it “zombieAni”; Under “zombieAni”, create an Animation and name it “walkAnimation”
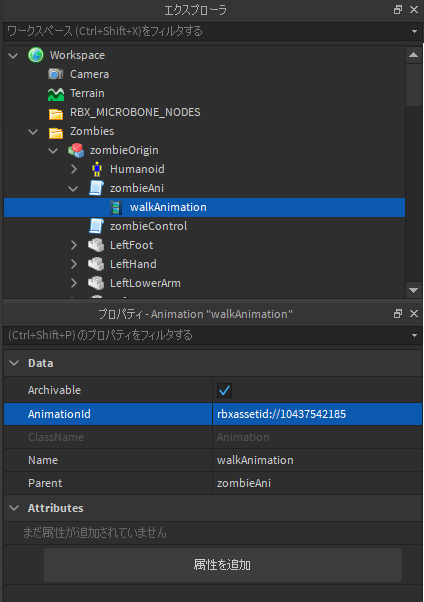
Under “walkAnimation”, paste the ID you copied earlier into “AnimationId”
Inside “zombieAni”, type the following
(game.Workspace.Zombies.zombieOrigin.zombieAni)
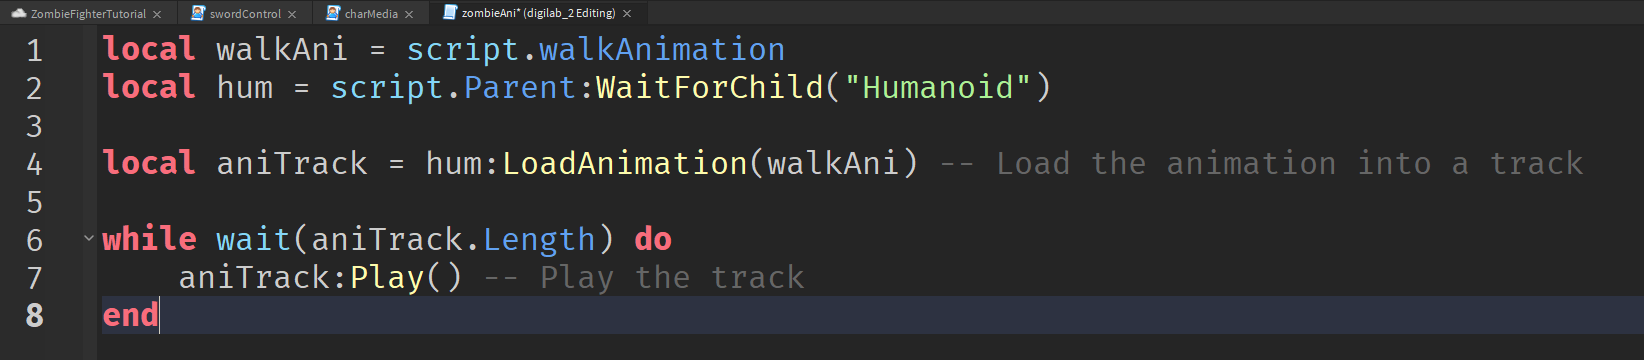
- line 1: Get the walk animation we created earlier
- line 2: Get the humanoid so we can load the animation into the character on line 4
- line 4: Load the animation
- line 6-8: An infinite loop that keeps repeating the animation on the zombie
Check if your zombie is moving as planned!
3. Audio
We will now add background music and sound effects into our game!
We need the 4 following soundtrack in our game:
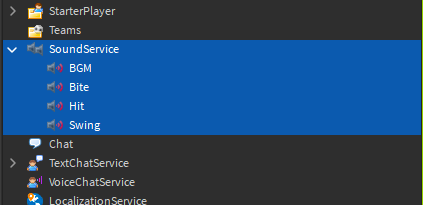
Enter the coresponding sound ID into the “SoundId” value:
- BGM: 10277787329
- Bite: 408341537
- Hit: 1647165403
- Swing: 4374879236
Let’s first put BGM into our game. The BGM will start playing once the game starts.
Create a script, name it “BGM” under “ServerScriptService”
Enter the following code into the script:
(game.Workspace.ServerScriptService.bgm)
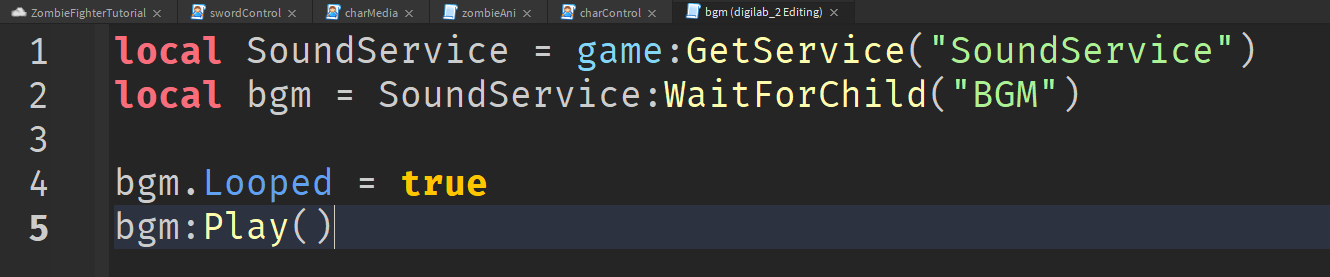
- Line 1: Get the Sound Service
- Line 2: Get the BGM sound file we created earlier
- Line 4: Set the bgm sound file to repeat
- Line 5: Play the bgm sound
Test your game and see if you can hear the BGM!
Next, open up your “charMedia” under StarterPlayer.StarterCharacterScripts, and add the following:
(game.StarterPlayer.StarterCharacterScripts.charMedia)
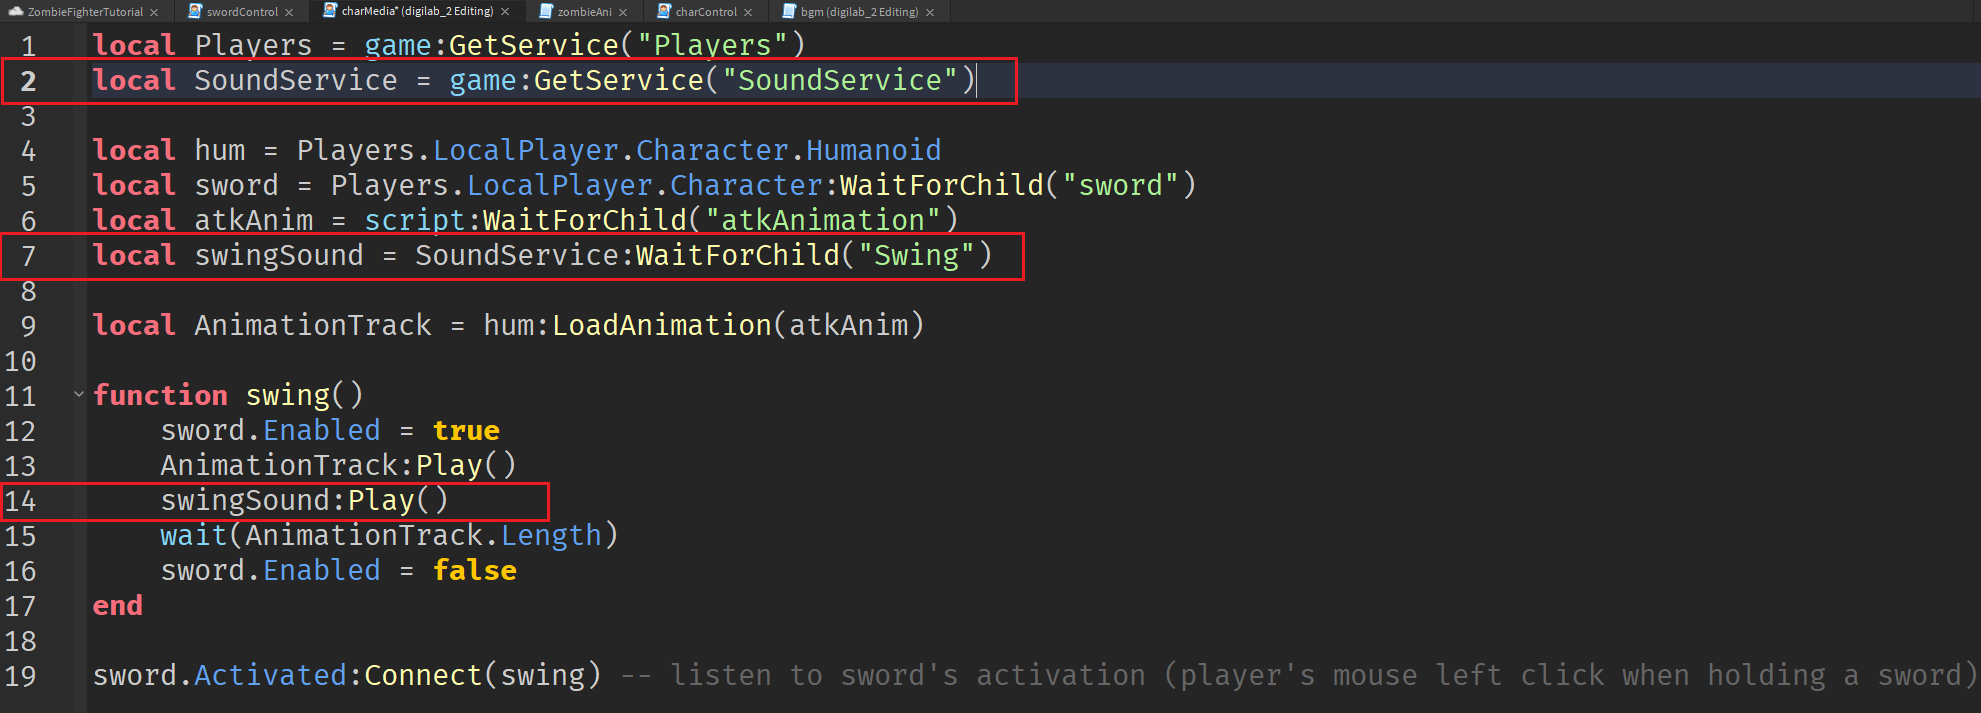
- line 2: Get the Sound Service
- line 7: Get the lightsaber swinging sound
- line 14: Play the swinging sound when the player clicks on the mouse left click (line 19)
Next, open your “swordControl” script, and add the following
(game.Workspace.sword.swordControl)
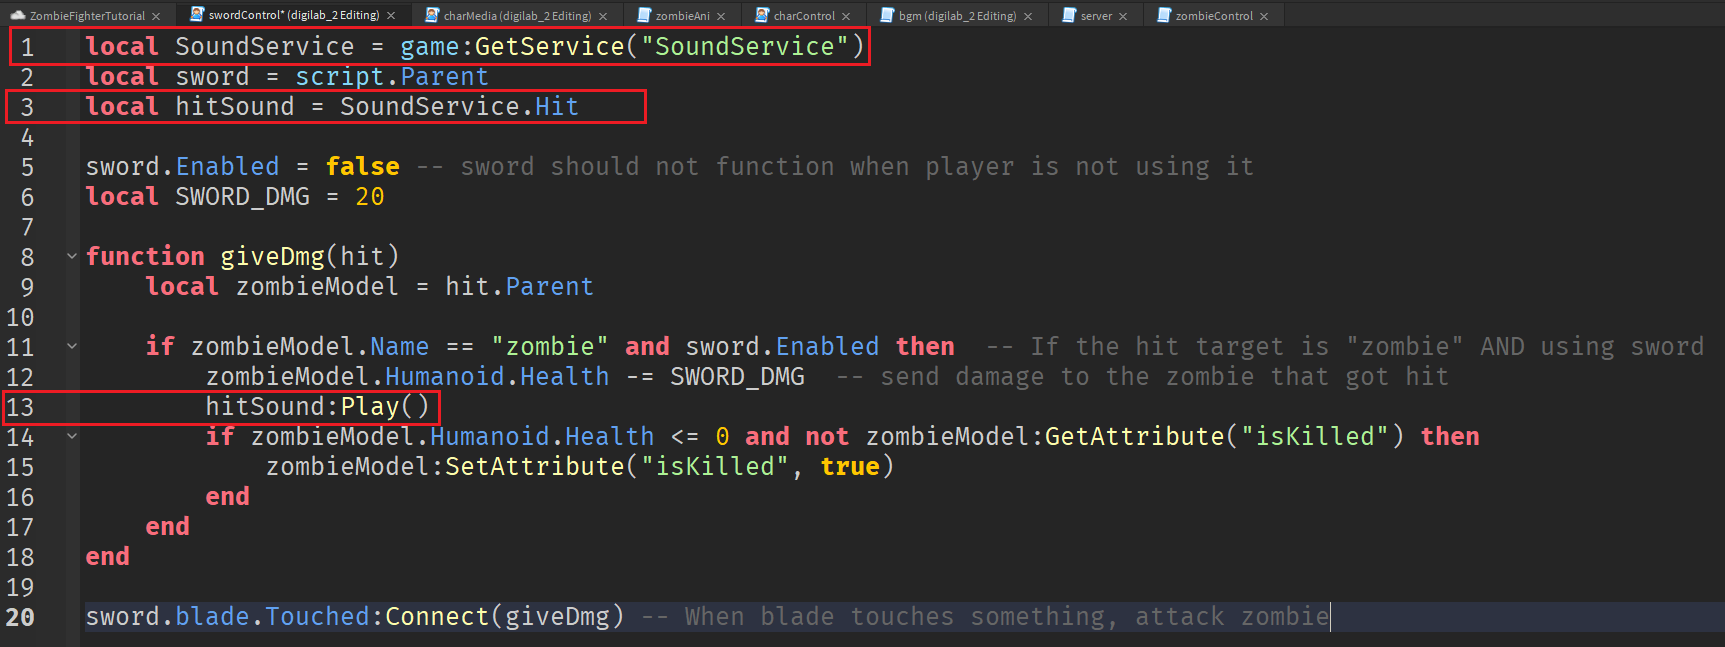
- line 1: Get the Sound Service
- line 3: Get the lightsaber hitting sound
- line 13: Play the hitting sound when the lightsaber hits a zombie (line 20, function from line 8-18)
Also open your “charControl” script, and add the following lines
(game.StarterPlayer.StarterCharacterScripts.charControl)
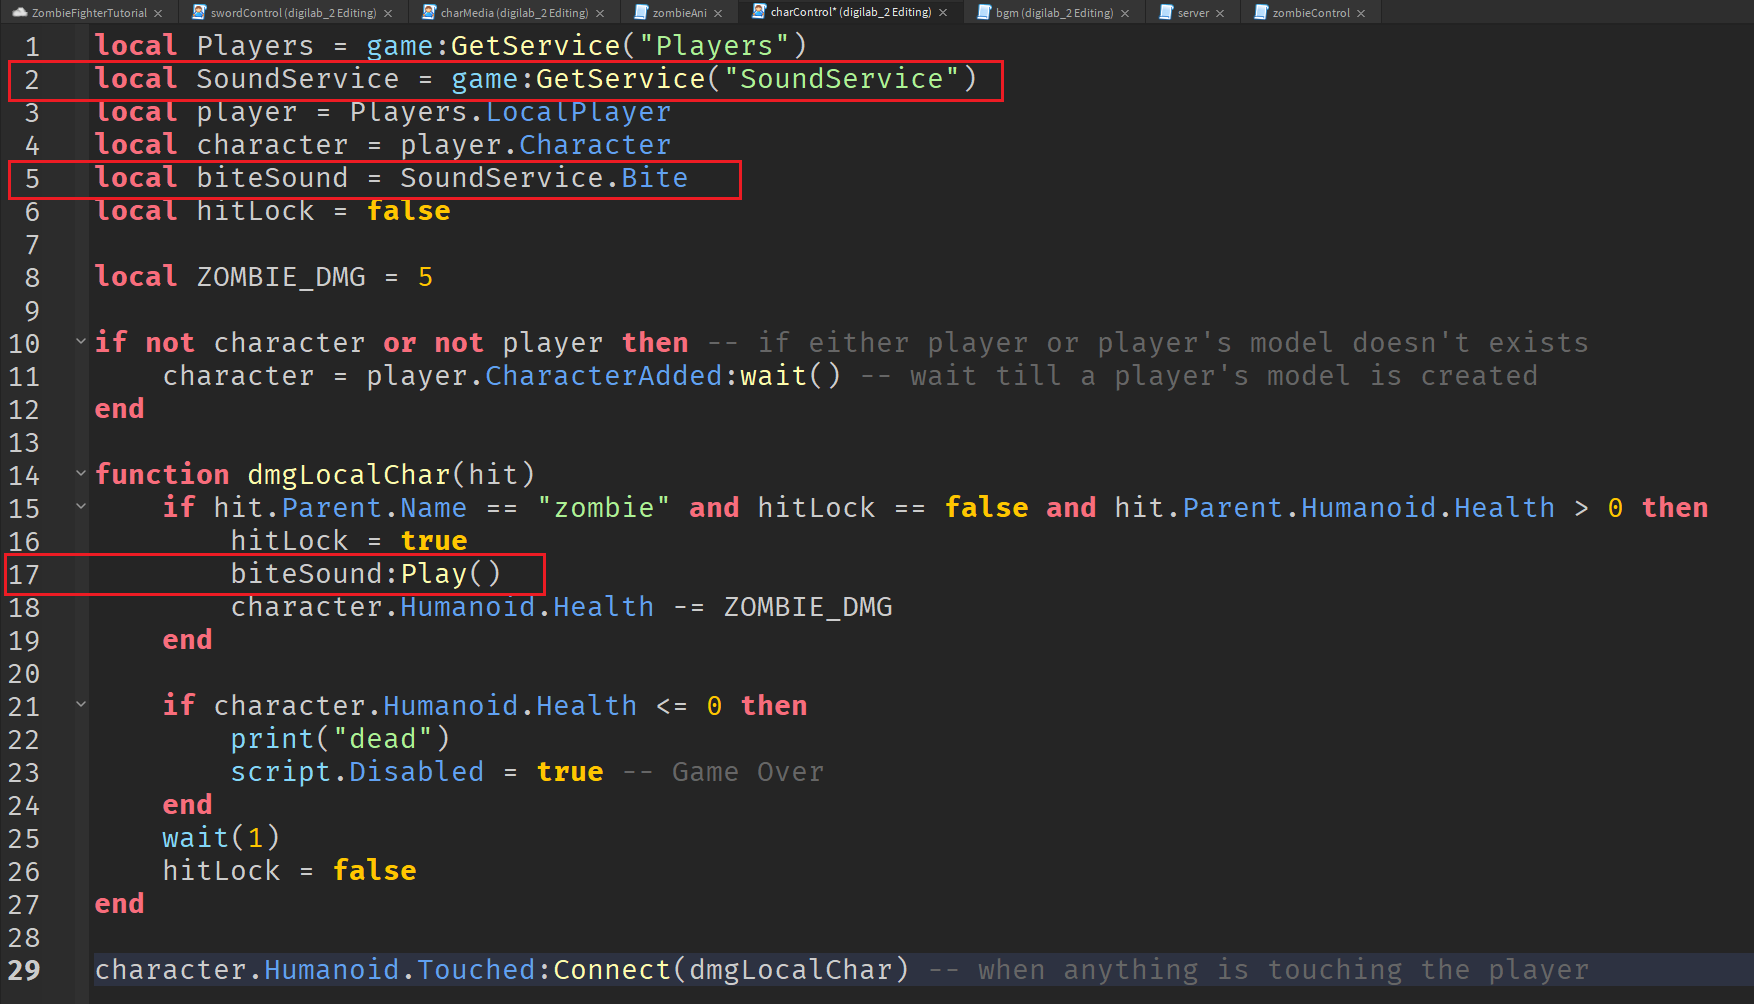
- line 2: Get the Sound Service
- line 5: Get the lightsaber hitting sound
- line 17: Play the bite sound when the character got bitten by a zombie (parts touched at line 29, zombie check at line 15)
We will also need to adjust our bite sound as follow (feel free to adjust other sound files’ settings):
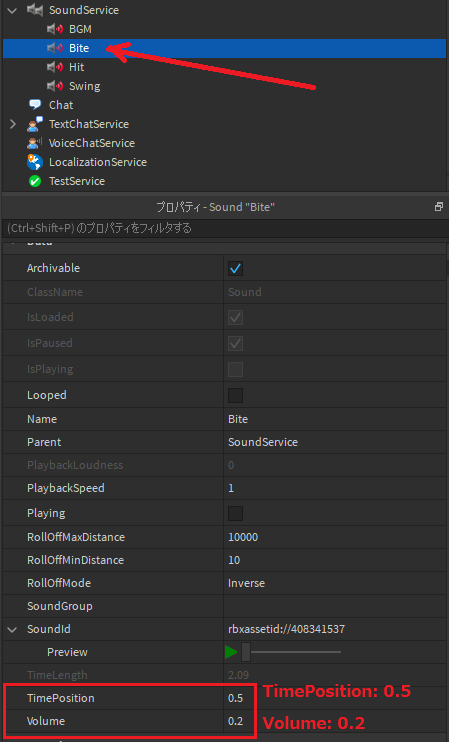
If everything works right, you should be able to hear everything like the video below:
4. Decorative objects
We need more objects/decoration to make our game more attractive!
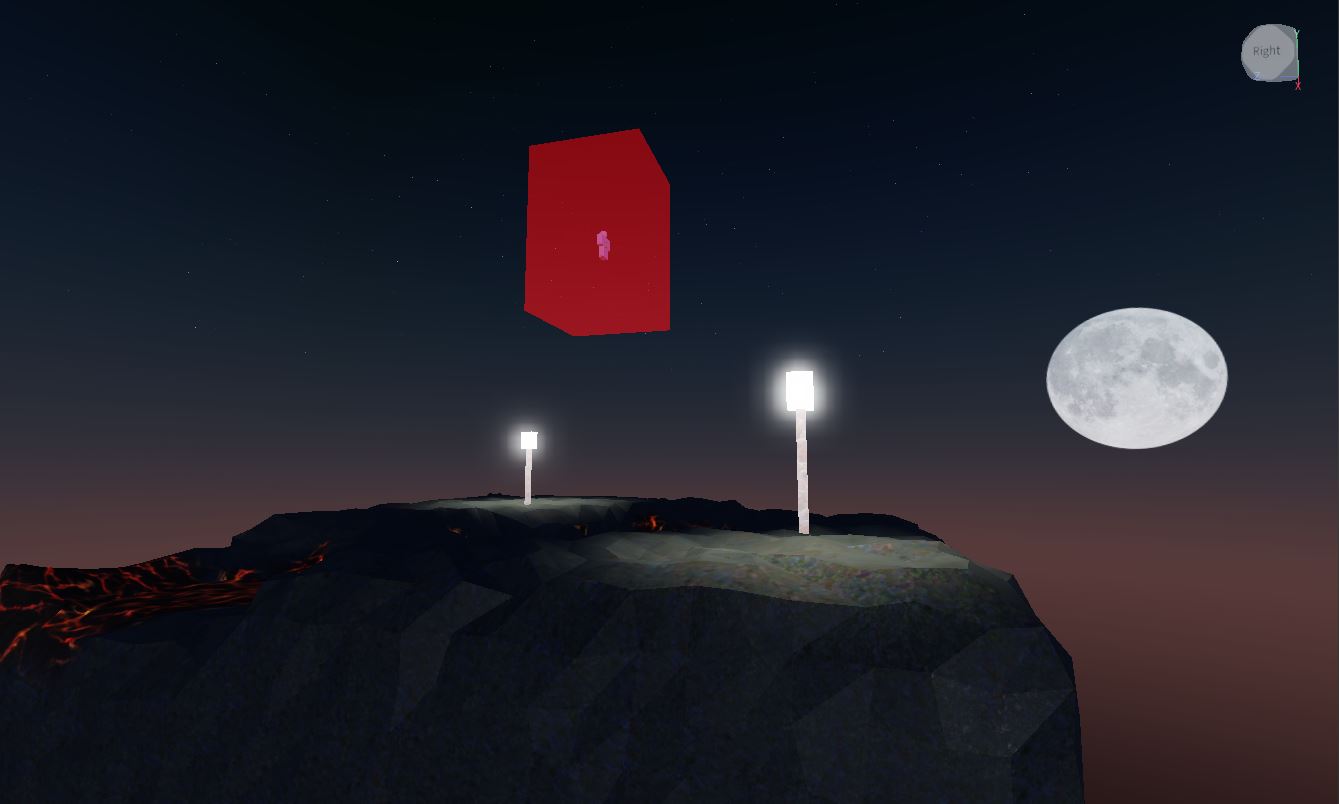
- Red transparent box in the spawning location
- Light poles
- Decorated floor (Lava & rocky ground)
1. Create floating red transparent box
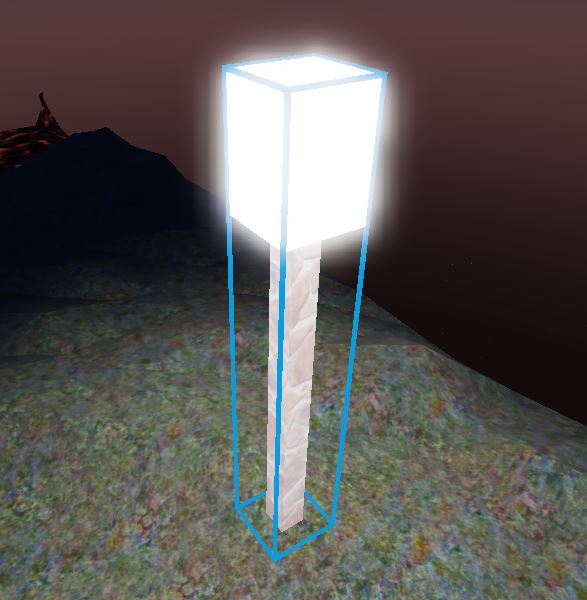
2. Create light poles
First, create a part name “bulb”, and under it create a “PointLight” object:
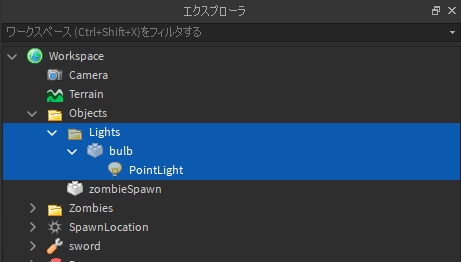
Select “PointLight” to change the lighting properties (feel free to have it your way!):
Create a pole part under the light, and group them into one object (check the previous lectures on how to move and adjust parts!):
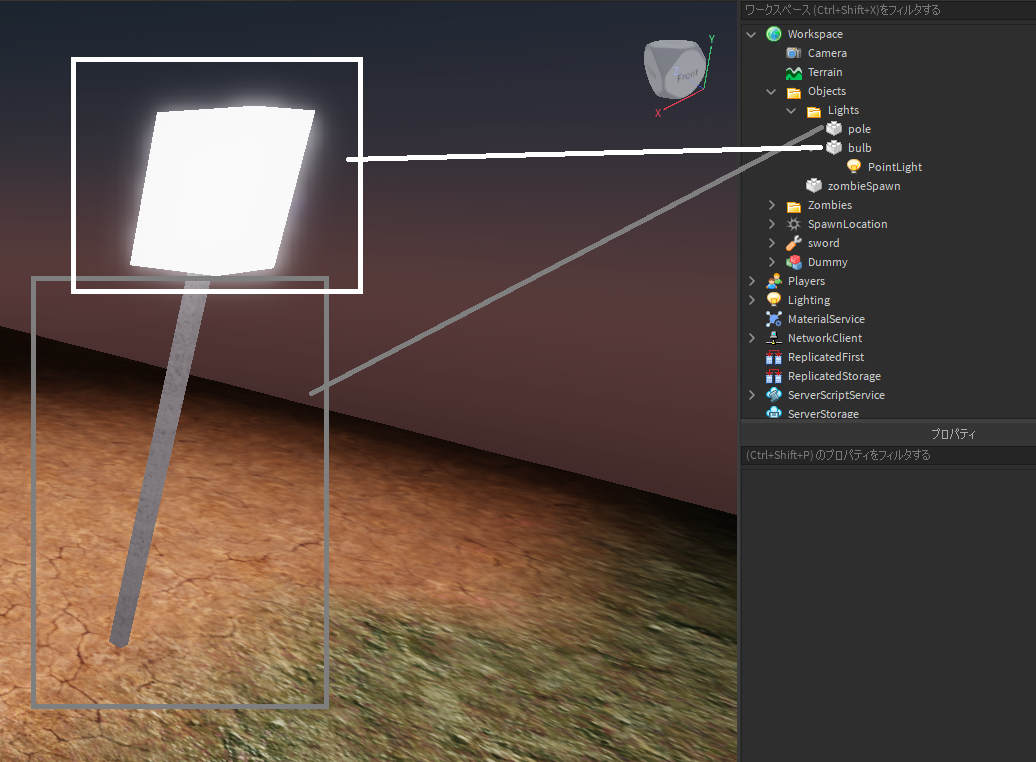
(Make sure they are both Anchored!)
And then let’s group these two parts together, and name it “lightPole”:
Duplicated the model for another light pole!

Put the lights wherever you want them to be!
3. Decorative ground
Use the terrain editor to decorate your terrain! (the videos below is for your reference)
4. Clean up
A few more things to clean up before our game is fully shaped:
1. Hide Dummy
2. Hide the SpawnLocation (make it transparent)
3. Put the sword into the StarterPack so the player can hold it once the game starts
1. Hide Dummy
Put the dummy under ServerStorage to hide it in game:
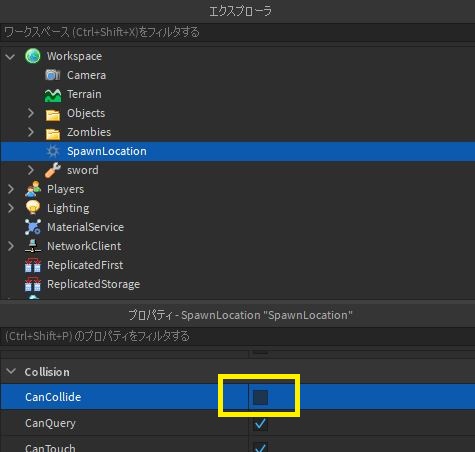
2. Hide SpawnLocation
We don’t want to see our SpawnLocation, we want it transparent:
![]()
And not colliding with anything:
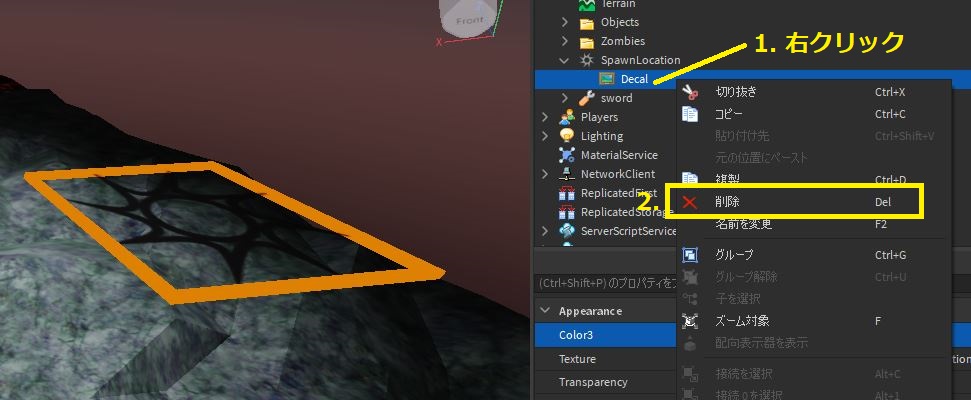
And we want to remove the mark above it:
3. Put sword into player’s starting inventory
“StarterPack” is the place that we put any tools we want to give to a player when their character is created.
So we will put our sword from Workspace to StarterPack:

Now when we start playing, you will see our sword is in our inventory (press key “1” to switch to sword):
5. Advance
Keep reading if you want to fix/add the following:
1. Add score board to keep track of zombie kills and highest score
2. Delete all zombies when the player died
3. Add hp item (Not written)
1. Add score board
First, let’s add the following new lines under ServerScriptService.Server:
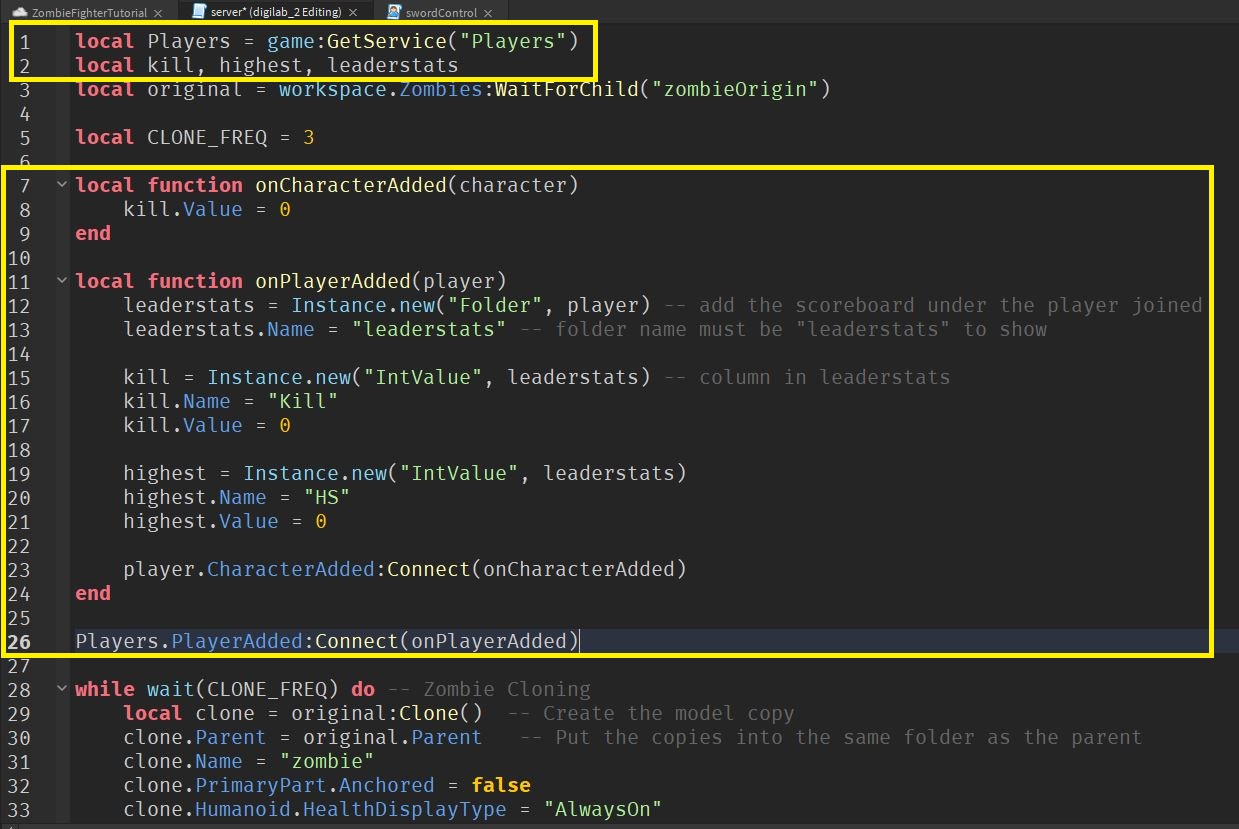
- Line 1: Gather players information
- Line 2: Set up variables
- Line 26: When a player joins the game, run function “onPlayerAdded”
- Lines 11, 24: Defines “onPlayerAdded” function
- Lines 12-13: Create a score board called “leaderstats” and created as a folder
- Lines 15-21: In score board, create two columns named “Kill” and “HS” (16, 20)
- Line 23: When a player’s character is created, run function “onCharacterAdded”
- Lines 7,9: Defines “onCharacterAdded” function
- Line 8: Reset “Kill” value when a character joins/rejoins the game
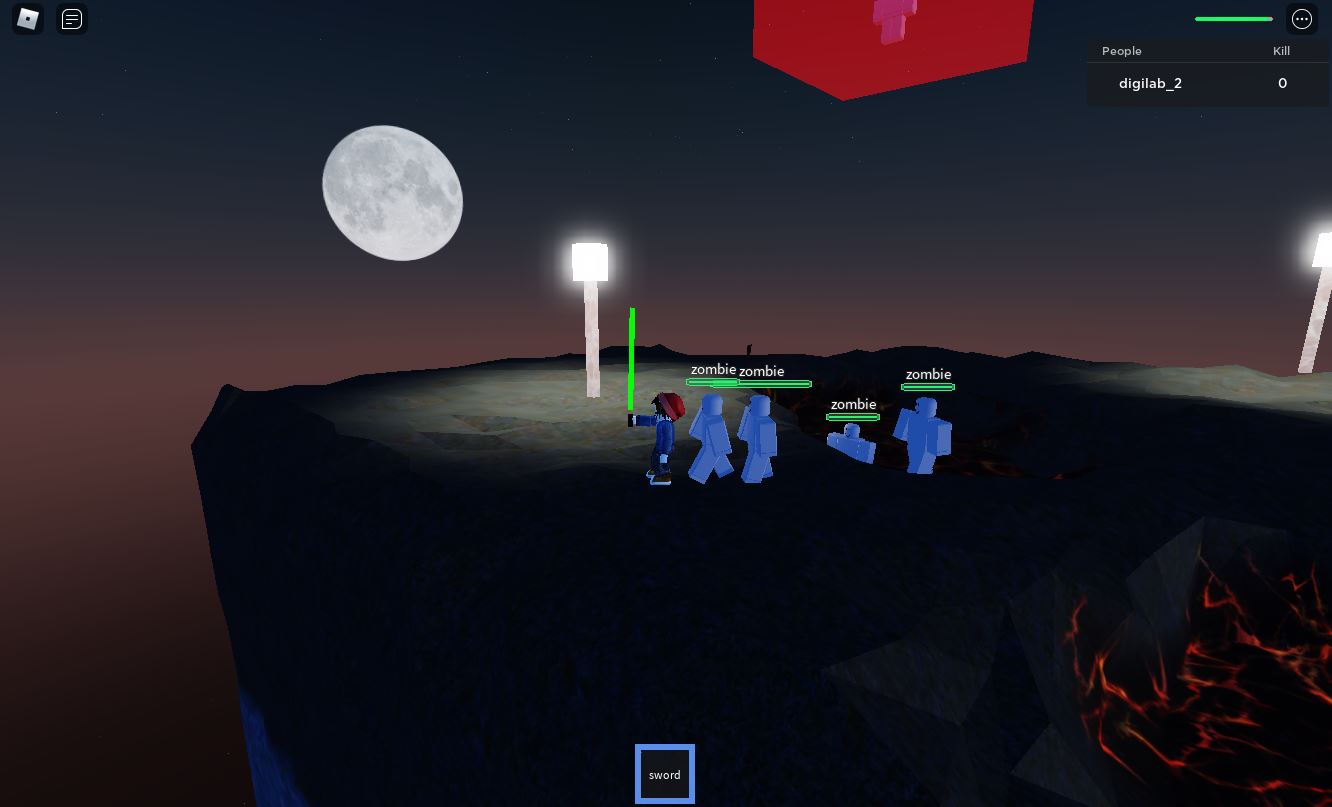
If you play now, you should be able to see the score board on your top right corner.
It should not be functioning just yet:
To keep track of kills using the leaderstats,
1. Add a remoteEvent under a folder named “Events” under “ReplicatedStorage”:
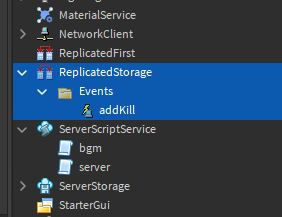
2. Next, add the following lines under Server script as well:
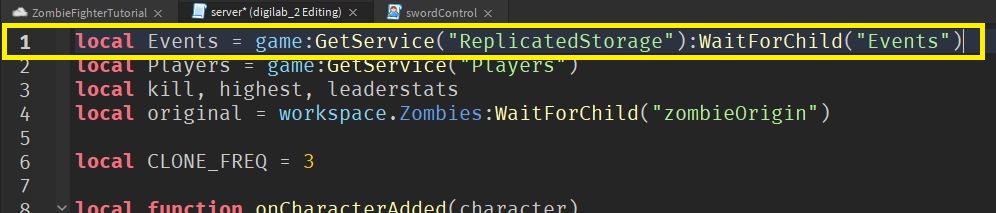
Line 1: Get the “Events” folder under “ReplicatedStorage”
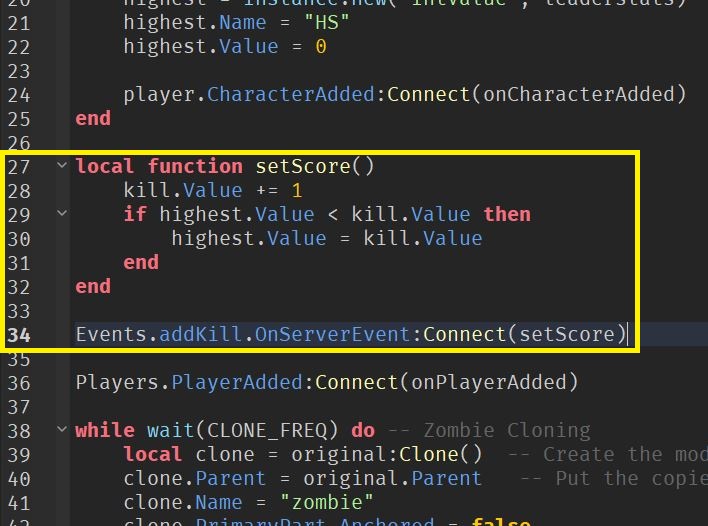
- Line 34: When server receive an event from client (any player), run function “setScore”
- Lines 27, 32: Defines function setScore
- Lines 28: Add one to kill value
- Lines 29-31: Check if the current kill is higher than the highest score. If it is, then replace the highest score with the current kill value.
3. Set up sending event when a player kills a zombie
We will add the following under “swordControl”:
(StarterPack.sword.swordControl)
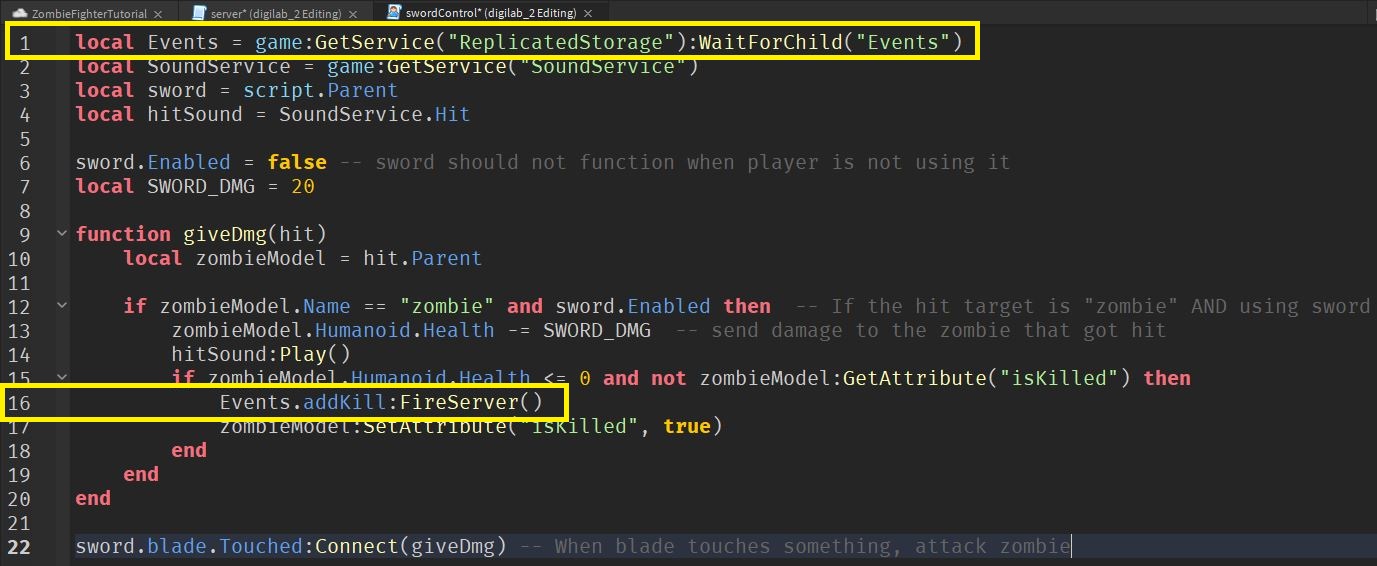
- Line 1: Get the “Events” folder under “ReplicatedStorage”
- Line 16: Send the “addKill” event to the server
The score board should now be working:
2. Clean up zombies left over
Inside server script, add the following to clean up the zombies before game starts:
(ServerScriptService.server)
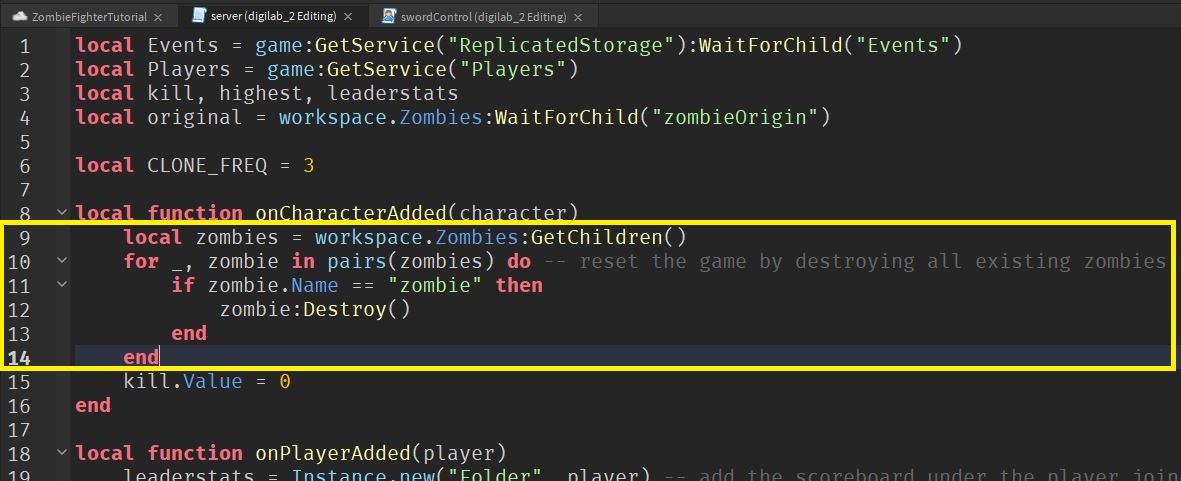
- Line 9: When a player’s character is created, get all the child inside the “Zombies” folder
- Line 10-14: Loop through all the child, and destroy anything named “zombie”
3. HP recover item
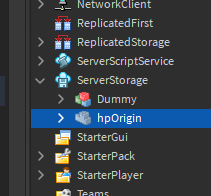
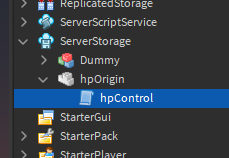
We will create an HP recover item, name it “hpOrigin”:
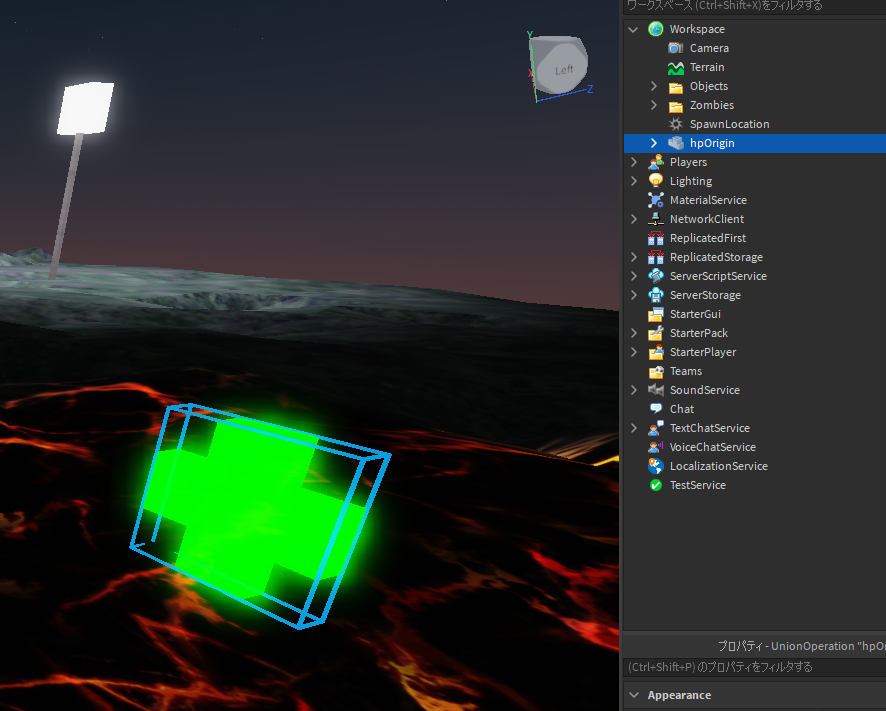
Put it inside the “ServerStorage” so it disappear from the game (hide from workspace):
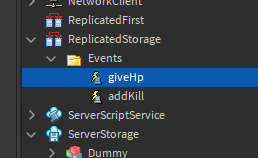
Next, create a new remoteEvent named “giveHp”, under “ReplicatedStorage.Events”:
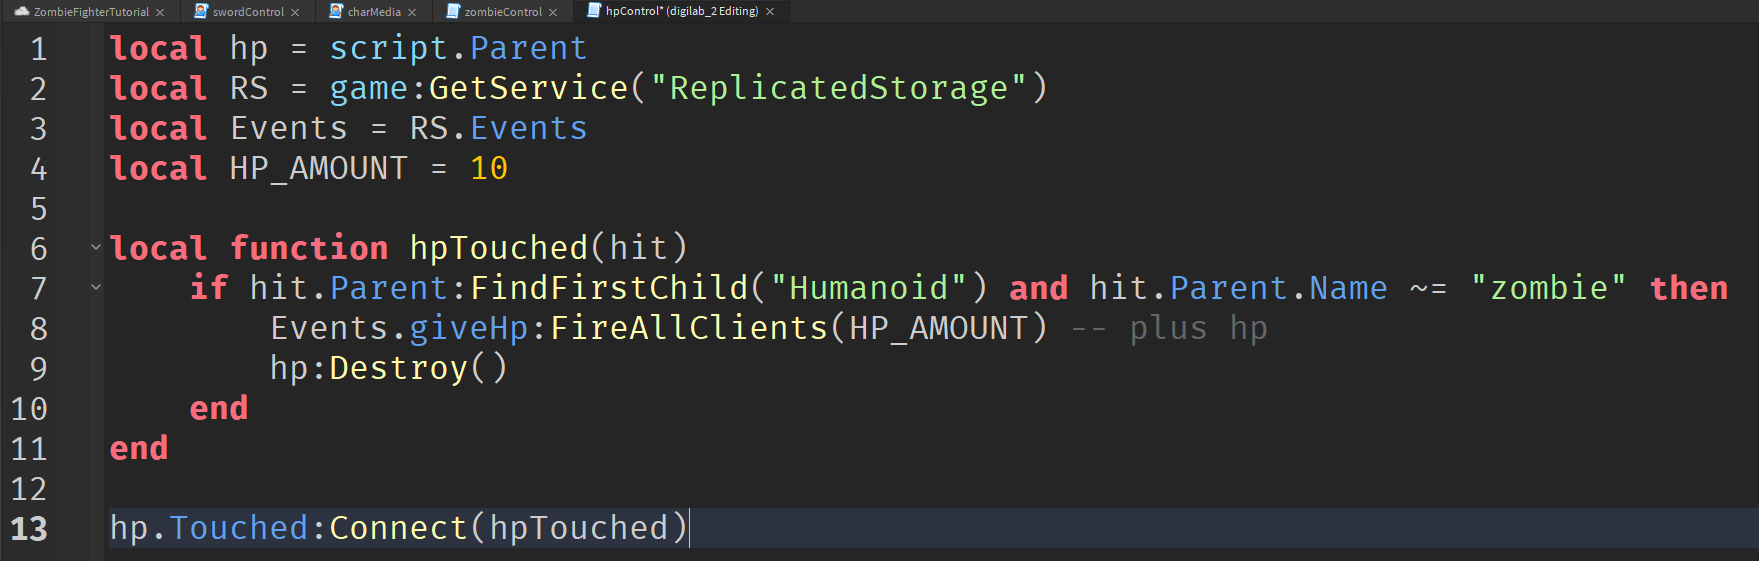
Back to “hpOrigin”, create a script file and name it “hpControl”, and type the follow:
(game.ServerStorage.hpOrigin.hpControl)
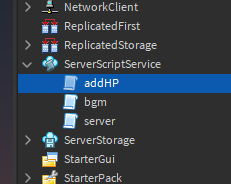
And inside “ServerScriptStorage”, add a new script name “addHP”, and type the follow:
(game.ServerScriptService.addHP)
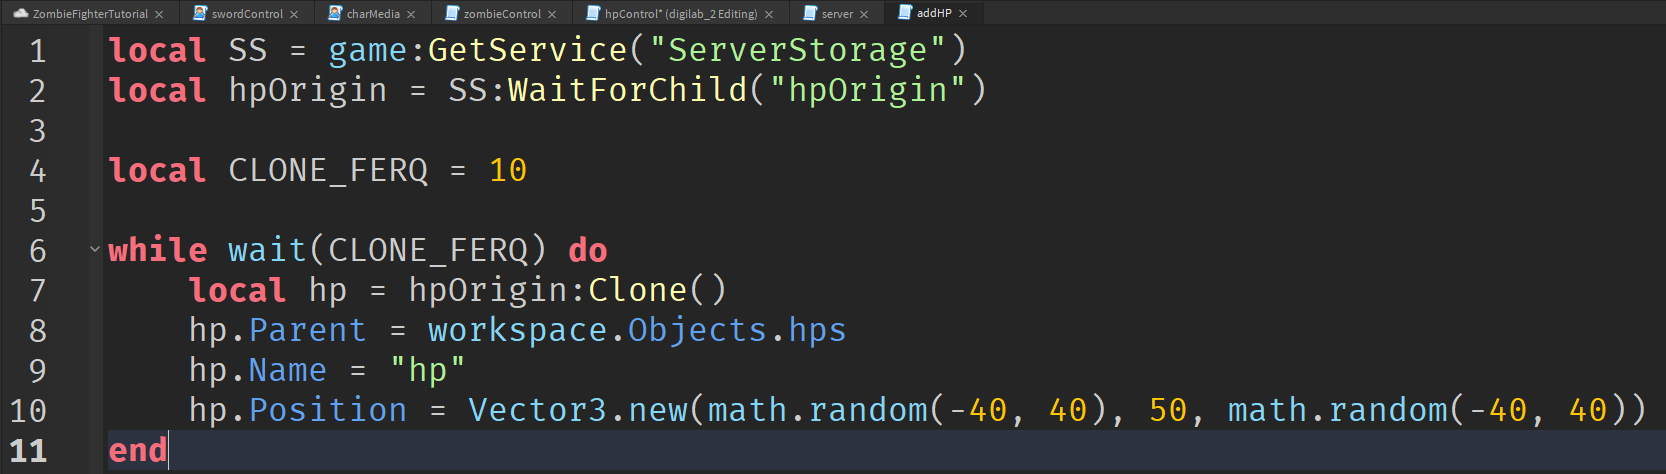
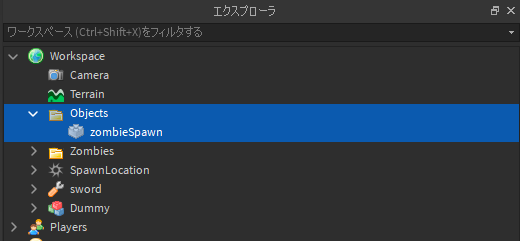
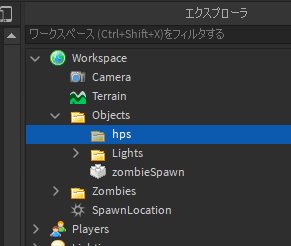
Make sure you also create a folder under “game.Workspace.Objects”, named hps (according to line 8 above)
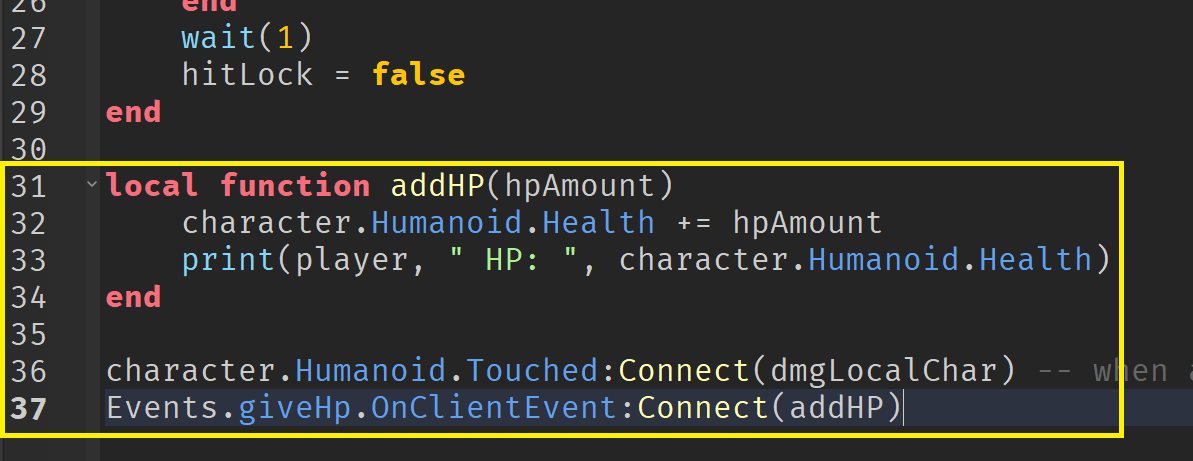
Under “charControl” you have created earlier, add the following:
(game.StarterPlayer.StarterCharacterScripts.charControl)