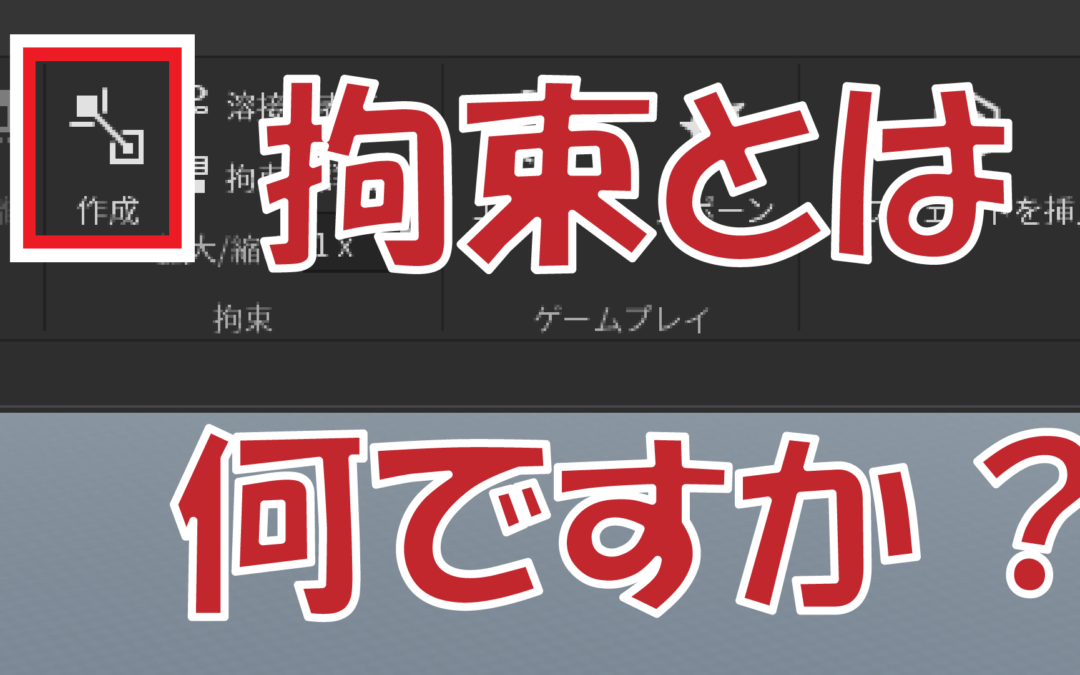
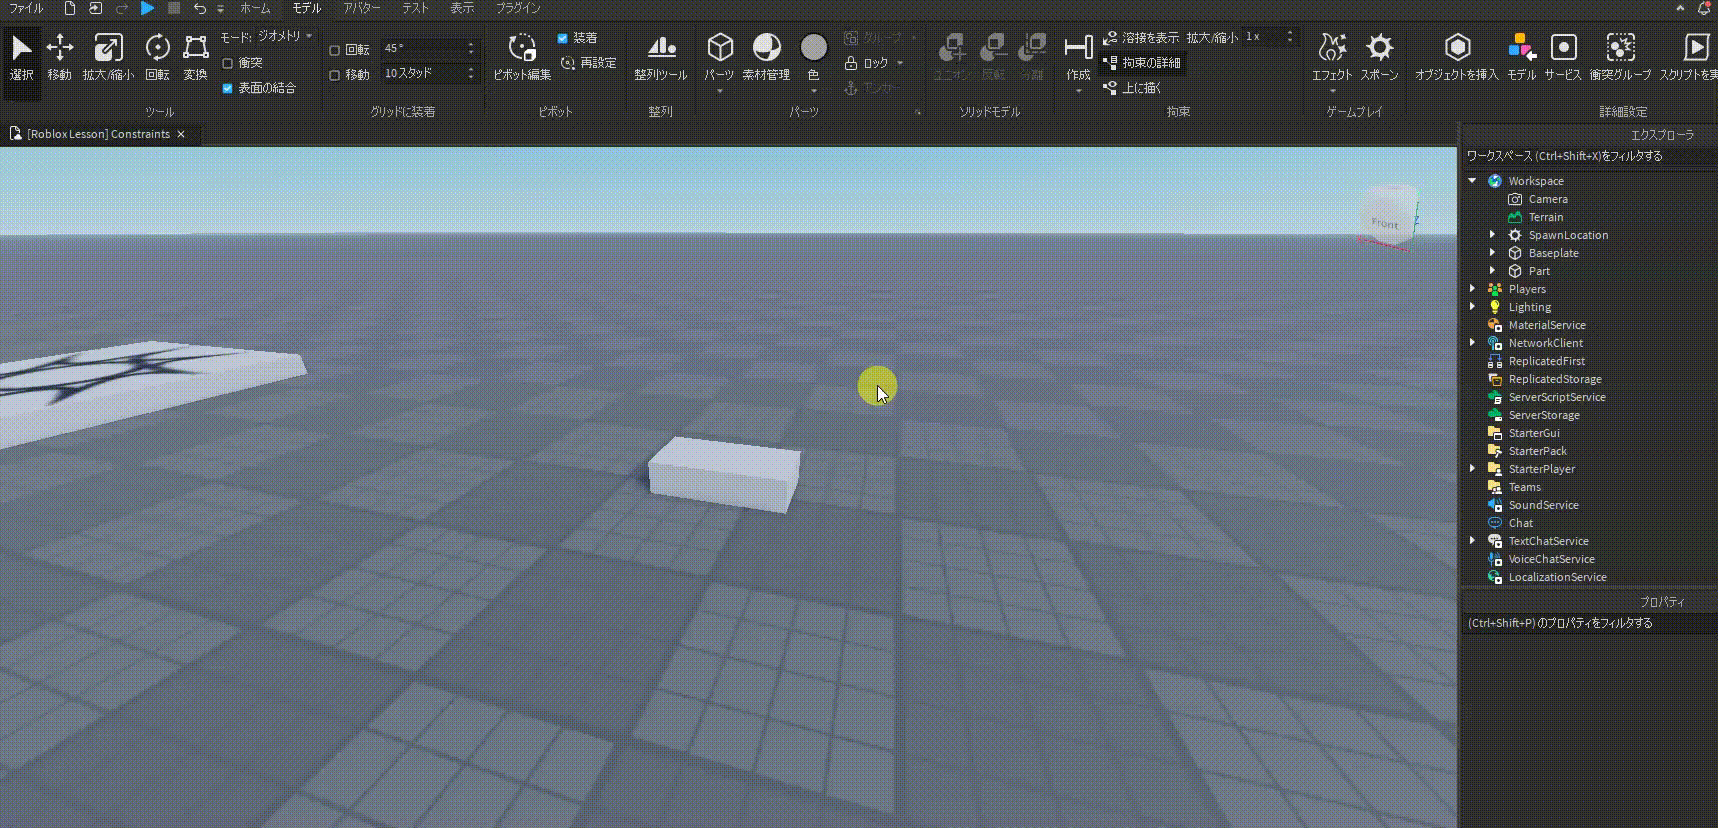
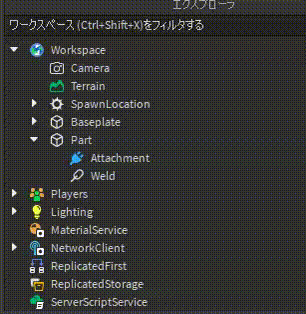
What are Constraints in Roblox Studio?
Constraints in Roblox Studio is a way of controlling physical movements of objects.
With the built-in Roblox constraints presets, we can create complicated movements in Roblox very easily.
This tutorial will be taking references from a youtube video, created by a channel named “US11“:
We won’t be going through all types of constraints in this tutorial, but only the more common ones.
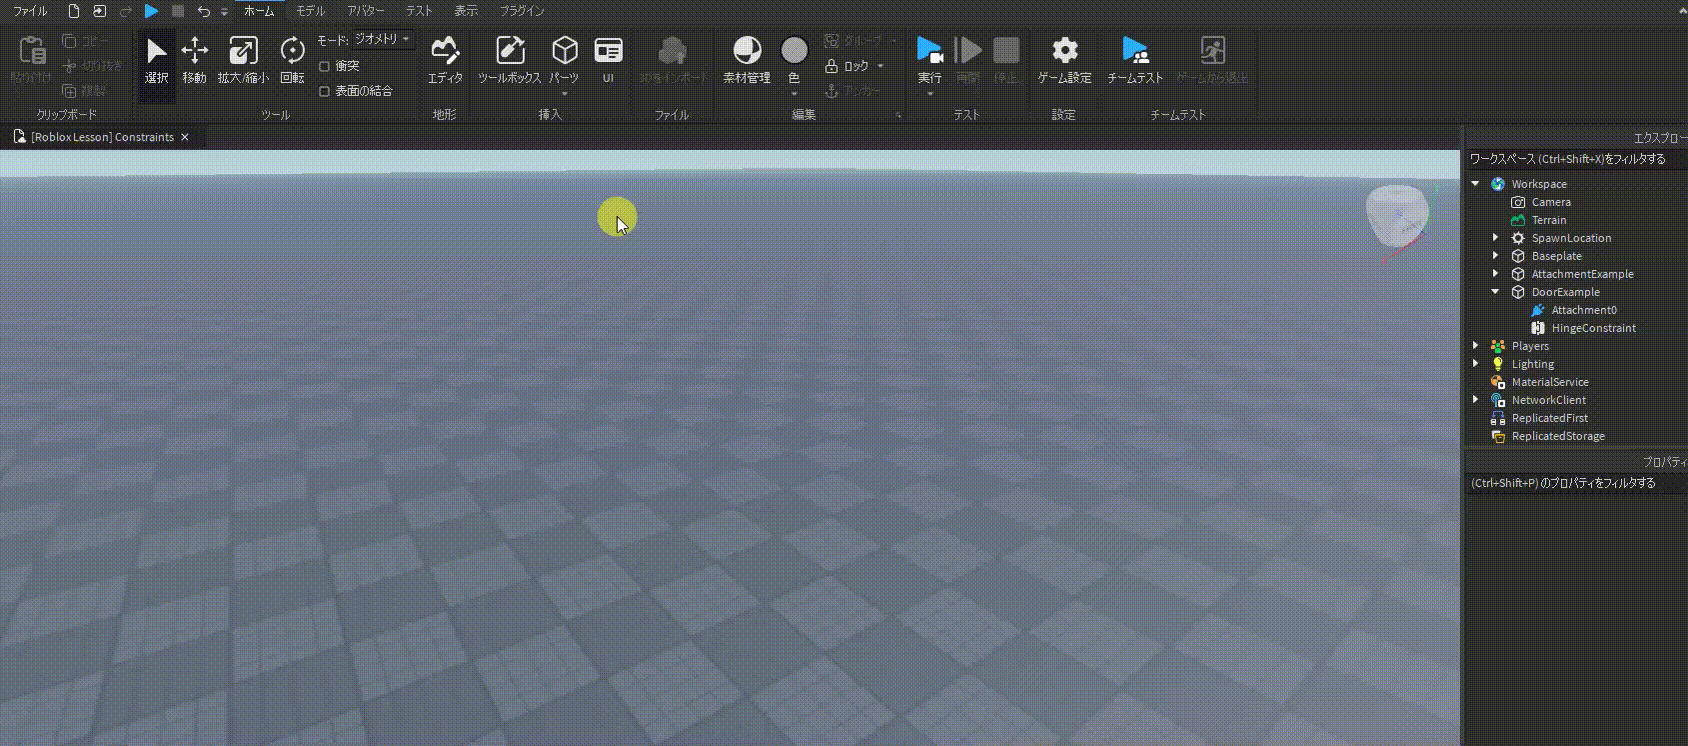
1. Attachment
Attachement Constraints is a point that we can place on our Roblox parts, and we can use it as an indicator to apply other constraints we will be talking about later.
We can also use it as a spot to apply different visual/audio effects, such as lights, particle effect emmitor.
Let’s look at the following example, on how to create a attachment with a particle emmiter attached on:
1. First create a part, then create an “Attachment” on it:
2. Click the + icon right next to the attachment, and select “ParticleEmitter” (You can try putting other different effects such as “Fire”, “Smoke”, etc.):
3. We can change this Emitter’s position or direction just like editing a normal part:
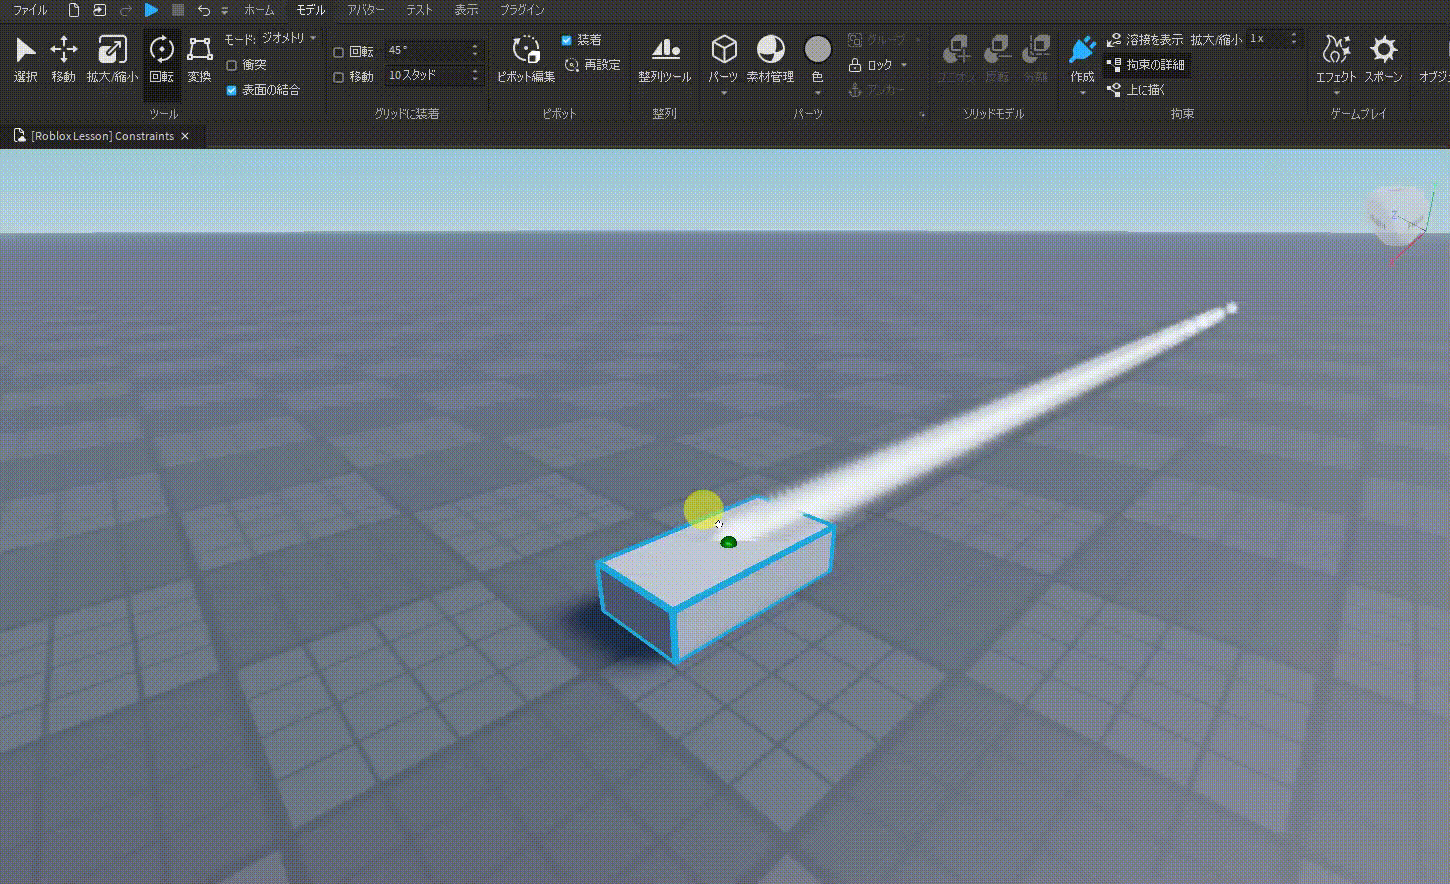
We will come back to Attachment constraints as this is an important element to many other constraints.
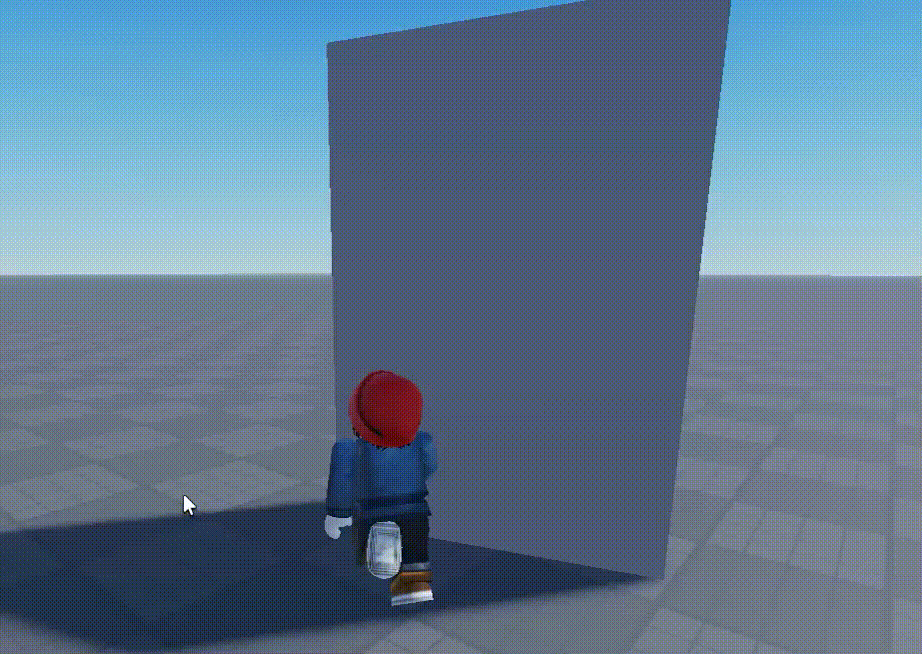
2. Hinge
Hinge is a very handy and widely used constraint in Roblox games. It can restrict an object to rotate in a specific rotation:
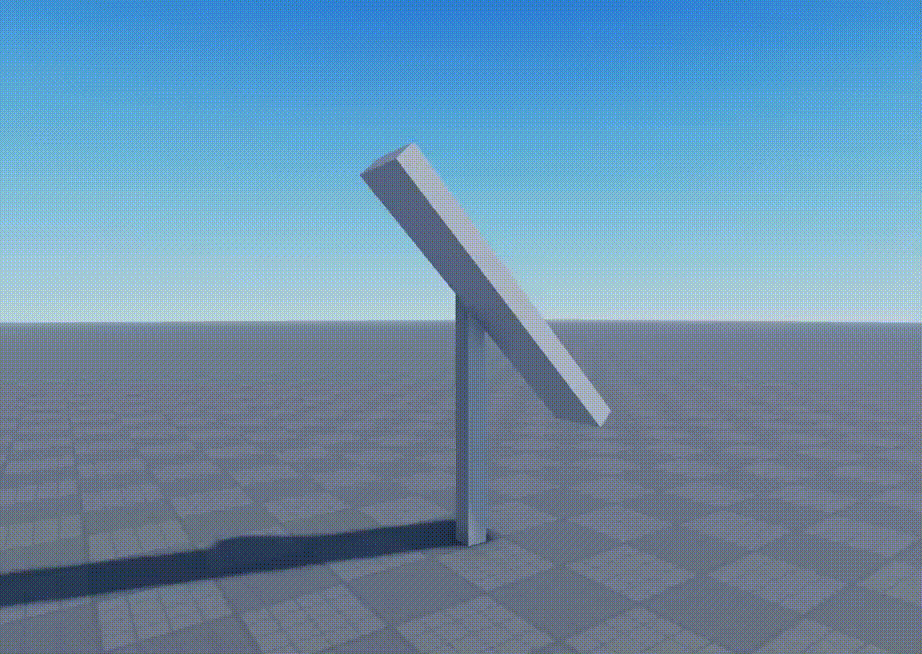
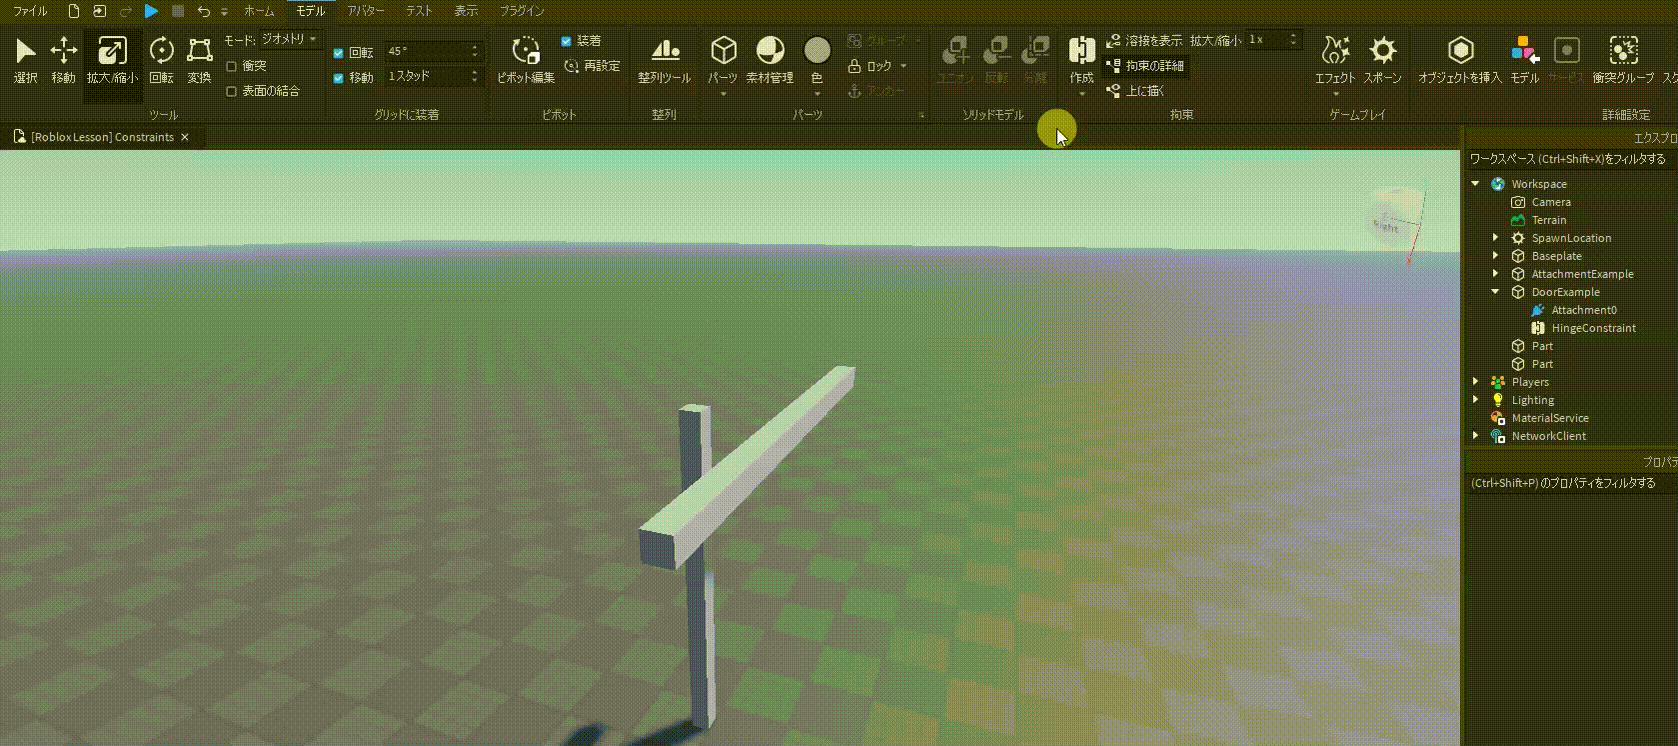
Let’s create the rotating mill together step by step:
1. Create the main parts. Make sure you have anchored the pole!
2. Create the Hinge Constraint between them:
Note: This step could be very tricky for beginners! Be very careful on when to left click to place your two Hinge points, and use right click + WSAD to adjust your camera viewpoint often!
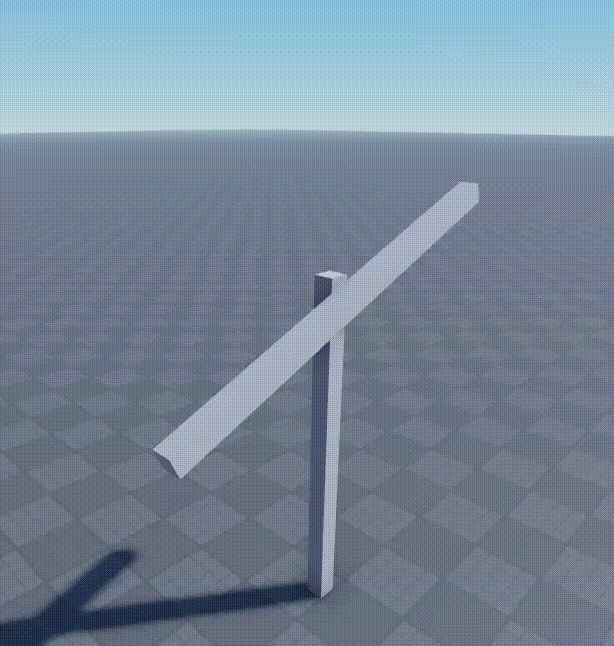
3. Go to the HingeConstraint’s property, find “ActuatorType” and change it to “Motor”
4. Set “AngularVeloctiy” to 10, and set “MotorMaxTorque” to 10000:

AngularVelocity: How much force you want to apply to the rotation. You can think of it as how fast you want to spin the object.
MotorMaxAcceleration: How fast do you want the rotation happens from no movement to expected movement.
MotorMaxTorque: Maxium rotation speed.
(Try if you can use HingeConstraint and create a rotatable door yourself!)
3. Prismatic
Prismatic constraint is another very important tool.
It is used to control a sliding movement of an object along one straight line.
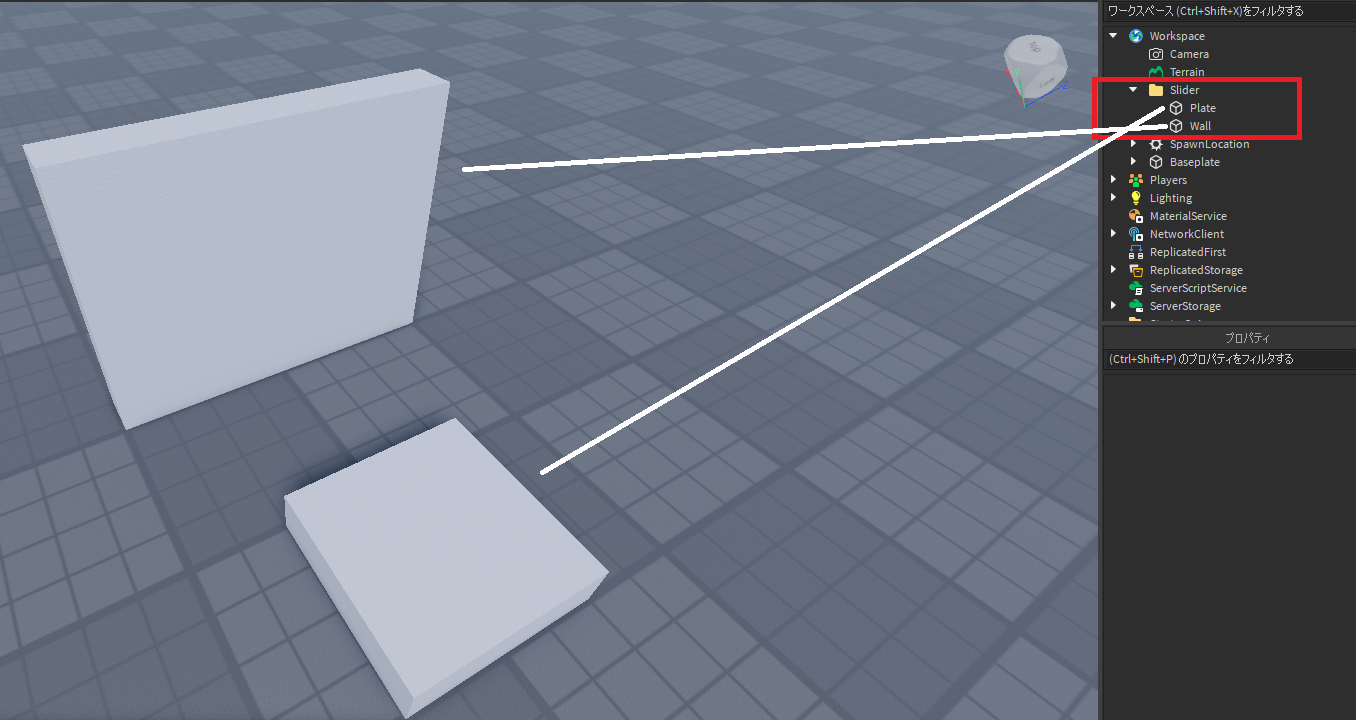
Let’s create the following auto moving plate:

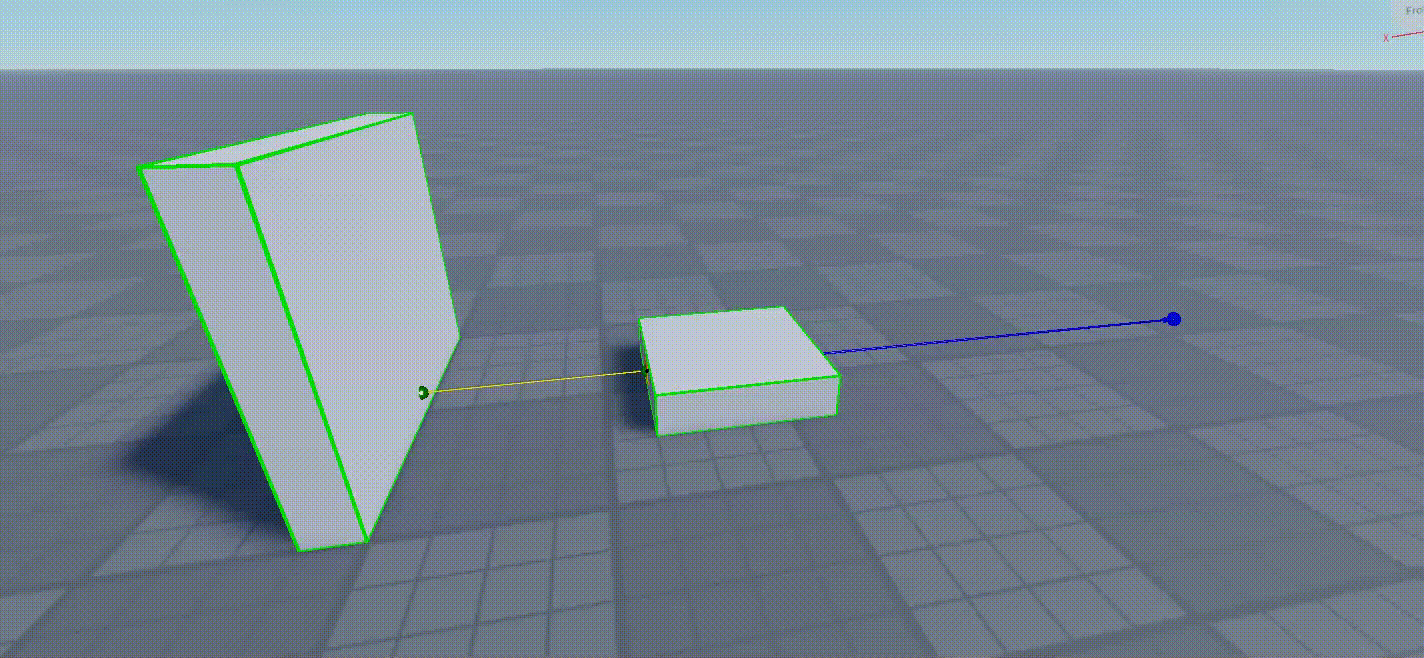
1. First create a folder, with a Wall and a plate part inside:
2. Create a Prismatic Constraint between the wall and the plate:
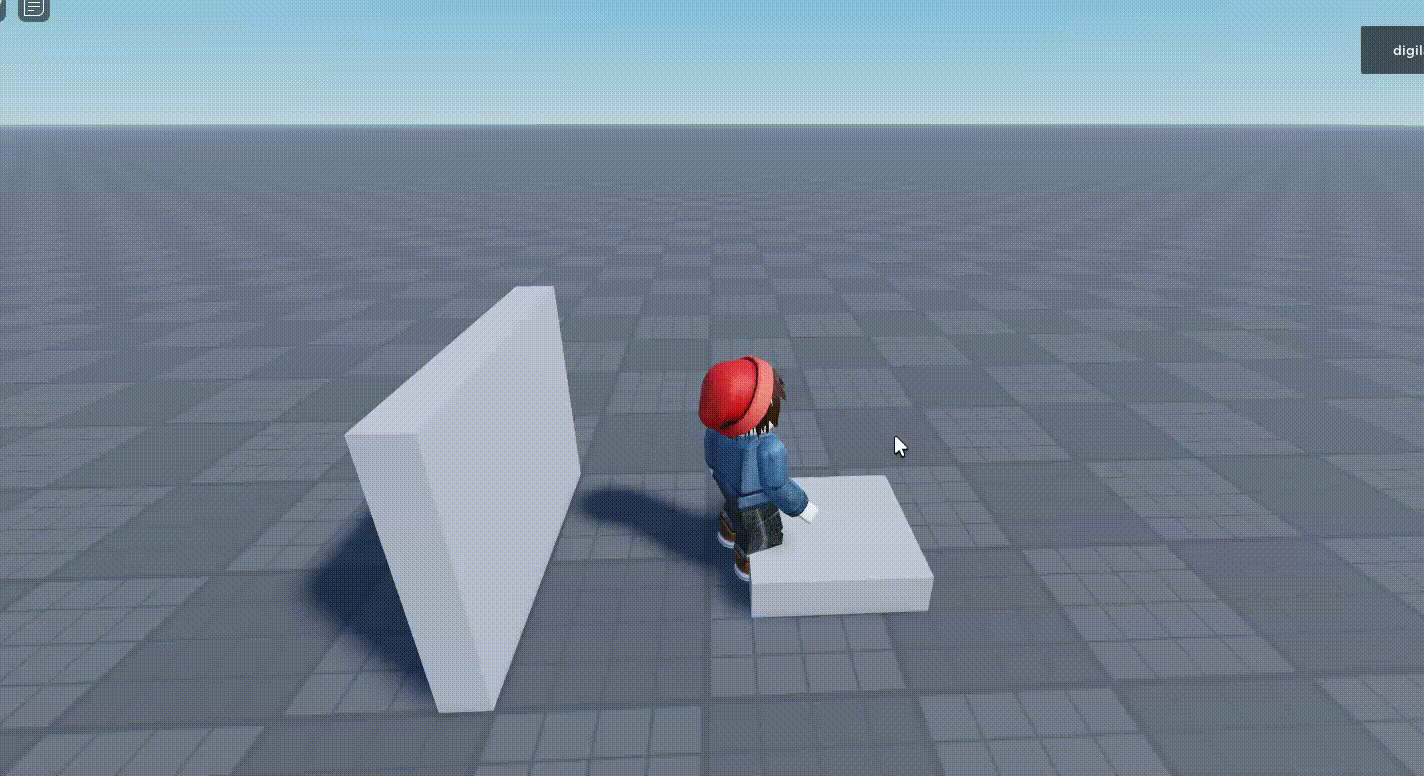
3. If we start pushing the side of it, you will realize it will move along a straight line only, not to the side:

4. Let’s see how setting a upper and lower limit on it will change its movement:
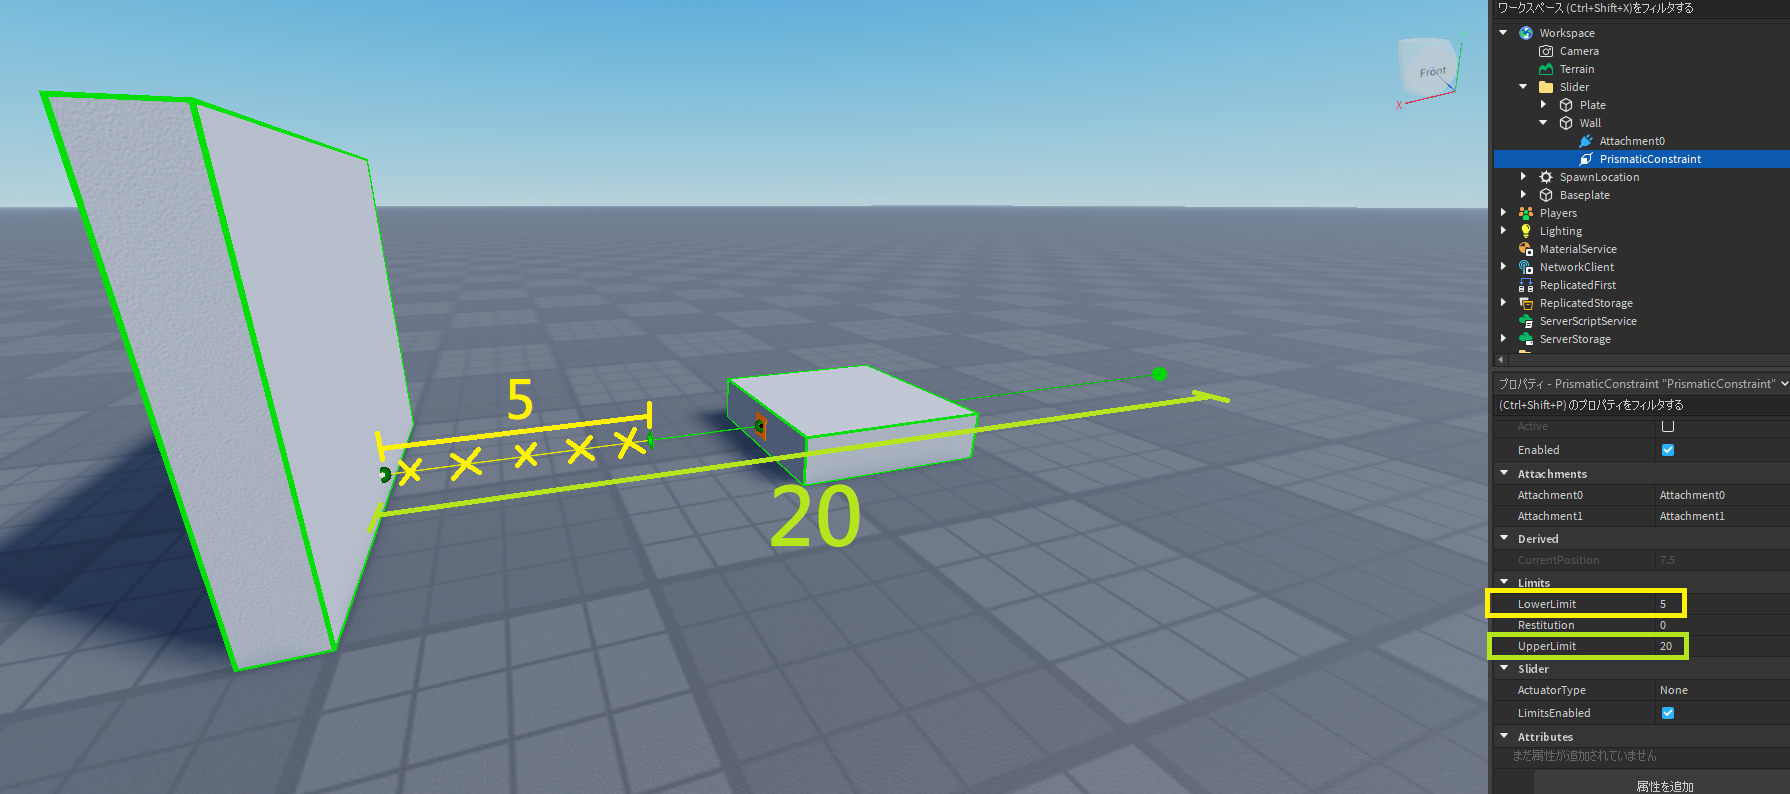
5. Let’s set a target position so that it moves on its own.
To set a target position, first we need to turn our PrismaticConstraint’s ActuatorType to “Servo” mode:
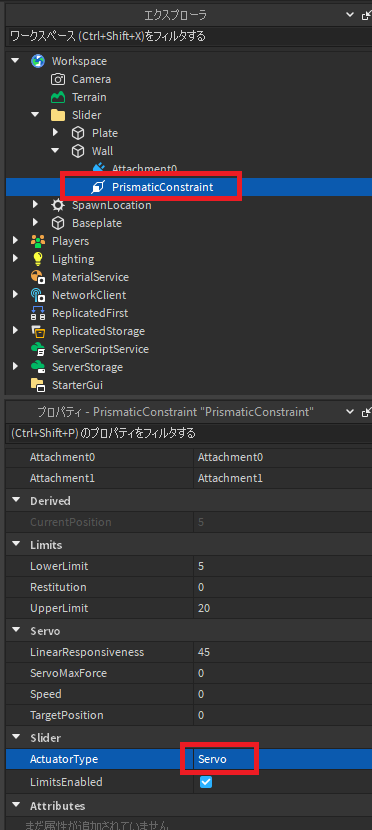
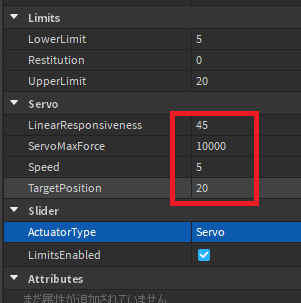
- LinearResponsiveness: The speed of starting and ending a movement
- ServoMaxForce: The highest force limit of a movement
- Speed: How fast the movement is
- TargetPosition: Where to stop the movement
4. Cylindrical
Cylindrical Constraint is a combination of Prismatic Constraint + Hinge Constraint.
A part that is Cylindrically constrainted will not only move along one axis, but also has the option of rotating itself.
1. Create the parts:
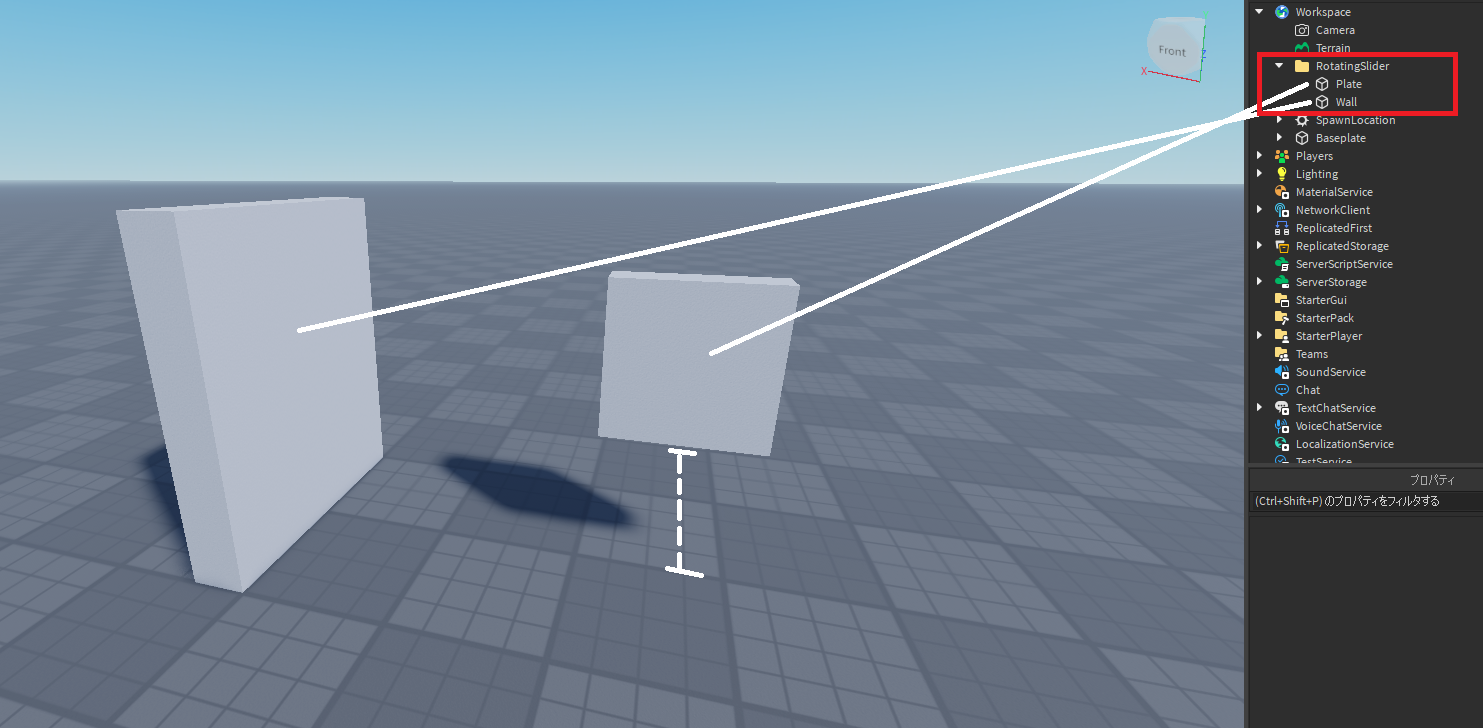
2. Select “Cylindrical Constraint”:

3. Connect the two parts with the constraint:
4. Remember to anchor the wall.
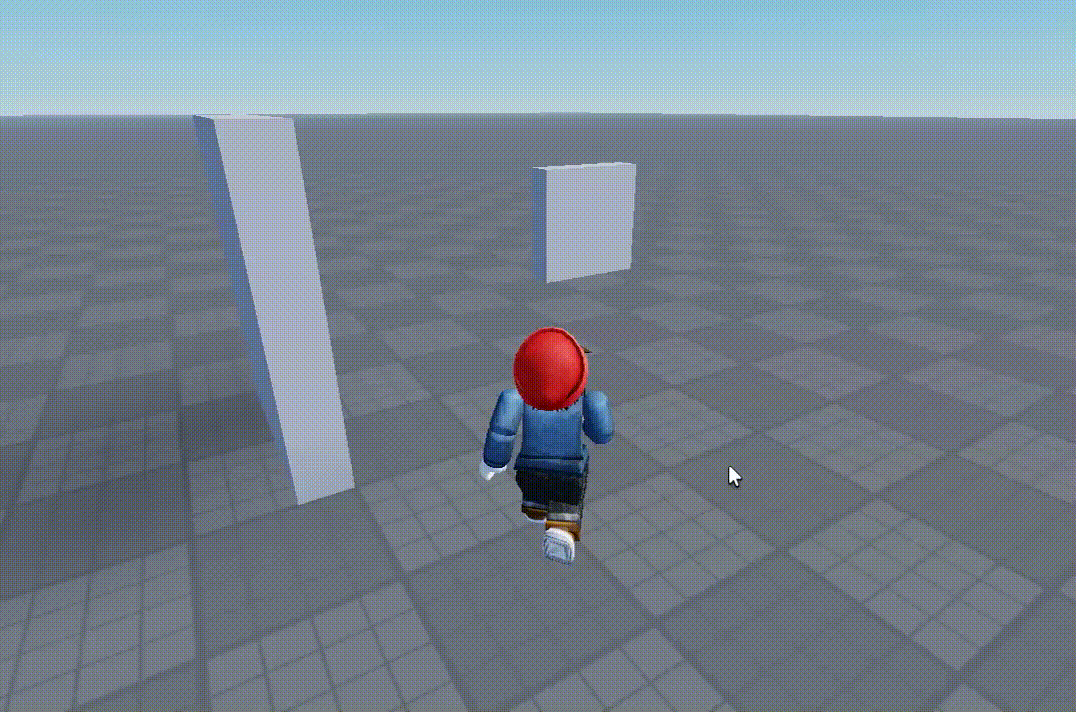
5. If we try it out now in game, you will notice the plate is prismatically constrainted (moving along one axis) and hinged (able to rotate on its own):
6. Same as Hinge and Prismatic, we can set limits to how much we can rotate it, or how far the part can slide to, by enabling “AngularLimitsEnabled” (please refer to Hinge Constraint section) and “LimitsEnabled” (please refer to Prismatic Constraint section).