Introduction
In this tutorial we will learn how to create the following:
1. A basic railway
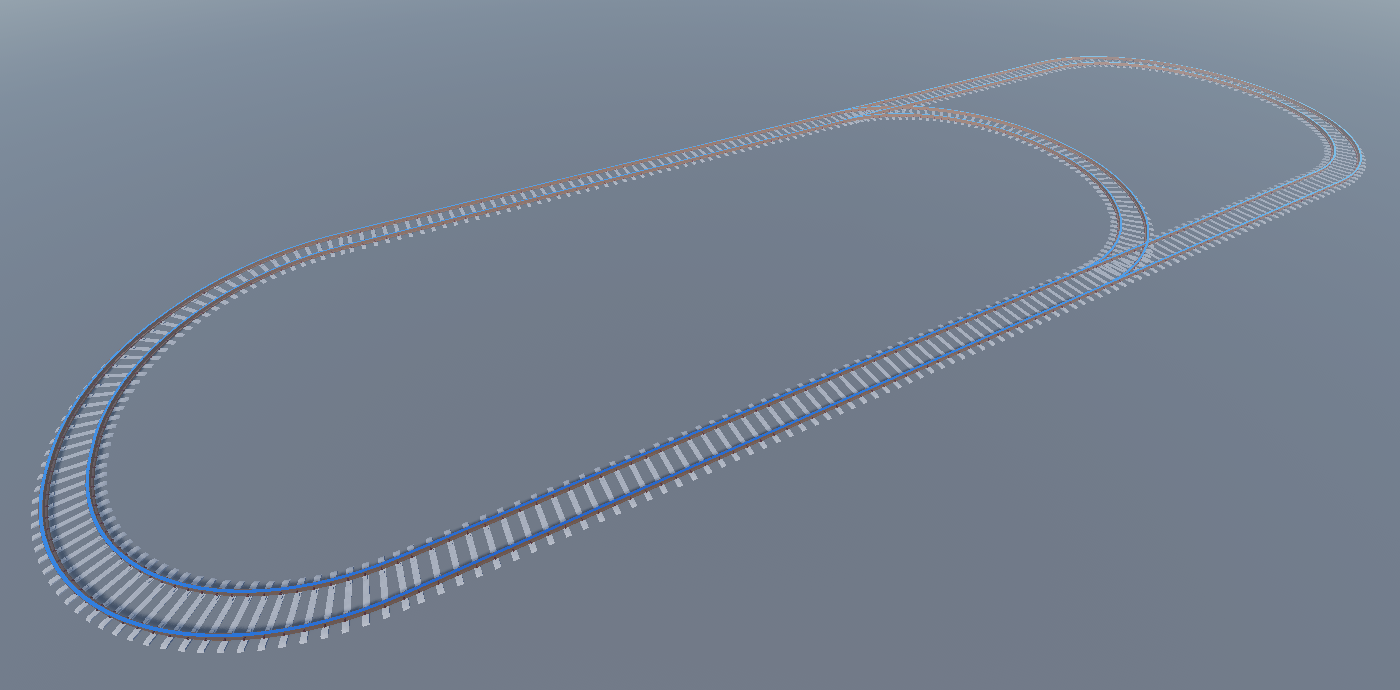
2. A train

3. A train with a cargo
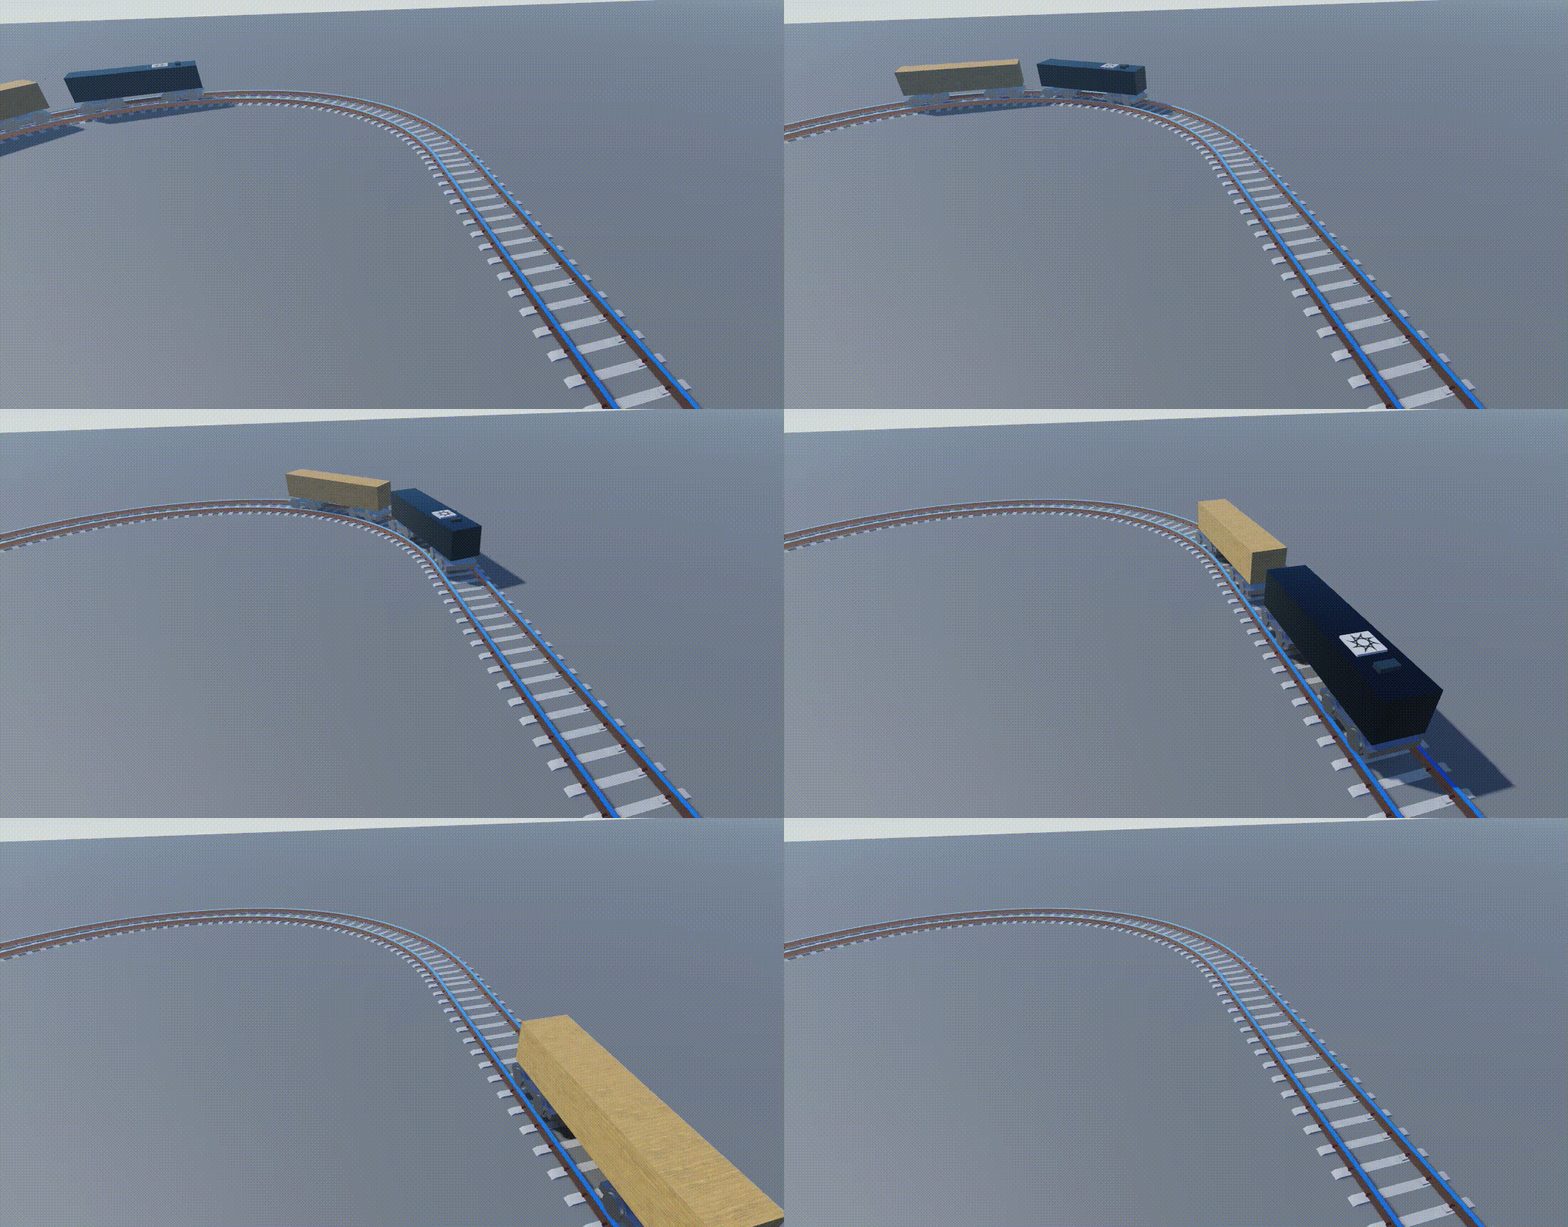
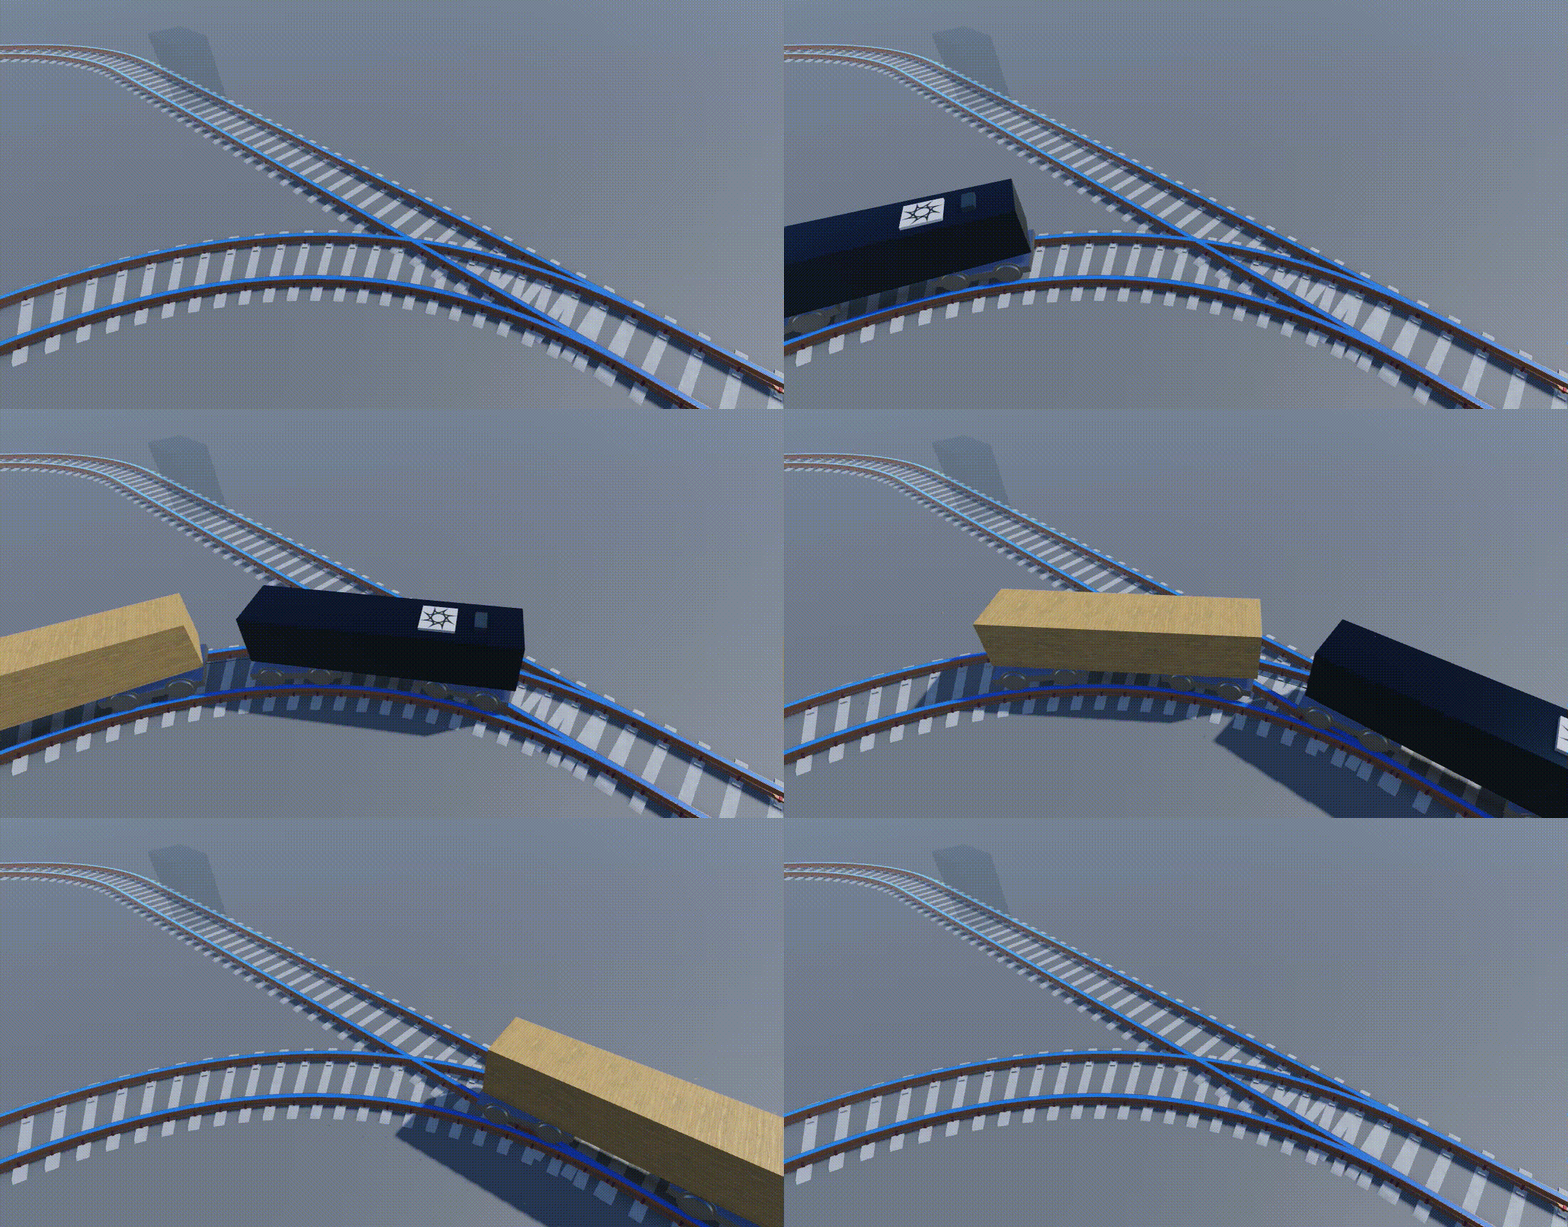
4. Spliting Y-Junction, traffic light and its sensor

5. Joining Y-Junction and its sensor
Creation
1. Create a basic railway
We start by creating a new template:
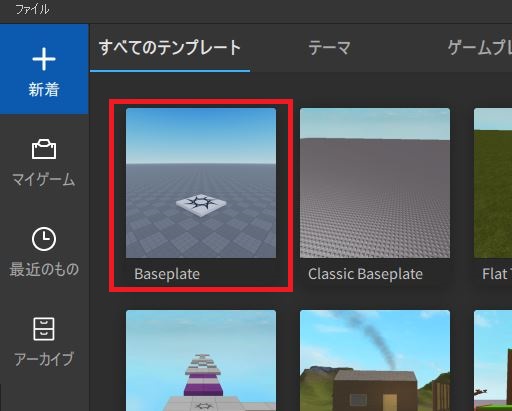
Login to Roblox and get the Model from the URL below:
Modern train tracks – Creator Marketplace (roblox.com)
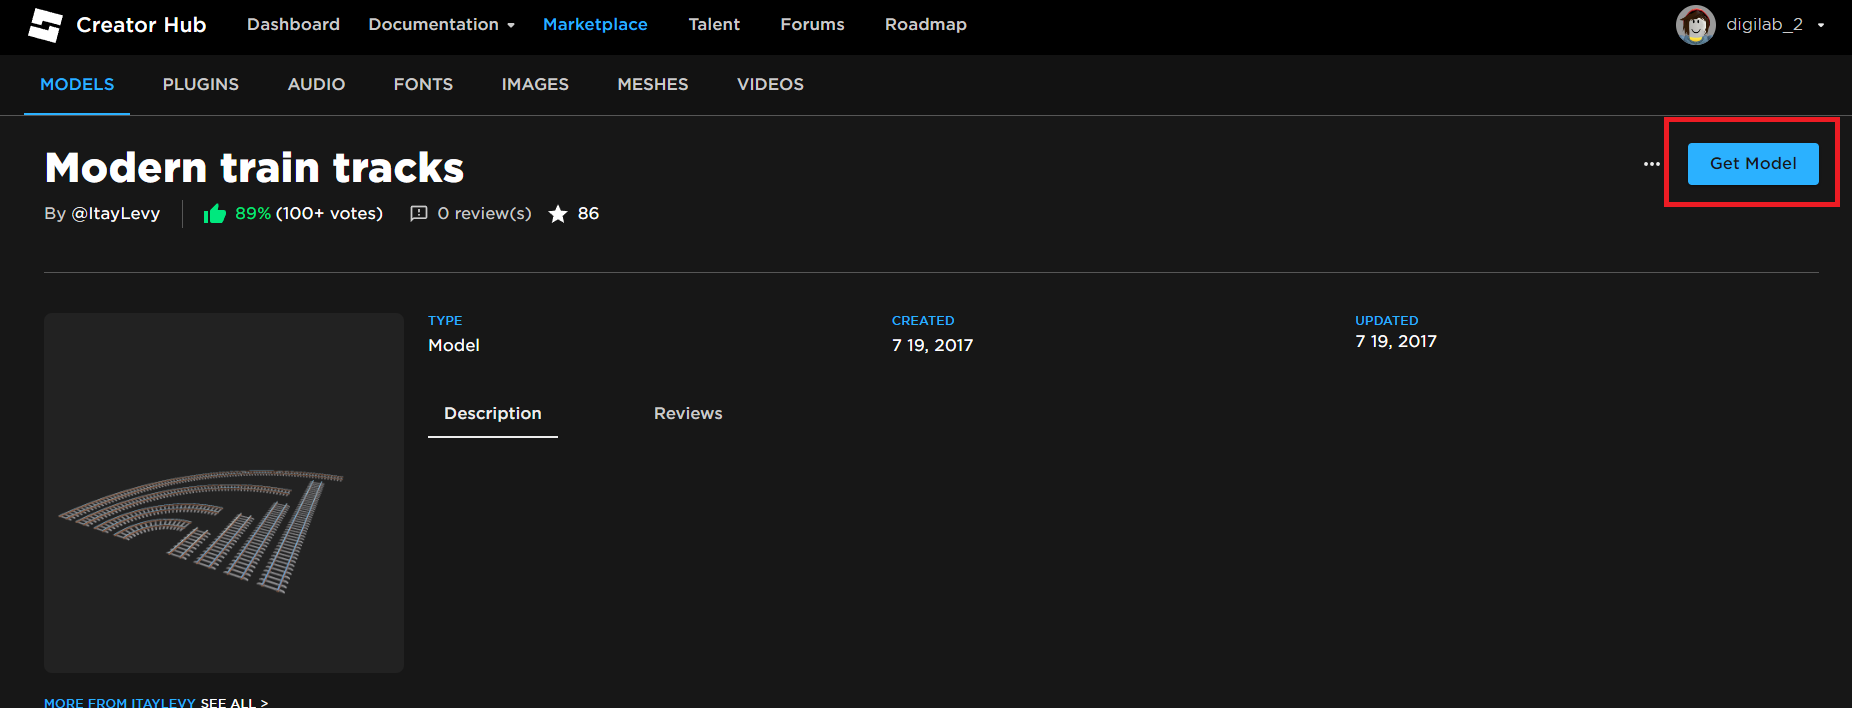
Open toolbox. Go to inventory and you will see the tracks added to your inventory:

Click on the icon and you will see all the models inserted under Workspace.
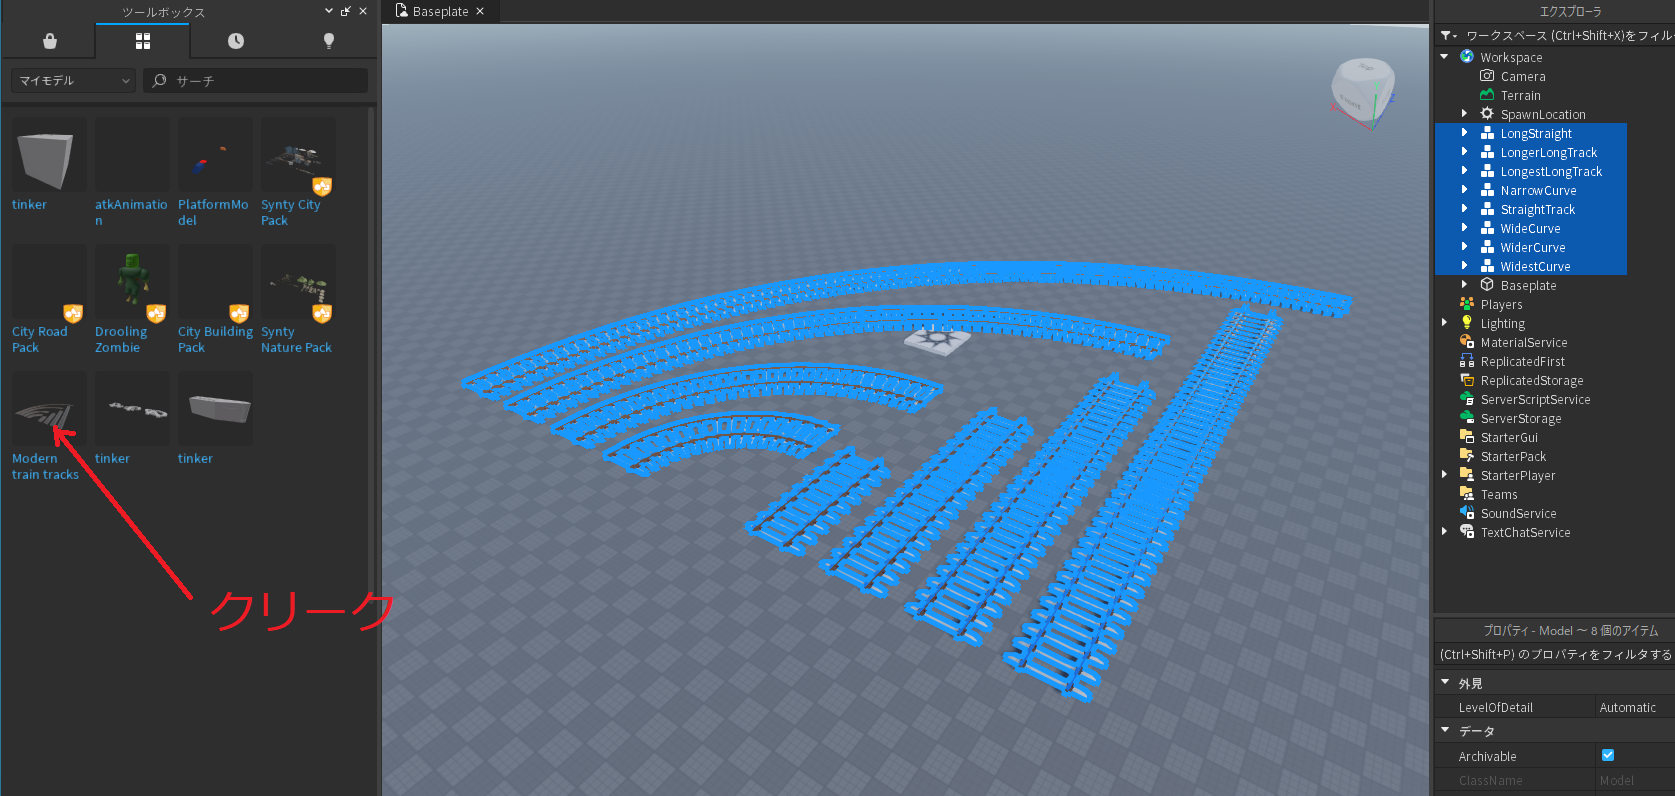
Delete “LongerLongTrack” and “LongestLongTrack”. We won’t be using these two tracks in our game:
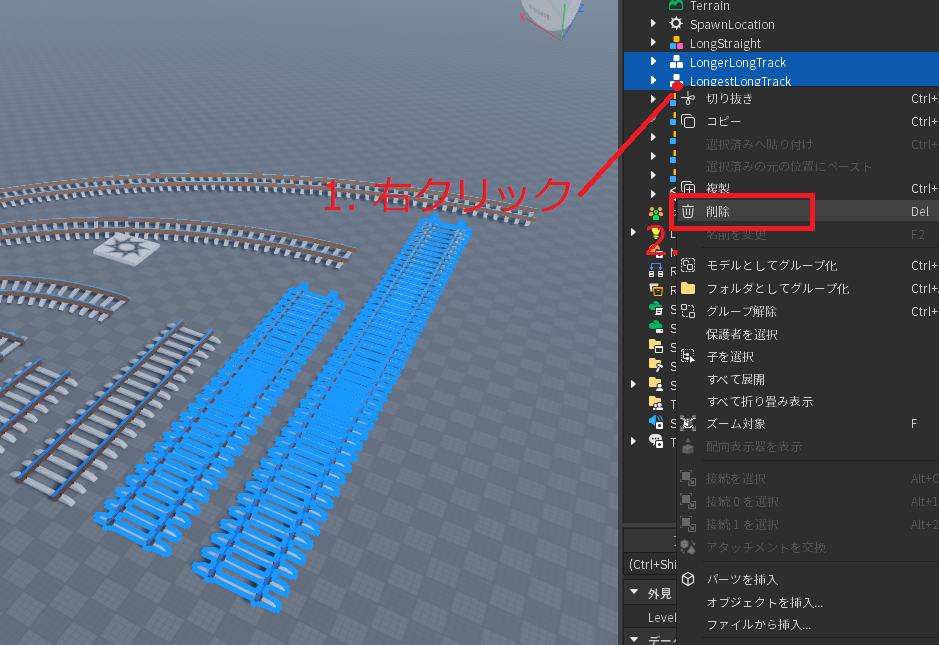
We will now create our own track. We can use “Duplicate” to get more of the same type of track easily:
Make sure we align our track well with the baseplate, so that there is no gap in between:
*** When we put connect tracks together, MAKE SURE they are well connected! (Imagine if tracks are not precisely conencted in real life…)
Steps to connect tracks:
1. Edit the pivot point if needed:

2. Uncheck pivot edit, and move the track to the track you want to conenct with:
3. Complete your track by repeating the Step #2.
4. You can if you want to add your train track Y-Spliter. Make sure you have unchecked “Collision” while doing so:
5. Right click the two tracks that areY-Spliter, and combine them into one folder. Name the folder “SplitY”. Do the same thing for the Y-Joinner, and name it “JoinY”:
6. Name each of the Y track. Name the left one “L” and the right one “R”:
7. We need one detector in front of Y-Spliter (To detect player’s direction input), and two detectors for Y-Joinner respectively (To detect incoming train direction):
Spliter Detector:
Joinner Detector * 2:
8. We will also need scripts for each of the spliter/joiner to control their behaviors:
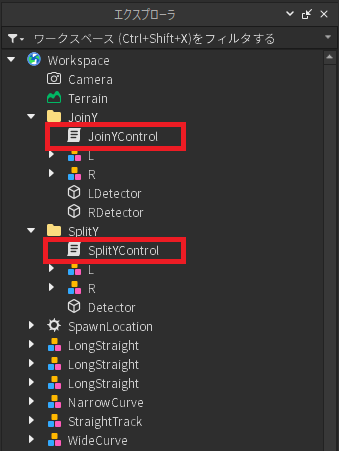
workspace.JoinY.JoinYControl
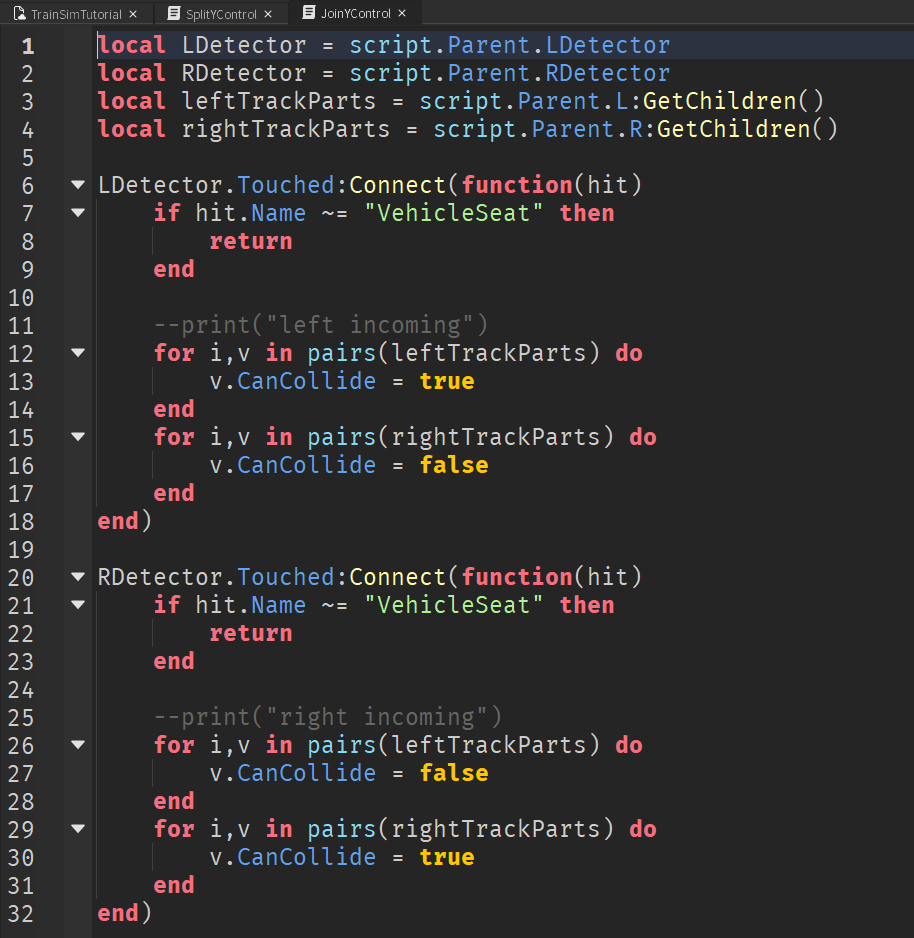
Explaination:
- Line 1-4: Take reference of L/R Detectors, and the parts inside the left and right track models
- Line 6, 20: Define the touching event for left and right detectors
- Line 7, 21: Ignore anything that hits the detector besides player’s VehicleSeat
- Line 12-17, 26-31: If LDetector touches player’s VehicleSeat, then enable left side tracks collision and disable right side tracks collision. Opposite for the RDetector.
workspace.SplitY.SplitYControl
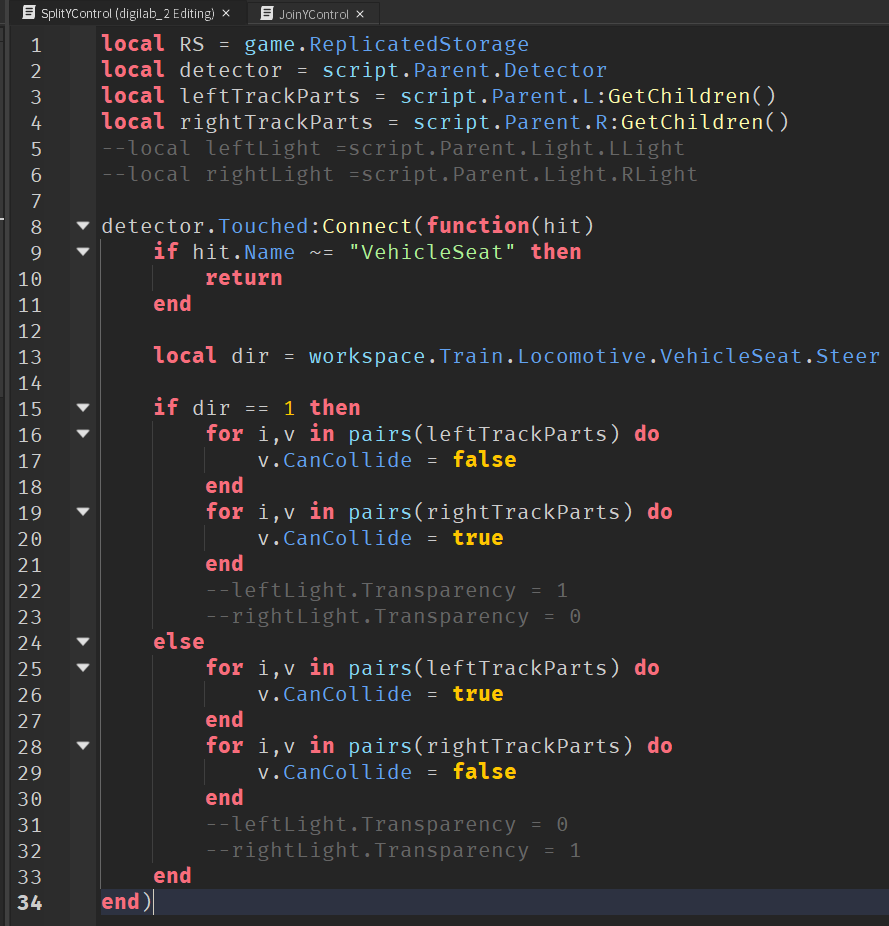
Explaination:
- Line 1-6: Take reference from the parts in game. (Ignore line 5,6,22,23,31,32 for now)
- Line 8: Define the touching event for the detector
- Line 9: Ignore anything that hits the detector besides player’s VehicleSeat
- Line 13: Get the steering direction from user’s input. For now we haven’t created a VechicleSeat, so error is expected.
- Line 15-30: If player input direction is right, then disable left side and enable right side track. If player input direction is left, then disable right side and enable left side’s track.
2. Create a train
Before we start making our train, let’s make sure we have a straight track that is long enough for our train to fit in:

Let’s organize our tracks under explorer:
Now let’s start making our train. Take a look at the basic structure of the train: 
A cargo is a train truck that does not move by itself. A Locomotive is a train truck that moves by itself, or through player’s control.
Let’s take a closer look at Locomotive’s structure:

The most important part of the Locomotive is our motors. Let’s look closer to one of them:
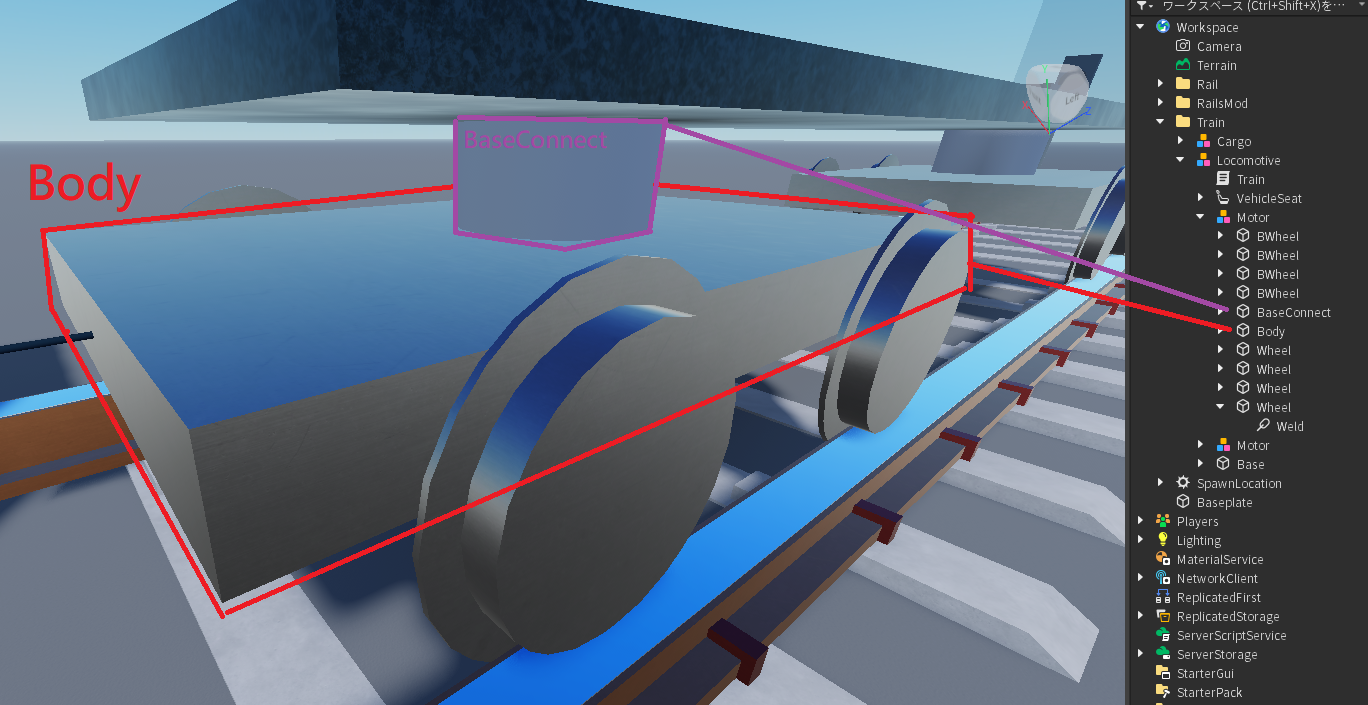
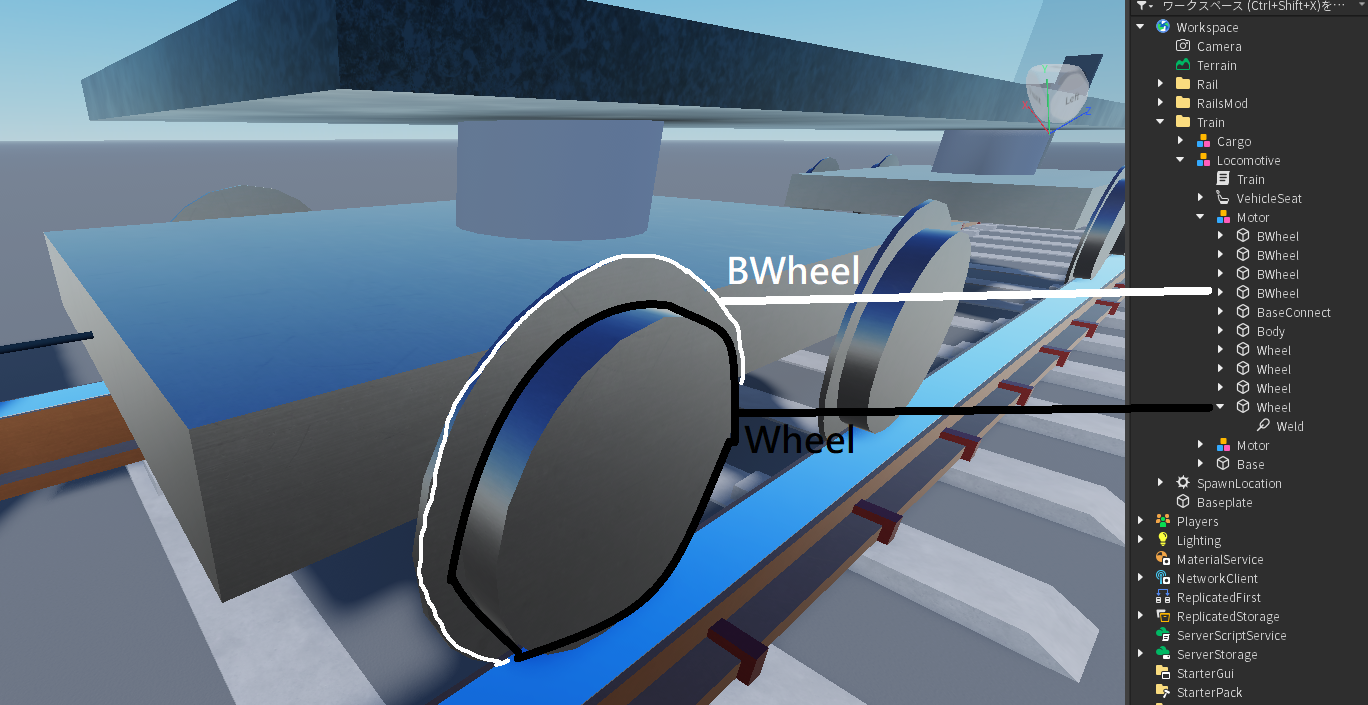
We will start by making the motor first:
WARNING: Follow EXACTLY what the tutorial shows. A slightly differed action may cause a complete different result.
1. Create the outer “Wheel” (smaller circle):
2. Create the inner “BWheel” (bigger circle), and weld them together:
3. Create the Body part (with temperorary shape for easier editing) for the motor that connects the wheel:
4. Create attachment on BWheel:
5. Create attachment on the Body part:
6. Rotate Body attachment to the opposite direction:
7. Reposition our Body attachment. We will copy BWheel attachment’s WorldCFrame Y,Z position (NOT including X) and paste it onto the Body attachment’s WorldCFrame position:
You should have two aligned attachment as shown. Rename Bwheel’s attachment to “Attachment0” and Body’s attachment “Attachment1”:
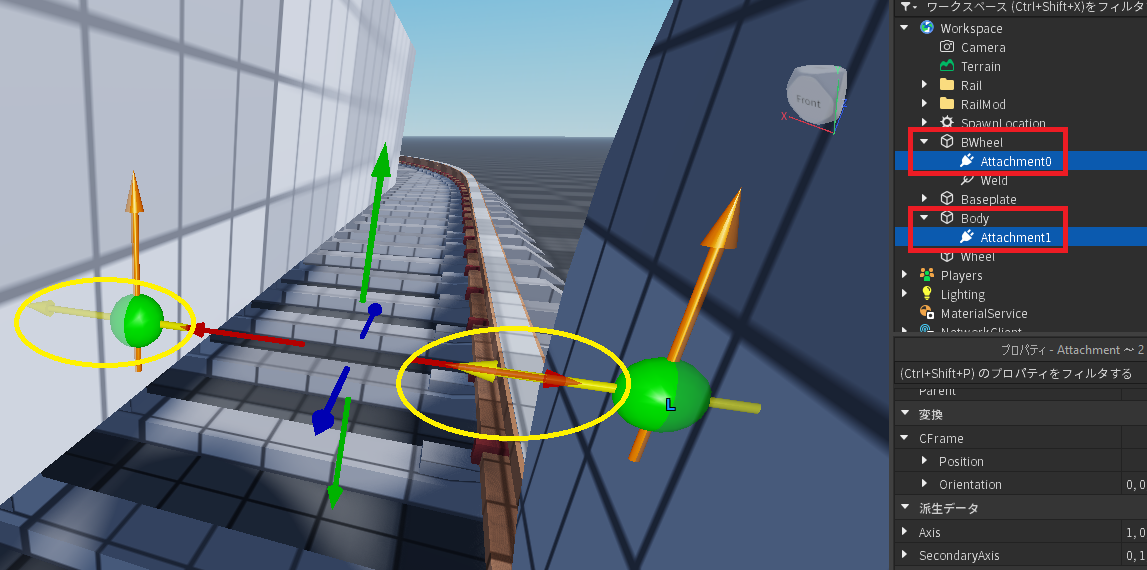
8. Create a HingeConstraint under BWheel, and link the two attachments together in the order shown in video:
9. Duplicate “BWheel” and “Wheel”, reposition and rotate it to fit the other side of the train Body:
10. Almost identical to steps 5-7, create another attachment for Body part, reposition and rerotate it, and edit the corresponding HingeConstraint to link the two attachments together:
11. Carefully duplicate the following, and reposition them:
- Both “BWheel”
- Both “Wheel”
- Body’s Attachments (NOT Body itself)
12. Readjust the Body’s size:
13. Test out our motor. To test, search “Hinge” to find all the current Hinge we have, and edit as follow:
14. Now there is one main flaw in our motor, which is the “Wheel”s side are too shallow, causing our train motor departing from the track:
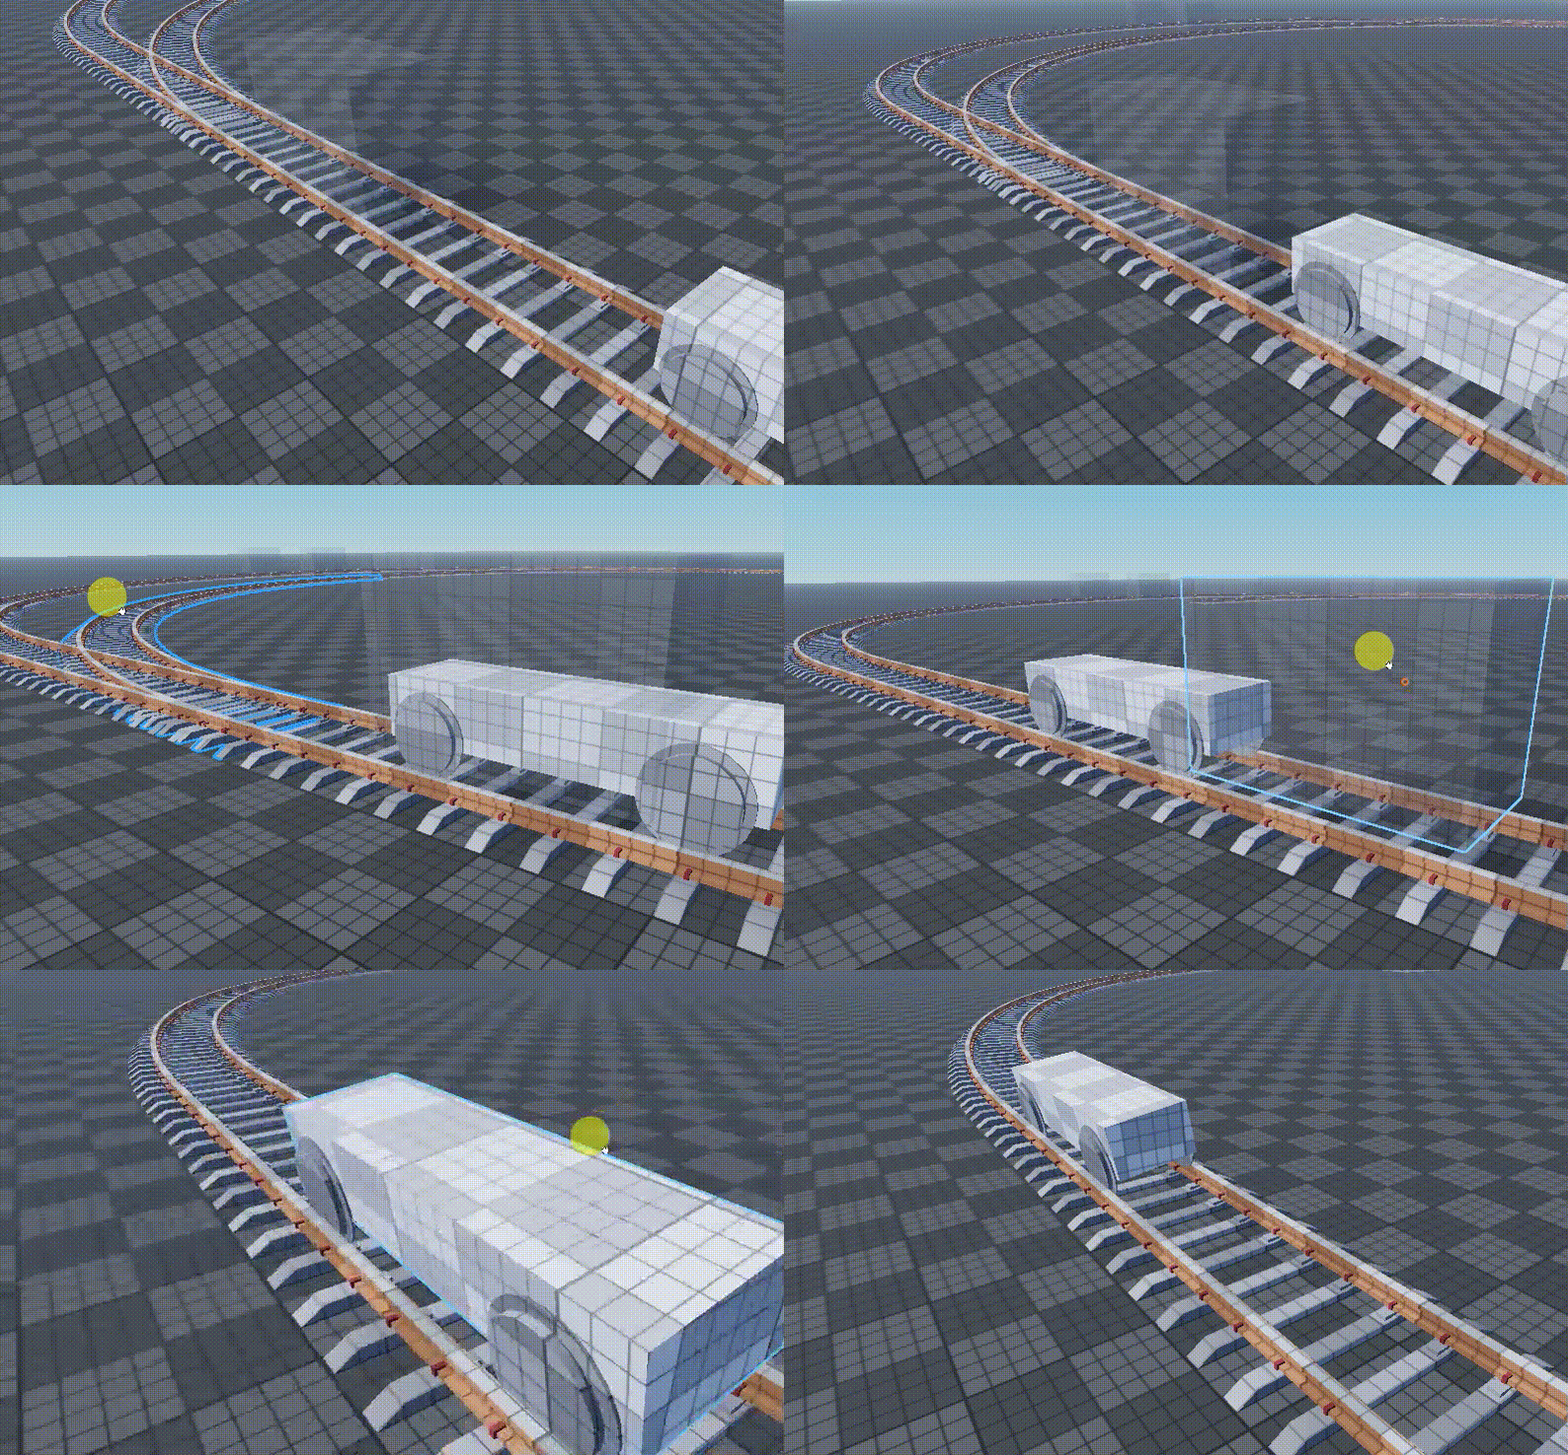
So the solution to this problem: edit our wheels so that each wheel’s width is wider:
15. As we can see from the last video, our motor could stay in track but not as stable as it should be, especially when it starts turning.
Let’s make our motor shorter so thaat it turns more smoothly:
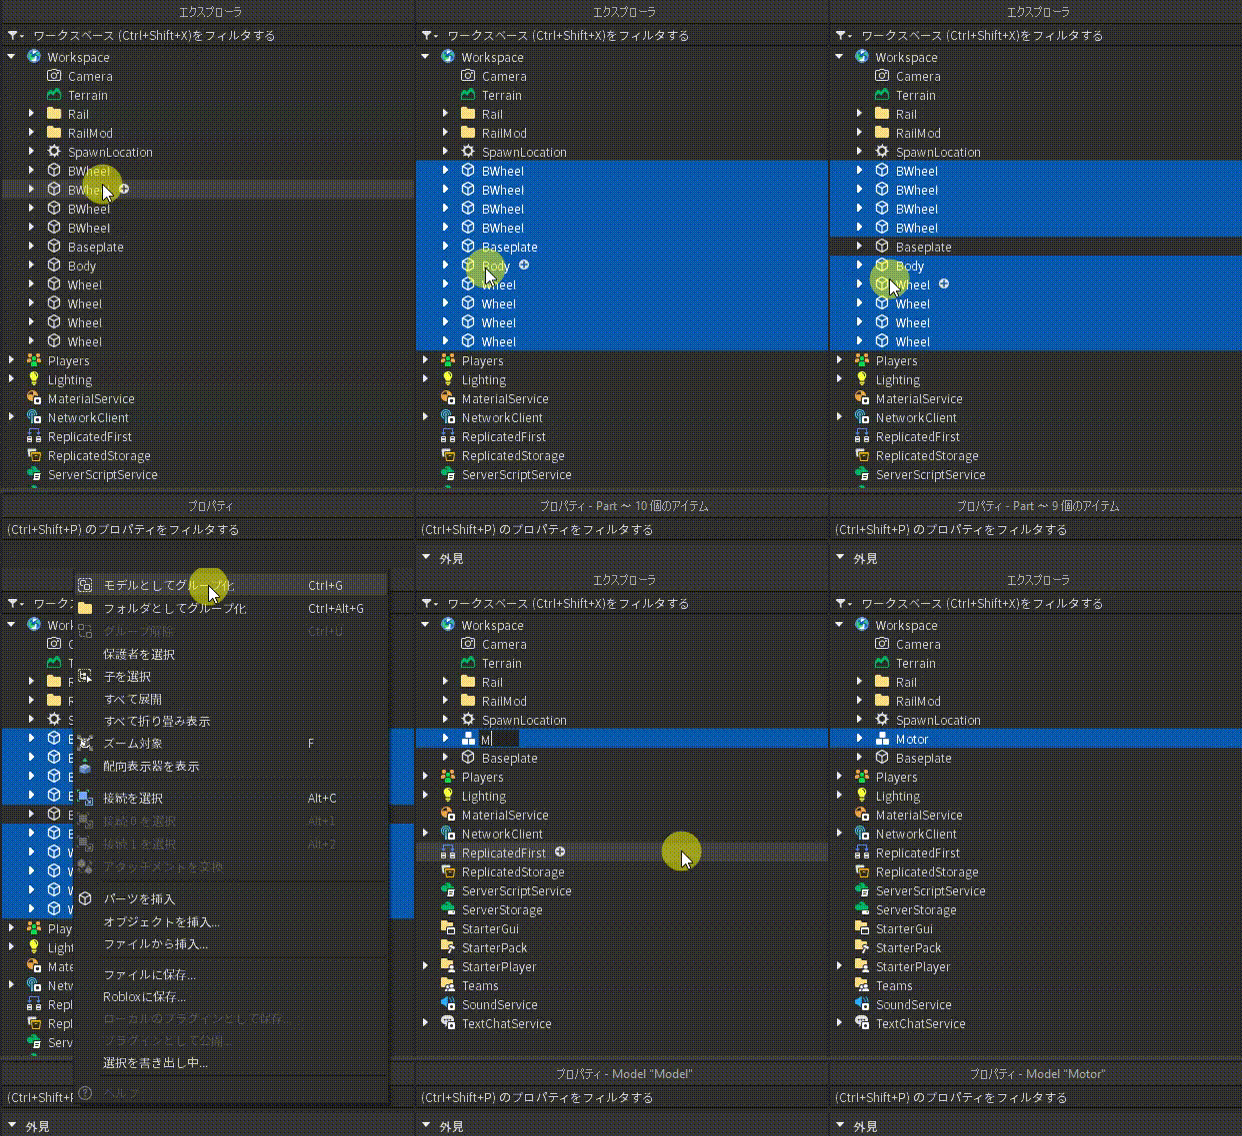
16. Group the parts as a model:
Next, we will create the base part of our Locomotive, which connects directly to our motors:
1. Create a new base part by duplicate the Body part of the Motor:
Delete the attachments inside the Base:
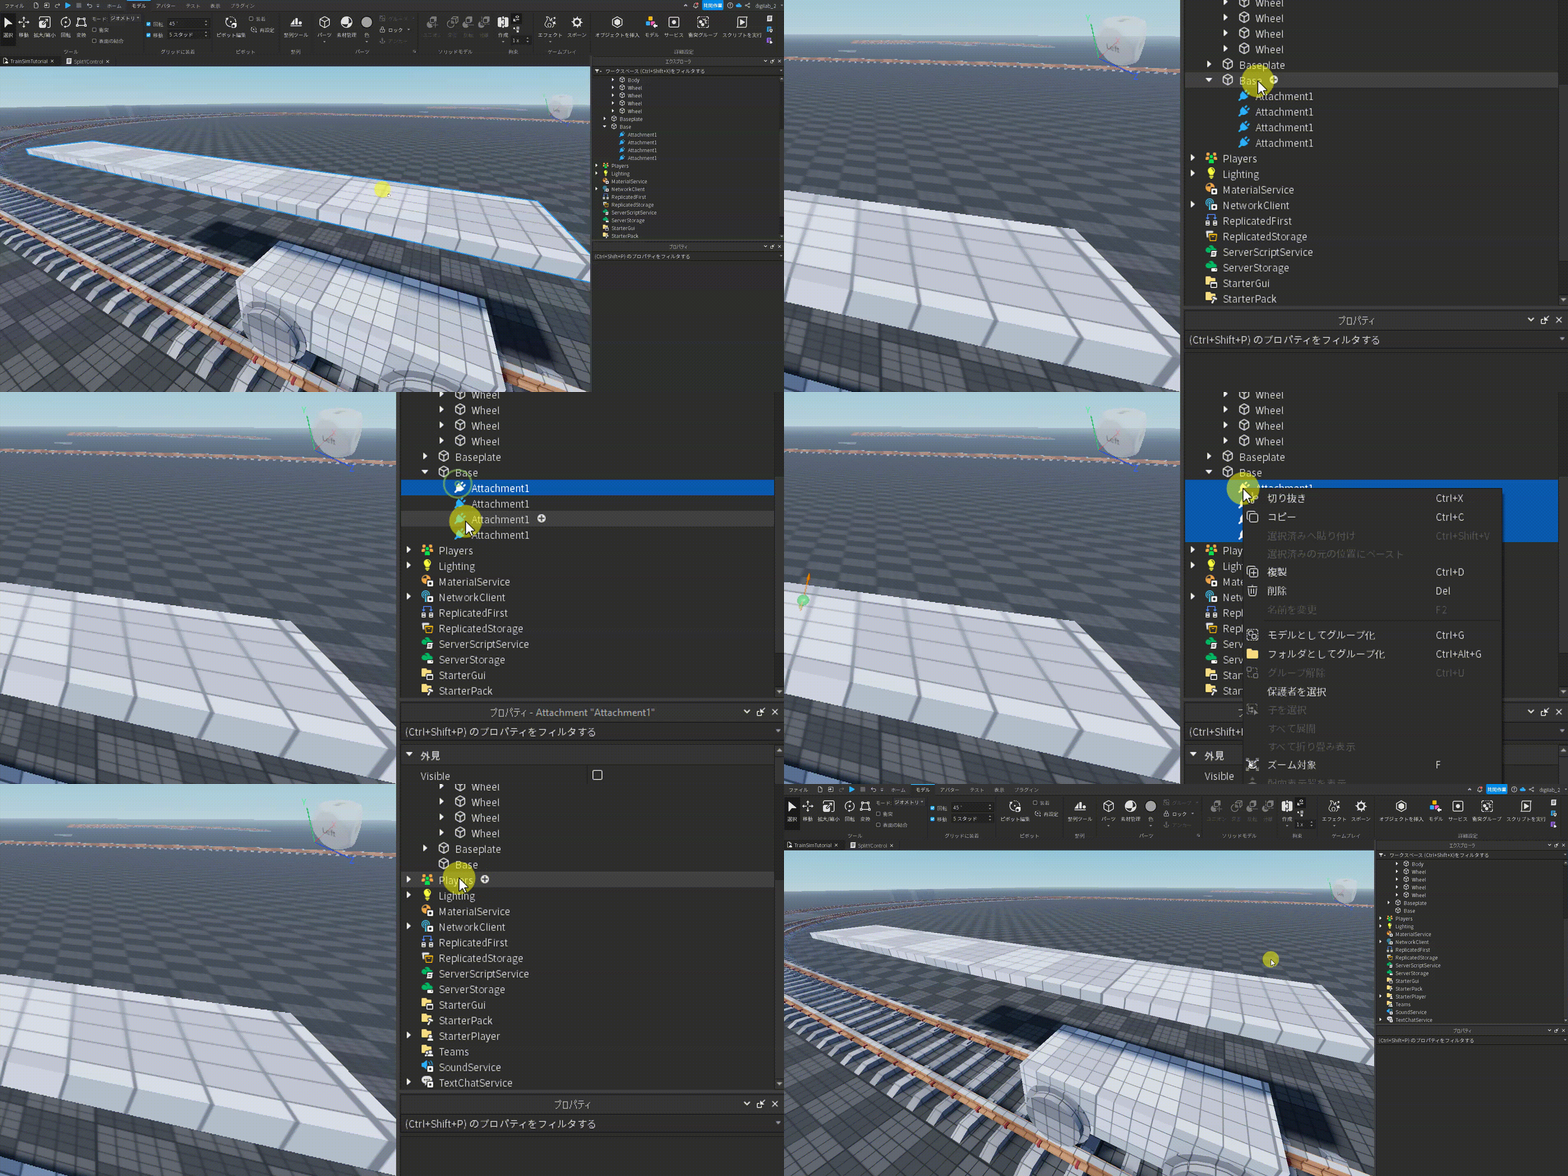
2. Create attachments for both Motor’s body and Base:
3. Copy “Body” ‘s X CFrame position to both the newly created attachments in step 2:
4. And copy “Body” ‘s Z CFrame position as well:
5. Rotate the Body attachment. Rename the attachments. Create new HingeConstraint between the Base and Body:
6. Carefully select the following and duplicate them. Move them to the desired position:
- Motor
- “Attachment1” under “Base”
- “HingeConstraint” under “Base”
7. Reposition the Base and test if everything works:
We will now take care of the train control:
1. Organize the parts we have created so far into one folder, and name it “Train”. Then combine the parts again into a model, named “Locomotive”:
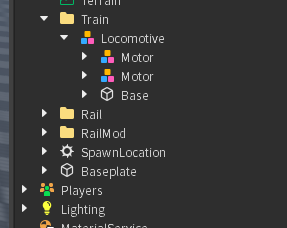
2. Create a VehicleSeat and a script under “Locomotive”:

3. We will rename our Wheels’ HingeConstraint, according to their sides:
4. Create a folder named “TrainValues” under “ReplicatedStorage”, and create an IntValue named “MAX_WHEEL_VELOCITY”:

5. Inside “Locomotive” script, type the following:
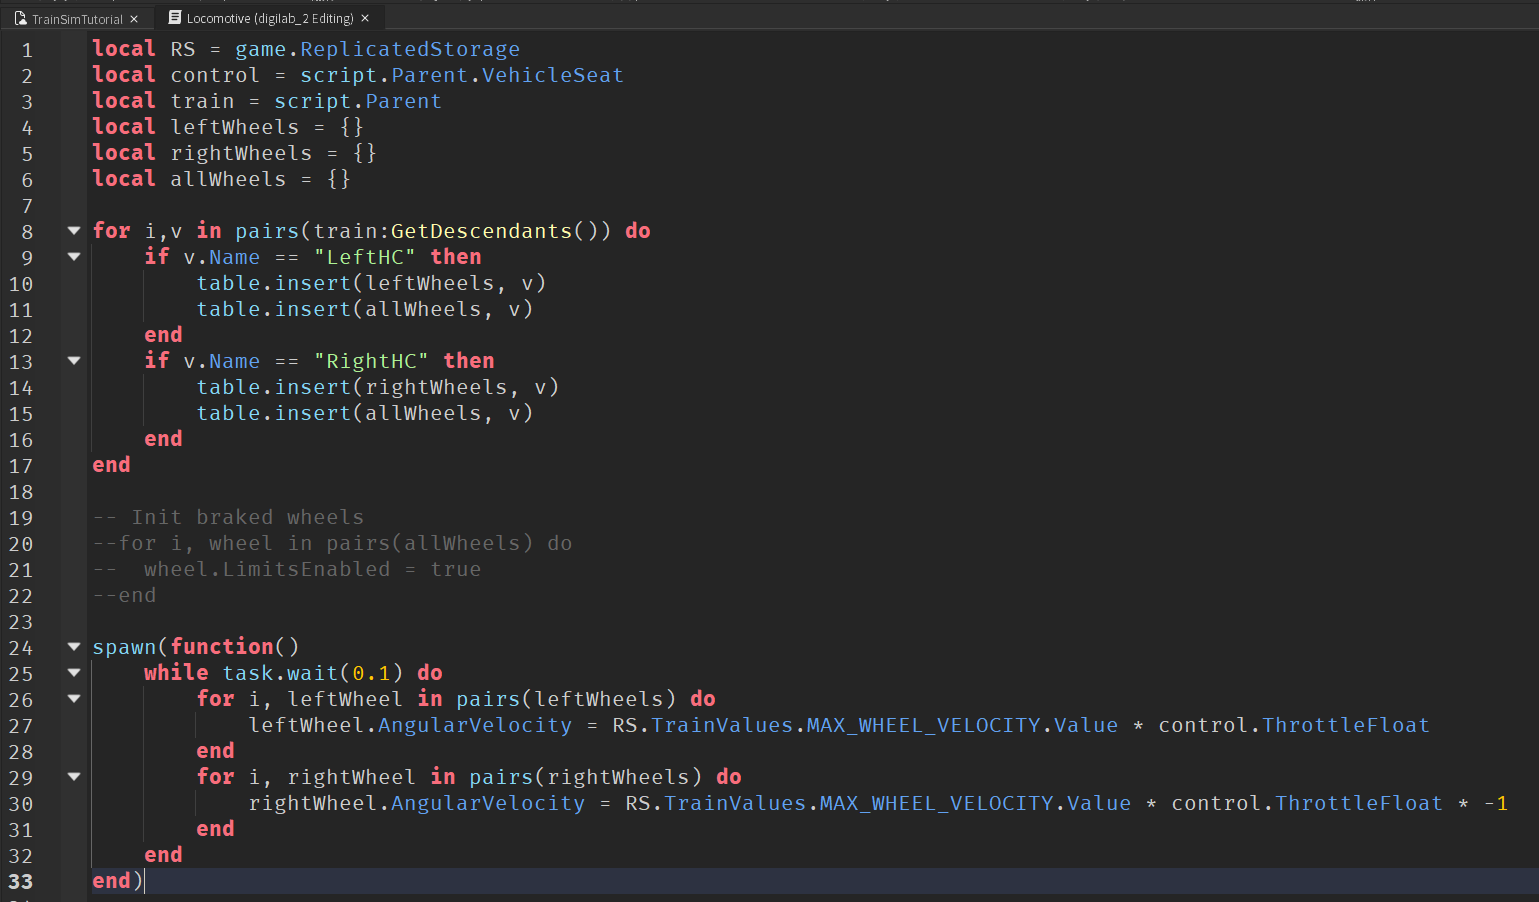
6. Download the Light from the URL below:
https://www.roblox.com/library/14911674280/Light
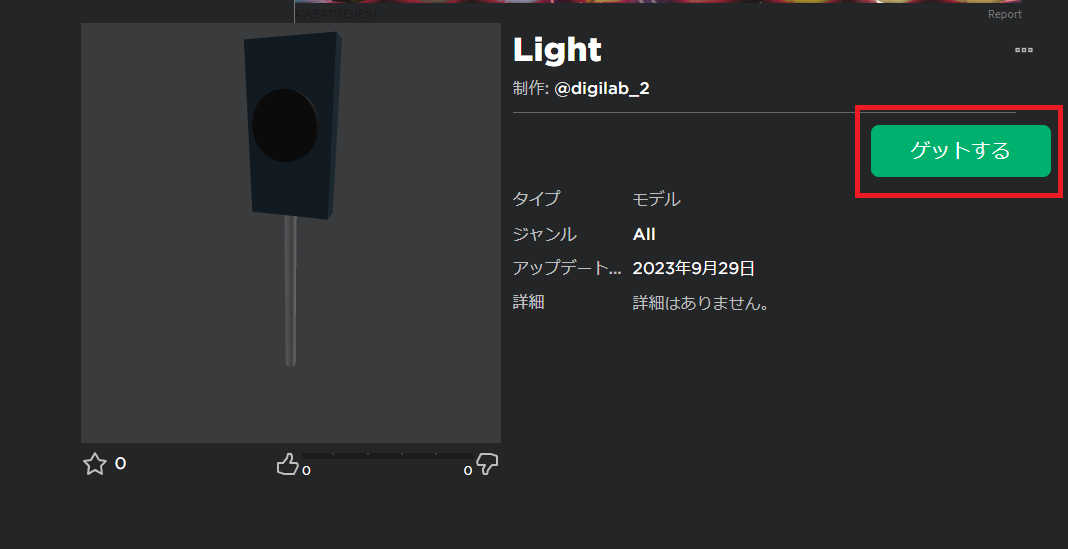
7. Insert your downloaded Light from Toolbox -> Inventory -> My Model:
8. Move the “Light” into “SplitY” folder:
Test your train with the following control:
- W/ key for throttle
- A/D for steering
Control Room URL:
