Important Concept: Server VS Client
-Please check DeathMatch Part I if you haven’t!
In this tutorial we will be scripting the game mechanics.
Let’s first look at the following example:

Imagine what would happen if there is no one controlling the air traffic in the sky? Things won’t go well at all!
We need not only the pilots to control the airplanes, but also someone who organize the pilots, which is the control tower.
It is similar in multiplayer game in Roblox.
The server acts as the control tower to organize the game mechanics for the players (the actual pilot)!
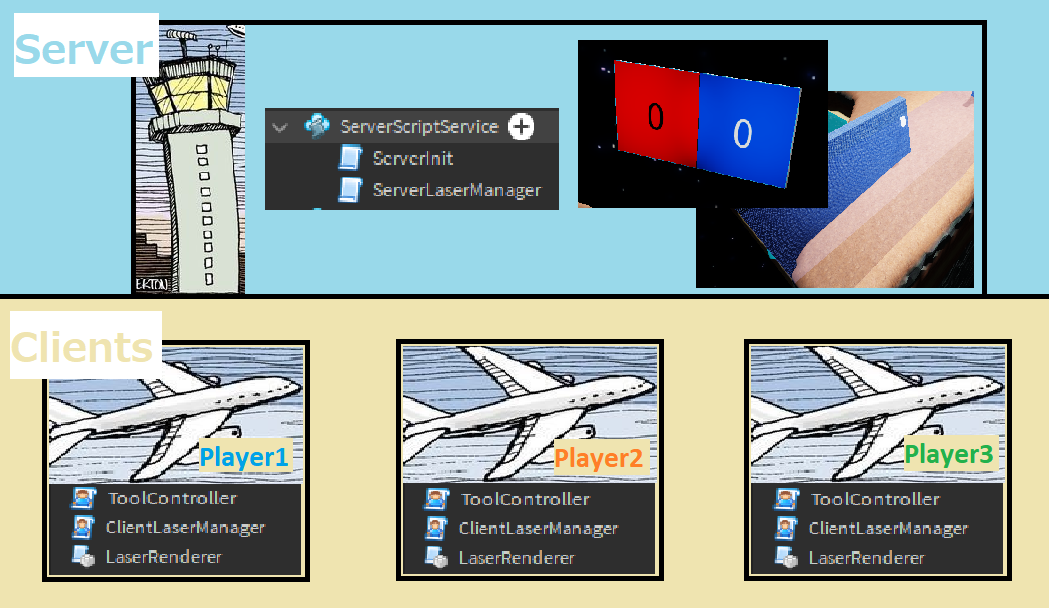
Each player (or Client) is given their own sets of LocalScripts.
You can think of airplanes having their own pilots on each planes, but always there will be one control tower only (the server!).
Server scripts
All server side scripts are put under the “ServerScriptService” folder.
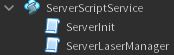
ServerInit
1. Provide gun grip adjustment so it looks more accurately gripped (line 9)
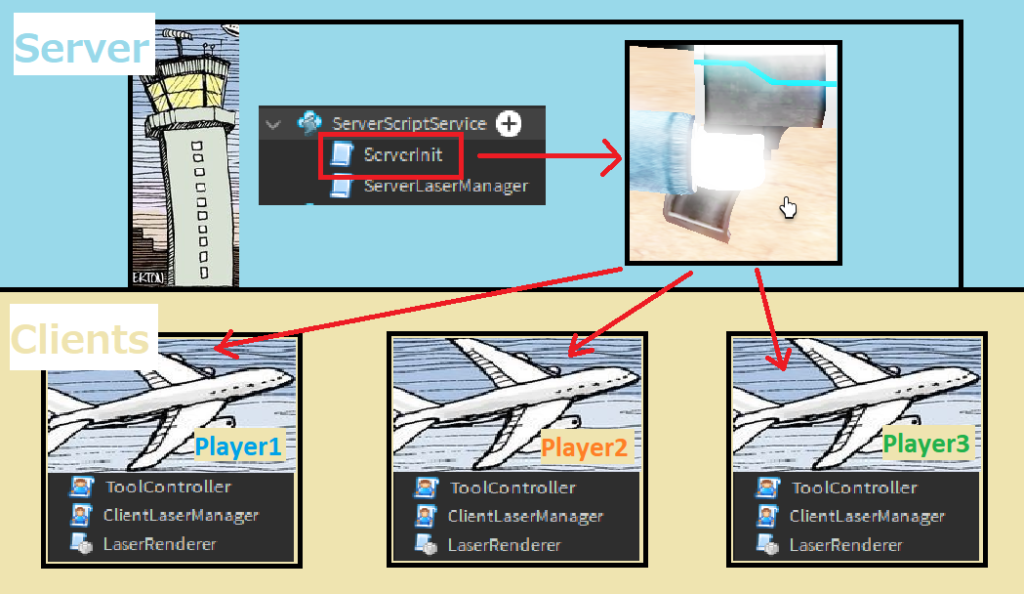
2. Drop random boxes into the game before the game starts (line 12-18). Notice on how line 4-6 constants value affect the actual result (feel free to test it by changing the numbers!)
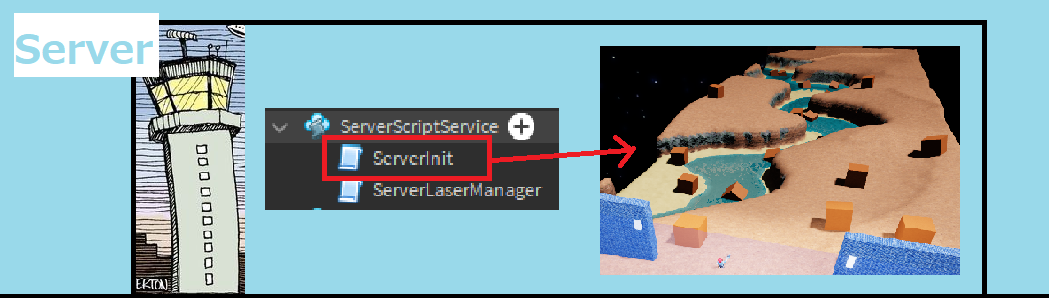
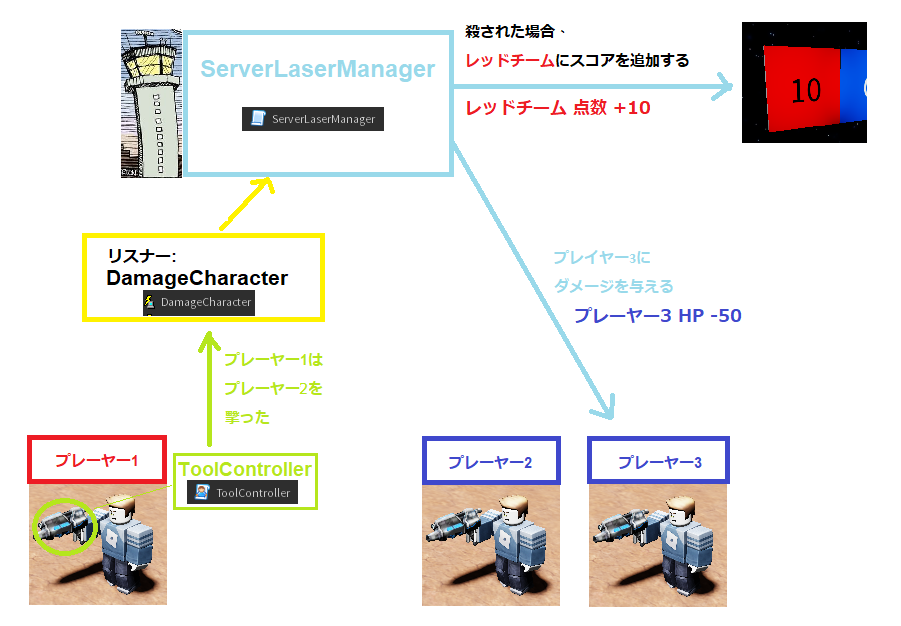
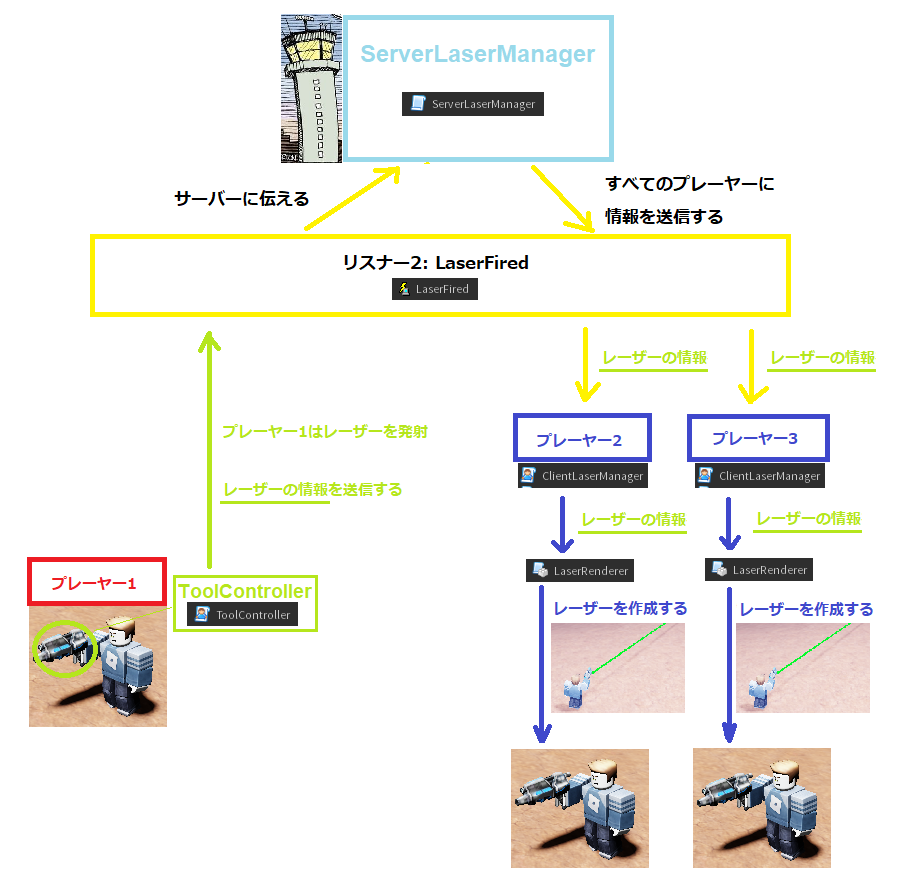
ServerLaserManager
Listener1: Start the script when a laser was fired by a player (line 51)
Listener2: Start the script when a player shoot at another opponent player (line 50)
1. Damage a player when that player got shot by another player (line 50, 20-29)
2. When a team teammate kills their opponent, award score to the killing team (line 50, 30-35)
図1
3. Gather information from the shooter (line 51, 41)
4. Gather information of the shooter’s weapon (line 42, 12-17)
5. Send information of the (shooter, weapon, gun shot end position) to all the players so that they can render the laser on the screen (line 44)
図2
Client scripts
ToolController (LocalScript)
Listener: Start the script when a player shoots (left click) (line 105)
図3
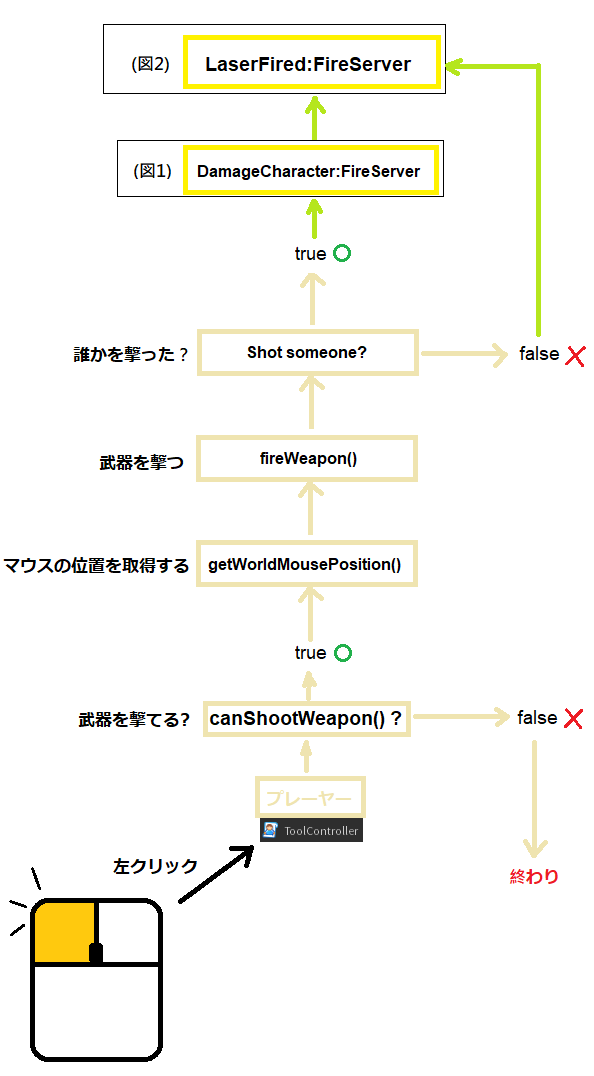
1. Check if the weapon waited long enough to shoot (line 97-100, 16-22)
2. Gather player’s mouse 2D position, and change it to a game world 3D mouse position (line 24-50)
3. Calcuate a ray (a beam) from the gun to the target 3D mouse position (53-64)
4. Check if the ray hit something or not (line 67-84)
5. Tell the server that a ray was shot (line 87)
6. Render the beam so that it becomes visible to the player (line 89)
7. Play the equipping sound when the weapon is equiped (line 103)
ClientLaserManager (LocalScript)
Listener: Start the script when the server tells the clients that a laser was fired by another player (line 16)
(Please see Fig. 2)
1. Receive information from the server (player who shot the laser, the handle of the shooter, and the laser ending position) (line 9)
2. Using “LaserRenderer” (line 4), render the laser so that it is visible (line 11)
LaserRenderer (ModuleScript)
Trigger: Run the script when it is called by “ToolController” or “ClientLaserManager”
(Please see Fig. 2)
1. The actual laser rendering script (line 7-33), including its appearance (line 16-23)
2. Clean up the beam (line 26)
3. Play the shooting sound (line 29-33)
4. Send the result back to either “ToolController” or “ClientLaserManager” (line 35)